If your site has faced any errors connecting your WordPress website, you should first check your access and enable WordPress error logs. This is because of avoiding hassles of your site visitors, also for managing your WordPress site in an error-free way. But where to get started to check your access & WordPress error logs to configure further? Don’t worry! We have you covered.
Best Time To Check Access & Set Up WordPress Error logs
Logs can help you prevent your site from experiencing any error issues and troubleshoot them in advance before arrival. WordPress error logs can easily track and fetch data about your site issues in detail. You have to just go through all the problems and solve them accordingly. This is important for your site security and maintenance to ensure a seamless user experience.
As no software is error-free and for WordPress, this is also true. All you have to do is to know the right tactics to find out all the bugs and solve them immediately. That’s why it’s important to know when you should check access & WordPress error logs. Take a look below:
- If you are unable to load your WordPress website & get blank screen errors.
- If you get warnings like 401, 404, 504, 505, etc loading your website or particular pages.
- If your theme or plugin doesn’t work properly.
- If your site performance is slow and takes a lot of time to error.
- If you want to find out plugin conflict issues & make them solved.
- Unfortunately, if your WordPress site crashed entirely.
Bonus Tip: Top WordPress Maintenance Tips To Keep Your Site Running Smoothly
How To Check My Access & WordPress Error Logs?
If you want to troubleshoot your website, it’s very simple to check your access and set up WordPress error logs. Just you need to follow the proper guide that can help you entirely. Check out all the simple steps below to check your access & WordPress error logs and manage your site in advance.
Step1: View Access Of Your WordPress Files Via FTP
If you want to activate WordPress error logs, you have to then make sure first you have access to your site files. You can make it happen in many ways, among all using File Transfer Protocol (FTP) is the wisest. FTP can help you directly get your site logs. And give you that access to edit, delete, or add any files when necessary.
To access your WordPress file via FTP, you can go with the FileZilla file transfer protocol tool to get a smooth and easiest start. All you have to do is to first download & install FileZilla, you need the credentials to get started. Credentials are provided by your host provider and can easily get this through your control panel.
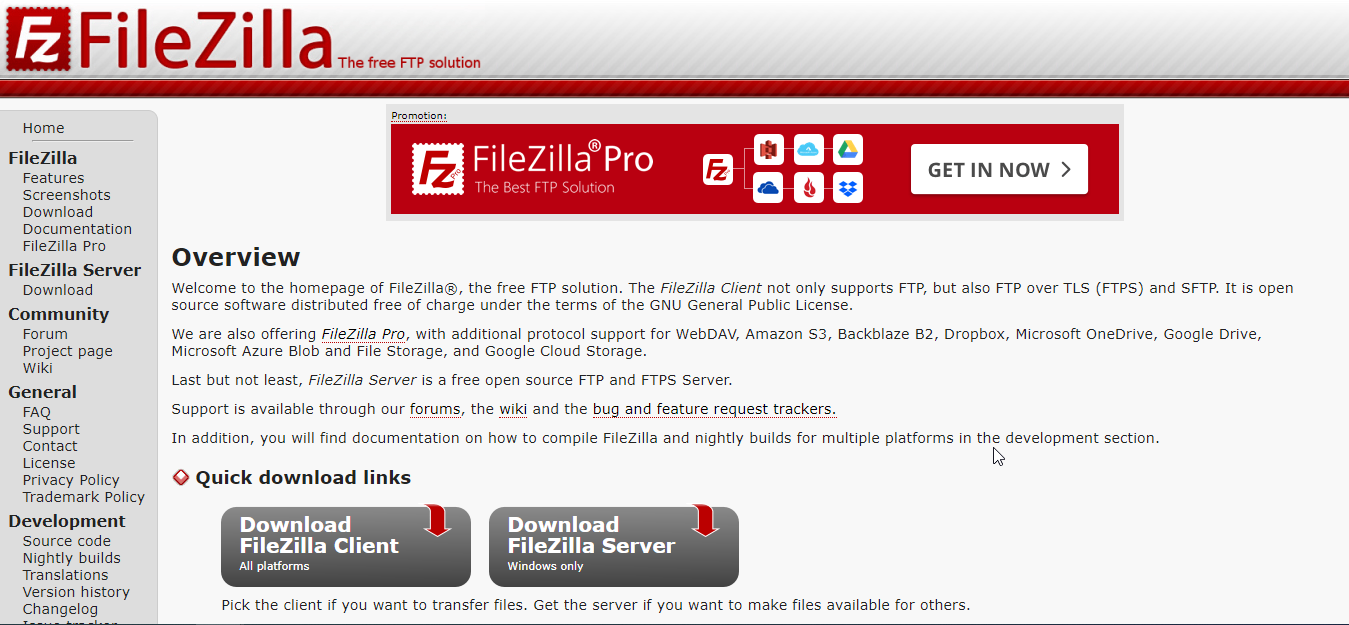
After getting the credentials, you can easily enter the host, username, password accordingly to access your site. Next hit the Quickconnect button to connect the FTP client successfully to your WordPress site. You are now able to check the success message and get along with several new folders and files.
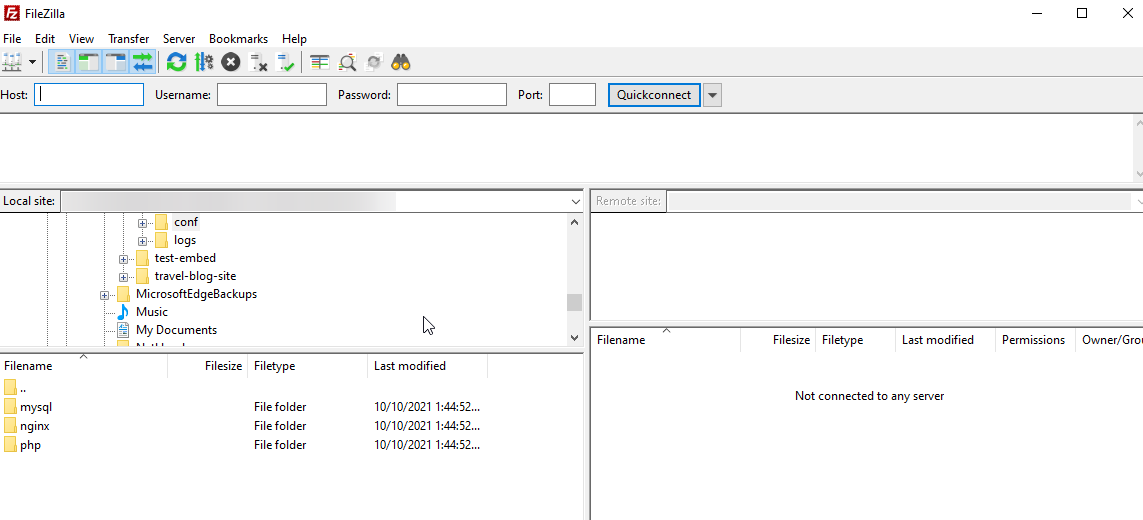
Step 2: Find Out WordPress Error Logs In wp-config.php File
As you have connected to your site, all you have to do is to look for the logs file. Where you can see the access.log, debug.log, and error.log files in one place.
Here all older file versions are saved with Gzip (.gz) type file. If you want to make any changes, you have to right-click and choose the ‘view/edit’ option to do any changes.

Other than that, you can enable WordPress error logs by configuring the wp-config.php file. It is always a good decision to take a backup to your original file before making any changes.
Step 3: Enable WordPress Log Errors In wp-config.php
Now, look for the ‘files’ folder and open it up. And just scroll down a bit, you will see the wp-config.php file. You can start modifying your wp-config.php file with a right-click and choose the ‘View/Edit’ option.
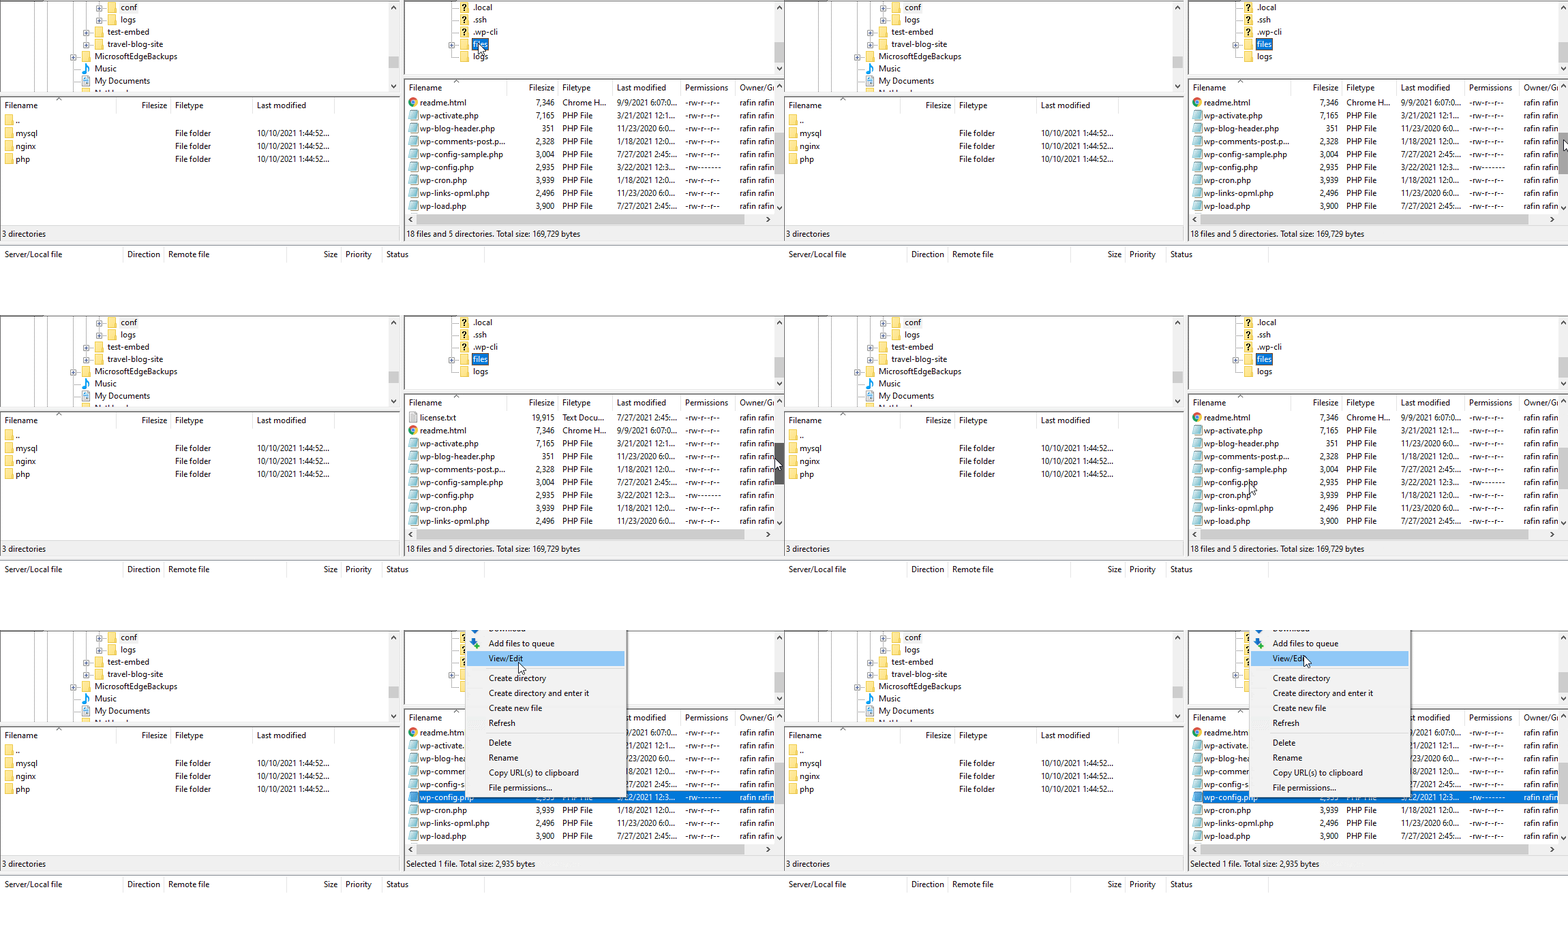
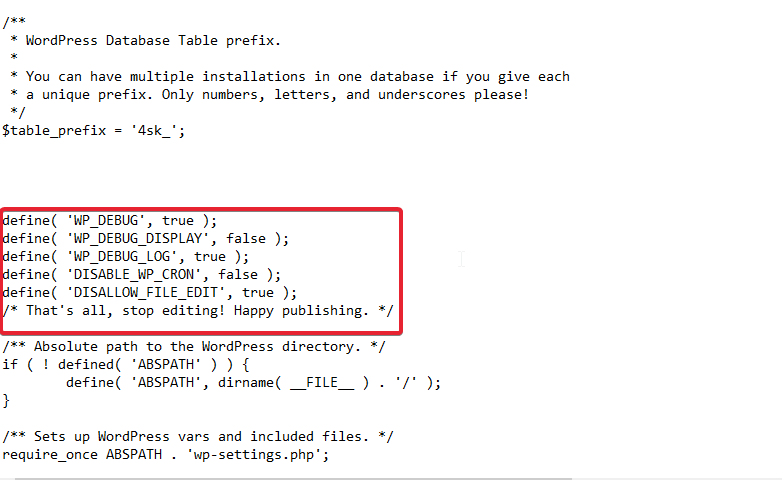
Afterward, search for the line that says “/* That’s all, stop editing! Happy publishing. */” and before this line pastes the below code:
define( ‘WP_DEBUG’, true )
If you see somehow the above code is already there in your wp-config.php file, just check if it’s set “false,” or true and make the changes to “true.” With this simple configuration, the debug mode will get enabled by adding this simple code below:
define( ‘WP_DEBUG_LOG’, true );
Save all the changes and now you will get all your WordPress error logs on your debug.log file within your “/wp-content/ folder”.
Now Solve WordPress Error Logs Issues Instantly
If you check your WordPress error logs enable you can easily check and solve issues immediately. Take a look at the below list to know all the common errors that you can find in your error logs and their step-by-step solutions.
Some Trending WordPress Errors Solution
- How To Solve If You Can Not Login To Your WordPress Site
- How To Solve “You Have Been Locked Out” Error In WordPress
- How to Troubleshoot the 502 Bad Gateway Error in WordPress website
- How To Fix The HTTP Error Uploading Image In WordPress Site
- How to Fix the Establishing Database Connection Error in WordPress
If you want to read more blogs, go to this blog page and don’t forget to join our Facebook Community, and subscribe to our YouTube Channel. Enjoy!

