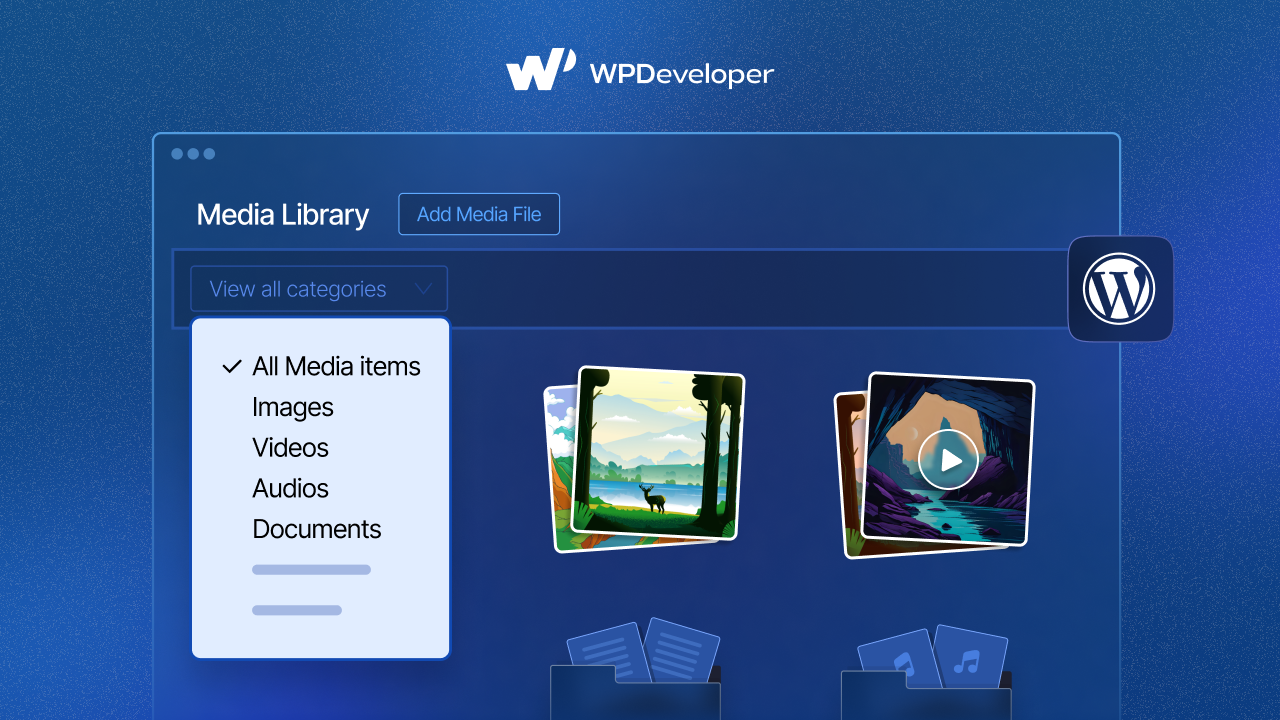
The WordPress Media Library serves as the central hub for all your website’s digital assets – images, videos, audio files, and documents. While it is a powerful tool for storing and managing your media, many WordPress users face a growing challenge as their sites expand: managing hundreds or thousands of media files becomes increasingly difficult without proper organization.

By default, WordPress displays media files in a simple grid or list format, making it challenging to locate specific files quickly. This is where categories and tags help. Adding taxonomies to your ‘Media Library’ transforms it from a basic file storage system into an organized, searchable database that streamlines your content creation workflow and saves valuable time.
In this blog, you will learn how to add tags and categories to your WordPress media library with tips to organize the media library and plugin suggestions for advanced taxonomy. So, let us dive in.
Why Organize WordPress Media Library with Categories & Tags
Organizing your WordPress Media Gallery with categories and tags transforms a basic file storage system into a powerful, searchable asset management tool. Before learning how to add categories and tags to the media library in WordPress, let us first understand why this is important.
🎯 Easier Content Management for Large Sites
As your WordPress site grows, so does your media collection. What starts as a manageable handful of images can quickly balloon into thousands of files. Without proper organization, finding the right image for a blog post or the perfect video for a landing page becomes a time-consuming treasure hunt. Categories and tags create logical groupings that make sense for your content strategy.
🎯 Improved Media Search And Filtering
Organized media libraries enable powerful filtering capabilities. Instead of scrolling through pages of files, you can instantly filter by category (like “Product Photos” or “Blog Graphics”) or by tags (such as “Red,” “Vintage,” or “Holiday”). This targeted approach reduces the time spent searching and increases productivity.
🎯 Better Workflow for Content Creators And Designers
Team environments particularly benefit from organized media libraries. When multiple content creators, designers, or editors work on the same site, clear categorization ensures everyone can find and use the right assets. It also prevents duplicate uploads and maintains consistency across your content.
🎯 Enhanced SEO Through Better Content Organization
While a media organization does not directly impact SEO rankings, it indirectly supports your SEO efforts by improving your content creation efficiency. When you can quickly find and use the right images, you are more likely to include relevant, high-quality visuals that enhance user experience and engagement, both important SEO factors.
How to Organize WordPress Media Library with Tags & Categories
Now that you know the benefits of adding categories and tags to media files in WordPress, let us learn how to organize media in WordPress. Follow the step-by-step guide to add tags & categories to your WordPress media library.
Step 1: Add Media Files to the Library
First, go to ‘Media’ → ‘Add Media File’ from your dashboard. Select the media file that you want to upload.

Step 2: Add New Media Category
To add a new category, navigate to ‘Media Categories’. Now, you will have to add a new category.

Step 3: Add & Assign Categories And Tags
Now, from your media library, choose the image you want to categorise and click on ‘Edit’. Give a suitable name to the file. Scroll down to ‘Media Categories’. Select the relevant category of the file and hit the ‘Update’ button.

📌 Creating Tags
Navigate to Media → Media Tags. Add descriptive tags like “Red,” “Landscape,” “Logo,” “Holiday,” etc. Keep tags specific but not overly granular.

Step 4: Filter & Organize Media Using Categories/Tags
Once you are done adding tags and categories according to your specific needs, go to ‘Media’ from the dashboard. Here, you will see all your items added to the media. These items are filterable.

Best Practices for Media Categorization
Remember, the best organizational system is one that your entire team understands and uses consistently. Take the time to document your categories and tags, train your team members, and regularly review your system to ensure it continues to serve your evolving needs. Here are some best practices to add categories to the WordPress media gallery.
📌 Use Clear and Consistent Naming Conventions
Establish a naming system before you begin categorizing your media. Use descriptive, professional names that your entire team can understand. For example, use “Product Photography” instead of “Pics” or “Website Graphics” instead of “Web Stuff.”
📌 Avoid Redundant or Overly Granular Tags
While it is tempting to create highly specific tags, this can lead to confusion and inefficiency. Instead of having separate tags for “Dark Blue,” “Light Blue,” and “Navy Blue,” consider using a single “Blue” tag. Strike a balance between specificity and usability.
📌 Create a Strategy Before Bulk Assignment
Before organizing existing media, develop a comprehensive strategy:
- Audit your current media to understand what types of files you have.
- Create a logical category structure that reflects your content needs.
- Develop a standard set of tags that cover common attributes.
- Document your system or create an SOP (Standard Operating Procedure) so that team members can follow consistent practices.
- Consider your future needs and leave room for expansion.
📌 Maintain Consistency Over Time
Regularly review and maintain your categorization system. As your site evolves, you may need to adjust categories or merge redundant tags. Consistency is key to long-term success.
Limitations of WordPress’s Default Media Gallery
WordPress’s default Media Library, while functional, has several organizational limitations that become apparent as your site grows. With consistent application and maintenance, your organized Media Library will become one of your most valuable WordPress productivity tools.
👉 No Built-in Categorization System
Unlike posts and pages, WordPress does not include built-in categories or tags for media items. The only organization options are the upload date and basic search functionality, which searches file names and alt text but does not provide sophisticated filtering options.
👉 Manual Sorting Becomes Difficult
Without taxonomies, users resort to manual methods, such as creating descriptive file names or organizing files into folders before upload. However, these approaches do not scale well and become increasingly difficult to maintain as your media library expands.
👉 Limited Search Functionality
The default search only looks through file names, titles, captions, and alt text. It does not provide advanced filtering options or the ability to search by custom attributes, making it difficult to find specific types of media quickly.
While WordPress does not include these features by default, the right plugin can add professional-grade organization capabilities that scale with your growing website. Start by choosing a media library management plugin that fits your needs, then develop a clear categorization strategy before organizing your existing media.
The first step is choosing and installing a plugin that adds taxonomy support to your Media Library. The process varies, but most plugins will add a settings page under Media or create their menu item. Look for taxonomy or category settings within the plugin’s configuration area. Here are some popular options:
🔌 Enhanced Media Library – A free plugin that adds categories and tags to media items with a clean, intuitive interface.
🔌 FileBird – Offers folder-based organization with drag-and-drop functionality, perfect for users who prefer visual organization.
🔌 Media Library Organizer – Provides comprehensive taxonomy support with bulk editing features.
🔌 Real Media Library – A premium solution with advanced features like virtual folders and detailed media information.
Organize WordPress Media Library & Increase Efficiency
Spending time to set up and keep your media library organized can pay off. It helps you work faster, keeps your content consistent, and makes things easier and less frustrating for everyone managing your website. Whether you are managing a personal blog with hundreds of images or an enterprise site with thousands of media files, proper organization is essential for long-term success. Start organizing your media library in WordPress to increase efficiency.
Was this blog helpful to you? Let us know your thoughts, and to get more articles like this, subscribe to our blogs. Also, join our Facebook community to connect with fellow enthusiasts.