Do you have a WordPress website? If you do, then you know how hard it is to create engaging content. But, here’s a catch – only good content are not enough to bring you traffic. Much of it depends on how you present it on your website.
Lightbox- Making Your Content Interactive
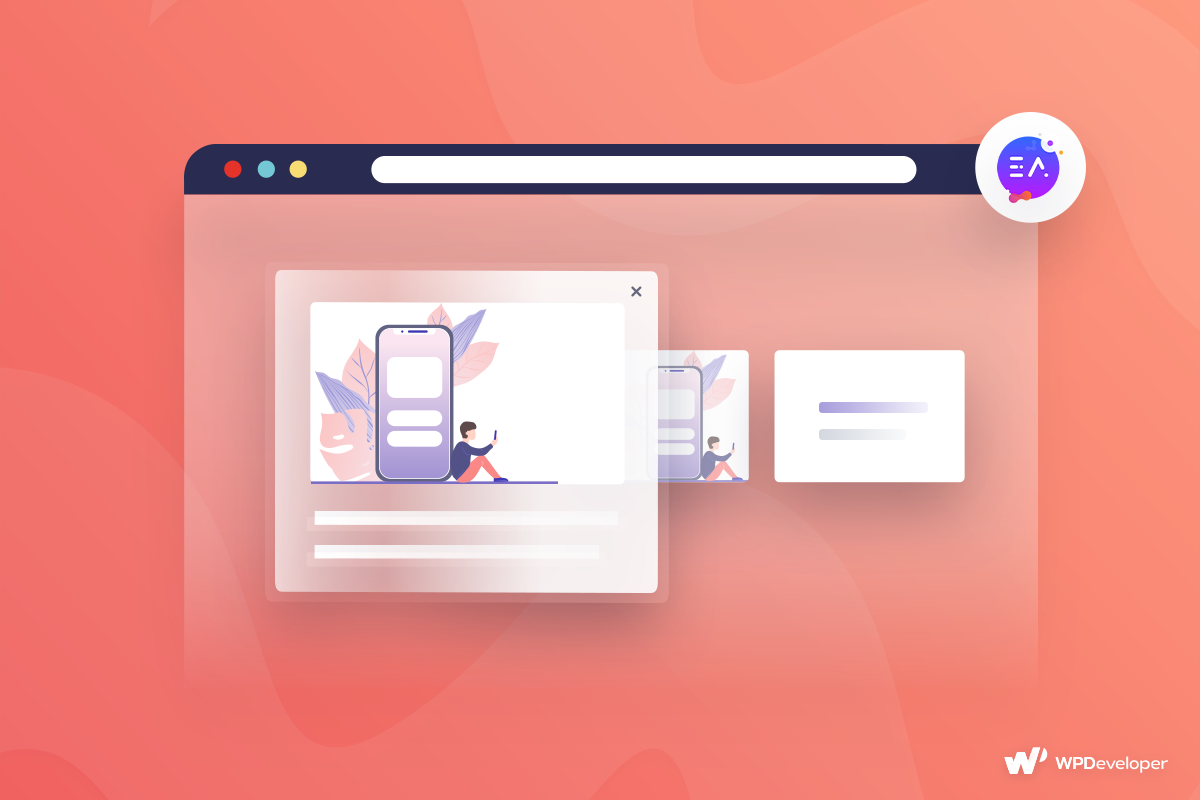
Lightbox lets you present video, image or other media in a pop-up. When a certain task is performed the Lightbox gets triggered and takes up the display screen. In short the Lightbox remains dormant and hidden until it is triggered, which makes it a great tool to grab reader’s attention.
Create Lightbox for Your WordPress Site
Elementor does not have a dedicated element for creating lightbox. But Essential Addons for Elementor does! You get EA Lightbox & Modal with the Creative Elements bundle of Essential Addons.
Undoubtedly, the EA Lightbox & Modal for Elementor can help you add the right amount of action to your content. Similarly, you will not be wrong thinking of it as a tool to extend the display area of a device. When the Lightbox triggers it takes up the full screen, leaving the original content behind. Your readers can get back to the original content at any time, using the close button.
EA Lightbox & Modal for Elementor
Trigger Options
This blog will guide you to exploit the three Trigger options for the EA Lightbox & Modal Element. At the end of the blog you will also find a brief description of the three different Content Source for the element.
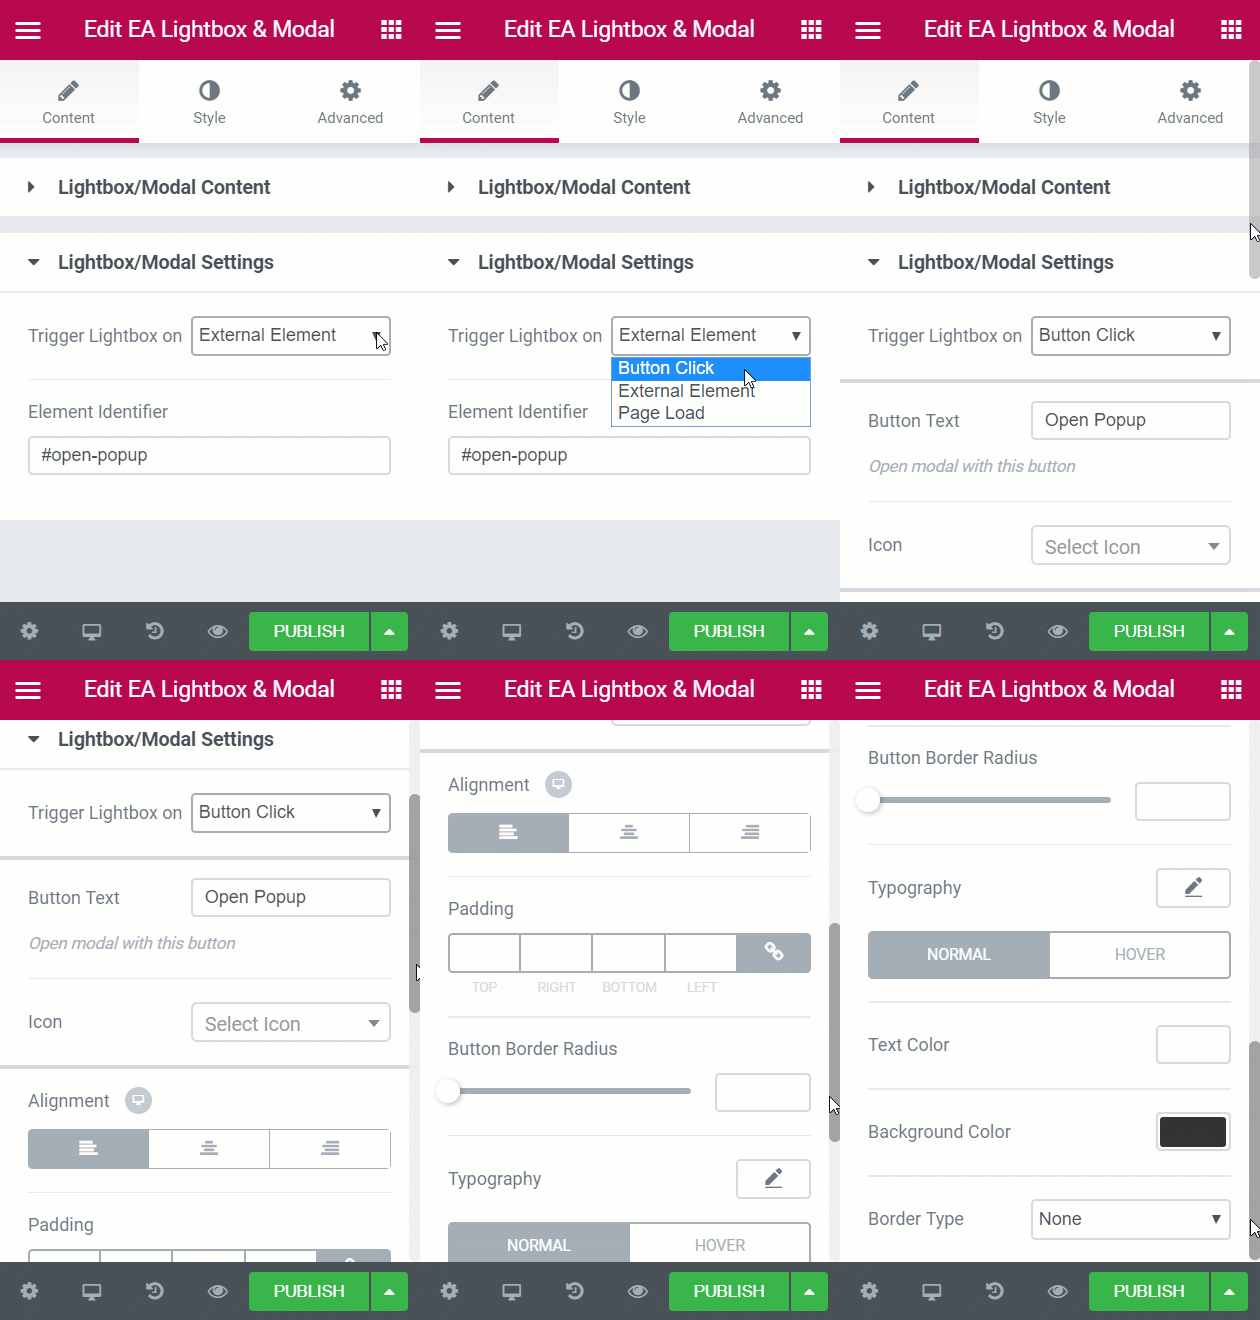
First thing first! Lets focus on the available trigger options. You can pick a Trigger option for the element from Content>Lightbox/Modal Settings>Trigger button on. There you will see three options.
1. Button click
2.External Element
3.Page Load
1.Button Click
To trigger the Lightbox element on button click navigate to Content>Lightbox/Modal Settings>Trigger button on>Button Click.
As soon as you do so, you will see the customization options change accordingly.
Why use Button Click?
By using this trigger option, you are letting your readers choose to open the lightbox. It may not seem that big of a deal, but it is! Remember, interruption is annoying. Nobody wants unnecessary content on their screen.
Customization options
You will have all the customization options available from the Content tab. You can add styling from here too.You can adjust the normal and hover styles for the button.
Button Text- In this field, simply type in the title you want to place on the button.
Icon- From the drop-down menu pick a icon for the element. There are thousands of readily available icons for use.
Alignment- Set the alignment for the button- Right,Center,Left.
Padding- Adjust the padding for the button area only.
Radius- From here you can reshape the button area.
Typography-Click on the Pencil icon to open the typography pop-up. Remember, you can only have one text on the button. From this option adjust the Font size, Family, Weight, Line-Height and Letter-spacing.
Normal/Hover Settings- From here you can adjust the Text, Background and Border color for both the Hover and Normal state of the button area.
External Element
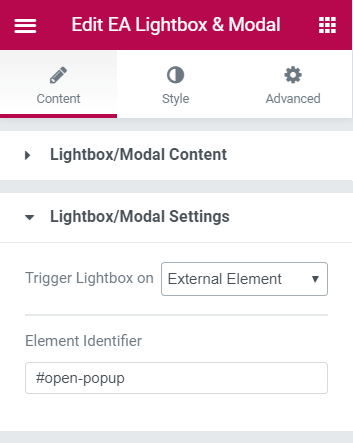
To trigger the Lightbox & Modal element using another Elementor element, navigate to Content→Lightbox/Modal Settings→Trigger button on→External Element.
As soon as you do so, you will see the customization options change accordingly.
Why use External Element?
This option lets you connect Lightbox & Modal with other Elementor Elements. This a great technique to interlink your content.
Customization Options
Well, there is no customization option for it, apart from the identifier key. And the identifier is generated automatically. So, you only need to learn how to use this key to link other Elementor elements. Once you choose this option a identifier key will be generated automatically. Copy this key and paste it in the CSS ID field of any other Elementor element. Also note that, every Elementor element has a CSS ID option in the Advanced Tab.
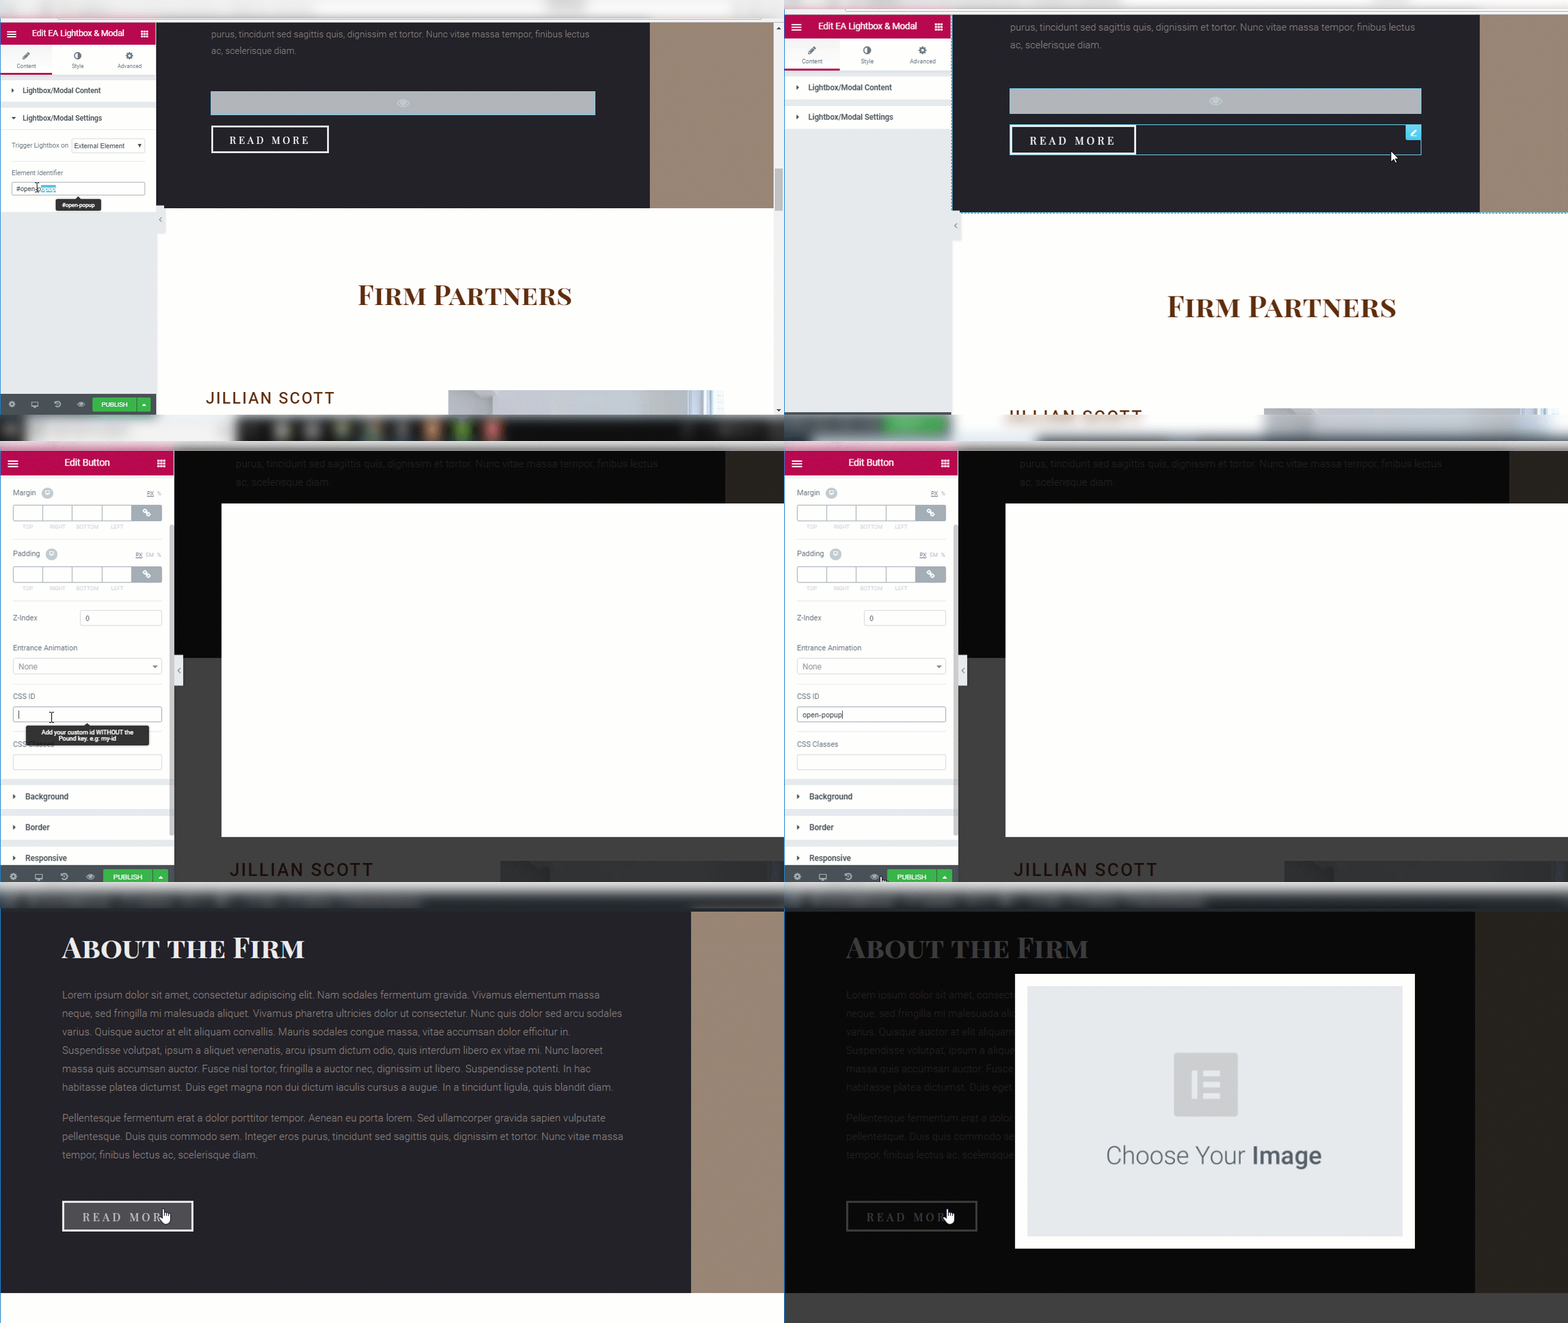
Lightbox and Modal linked with Button Element
We are going to link the EA Lightbox & Modal element with the Button element of Elementor.
Step1-Drop the Lightbox element on top of the Button element.
Step 2-Select the EA Lightbox & Modal and navigate to Content→Lightbox/Modal Settings→Trigger button on→External Element.
Step 3-Copy the Identifier Key without the hash.
Step 4-Select the Button element and navigate to Advanced→Element Style→CSS ID.
Step 5-Paste the Identifier key in the CSS ID field.
Step 6-Save and Publish!
3.Page Load
Suppose you want to insert the modal in the middle of your blog post. No worries! That is also possible. Drop the element inside your blog, no matter which position. Then navigate to Content→Lightbox/Modal Settings→Trigger Lightbox on→Page Load.
Why use Page Load?
Use it to surprise your readers. You can insert an offer or announcement in the pop-up. In short, this is the exact opposite of the Button Click trigger.
Customization Options
There is only one customization option that lets you adjust the delay for the element. Use the bar and drag it left-right to pick the delay duration in seconds. Additionally, you can directly type into the field to use a negative delay duration as well.
Now lets focus on content source for the EA Lightbox & Modal element.
Content Source
You will have three available sources to choose from.
Image- If you choose to use an image, use this option. You can either select an already existing picture from the media library or upload a new one.
HTML Content- if you choose this option you will see a smalll version of the WordPress Ediotr appear below. From there you can insert any HTML Content.
External URL- You can link videos, images, maps or other online content with this element. All you have to do is copy the link to that web page and insert it in the link field.
Wrapping Up
Why take all the trouble if the final result will not be good, right? If you are asking this question to yourself, then see the Demos and decide for yourself.
Please let us know if we missed out on anything. If you want us to do a similar blog for any of the other Essential Addons elements, please leave a comment below. In the meantime, here is a blog on the EA Content Timeline element.


