How great is Elementor 2.0 Theme Builder? We all know the answer. It redefines the way you build websites with Elementor. However, this blog is not about praising Elementor. In this blog, you will see how you can use Dynamic Content.
Dynamic Content
First, lets visualize the difference between Static and Dynamic Content. In case of Static Pages, like Landing Page or Home Page, the content stays the same. Same is true for their layout.
On the other hand, Dynamic Pages like Blog pages, have dynamic content. You will have different texts, media files and layout in different blog pages. Similarly, their relative sequence and positions will also vary from post to post.
How can You Benefit From Using Dynamic Content?
Suppose, you have a WordPress plugins website. Now, you will have introductory blogs for different plugins. You might have one or two plugin comparison blogs. Also, you might have different plugin review blogs. The three types of blog pages will have different layouts.
Okay, so now think about a scenario where you have to write another plugins comparison blog. And this needs to be completed on an emergency basis. What would you do? Will you have enough time to complete the work in the traditional way of page building. You need to write the content first. But what about the layout- the sequence of content types in the blog.
No worries! Elementor addressed this exact issue with their latest update.
Elementor 2.0 Theme Builder
So, what is the solution Elementor Team came up with? Dynamic Content!
Hopefully you understand the nature of dynamic content by reading the previous sections. Now, lets learn about the steps involved in creating and using dynamic content with Elementor.
Lets use the previous scenario one more time where you have a WordPress plugins website. with Elementor 2.0, you can save one plugins comparison blog layout as a template. And later on, when you are creating a new but similar comparison blog, you can use the previously built template and pull content from some other source. The new content will fill in the previously designed content framework.
Using Dynamic Content
Lets try this new feature. Open your WordPress Dashboard and open Elementor. Open the Add New Template Popup and from the first field under Choose Template Type drop-down select Single. Give a name to the template and click on Create Template.

After you click Create Template, Elementor will load that layout for you. Take time and observe the different types of elements used in the layout. You will notice that the templates are built with a new set of elements that were not available with the old versions of Elementor.
The template will have Post Content, Post Excerpt, Post Info, Share Buttons, Author Box, Post Navigation and so on. You might ask yourself, why isn’t the templates built with the old elements that came with the Elementor. Like- Image, Heading, Text Editor. Well, this is because Elementor 2.0 has introduced a new approach to website building with.
Elementor 2.0 is dubbed as Theme Builder. With this version, you can create and edit each and every part of your website.The old elements are still there, but there is also a new set of elements- Theme Elements.
Creating the Framework
Are you happy with the layout? If not, adjust the layout as you wish. Add new elements or replace existing ones. Once you are happy with the layout, save the template.
It is a better idea to use the Theme Elements to create such blog layouts. From the left panel of the Elementor Interface search for Theme Elements. You will have Post Title, Post Excerpt, Site Title, Featured Image and so on.

Why use Theme Elements?
As previously mentioned, Elementor 2.0 comes with Theme Elements. And it is advised to use the newly introduced elements for using dynamic template layouts. But why is so?
It is so that Elementor can accurately read the content. Suppose you have built a Blog template that you will use for every plugins comparison page from now on. So next time you are writing a comparison blog, you only need to write the content. Later on you can pull the content into the template you have built previously.
Using Different Content
Once you are happy with the layout you might want to see how the newly created framework looks on different blog posts. To do so, click on the Settings Icon and go to Preview Settings. Type in texts in the second filed and it will bring up suggestions about your existing blogs. Choose any of them and you are done. Now the layout will pull all the content from that source into the newly built framework.

Finishing it Off!
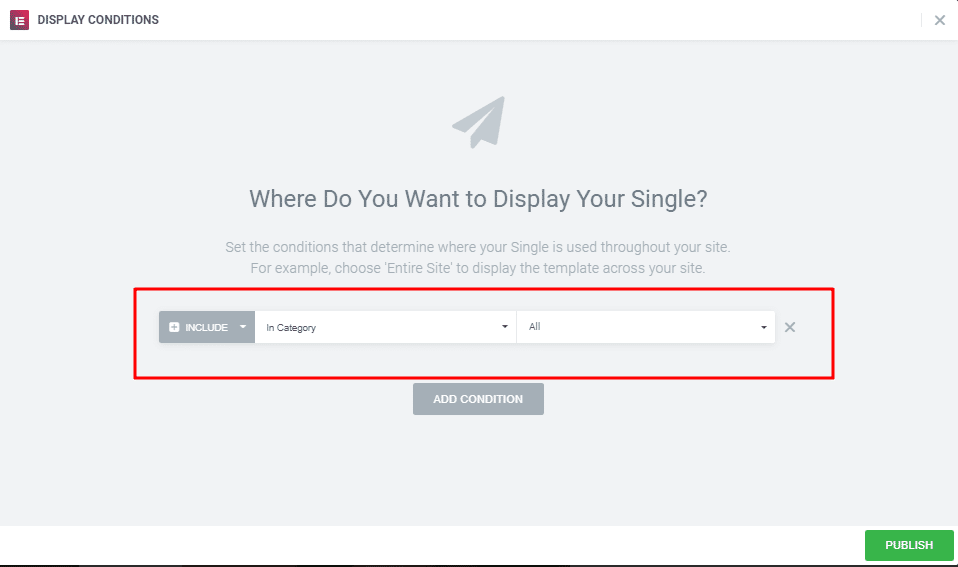
Now at last, you want to specify conditions for the blog template. You can assign this newly created template to any specific category or Tag.
Want to learn more about Elementor 2.0? Did you know you can create Header Templates with Elementor? If no, check out this blog Elementor Theme Builder-Header Template.
Will You Recommend Our Plugin To Your Friends?