Want to include or exclude Disable Comments settings on your WordPress website, based on different user roles? Now, get complete control over who you give access to view and comment on your site, and much more with the latest update from Disable Comments. Follow our detailed guide below to manage and disable comments on your entire network or individual sites in just a few minutes.
Why Should You Customize The Access Of Your Site’s Comment Section?
WordPress comes with a built-in user management system and some predefined user roles and permissions. As an administrator of a WordPress website, you can add or remove users, moderate the comment sections, and assign custom permissions.
When you have multiple users on the same website, you might want to give access to only a few of them to review and moderate comments. When disabling the comment sections, you might not want to deprive subscribers of their ability to comment on your blogs and product pages.
This is why you need a solution that offers you all the facilities and lets you disable comments or exclude the settings for particular users. And we have the perfect solution for you.
How To Exclude ‘Disable Comments’ Based For Different User Roles?
Disable Comments – the most popular, free WordPress plugin for preventing spam on your website with over 1 million happy users worldwide – is now here to take your site protection facilities to new heights. With the release of Disable Comments v2.4.0, you can now get your hands on the latest, exclusive feature to exclude the tool’s settings based on custom user roles and set custom permissions.

Now, when you update to the latest version of this plugin, you will find the outstanding new feature to ‘Exclude Disable Comments Settings Based On User Roles’. Regardless of the type of users, you can fully control and customize their permissions. You can moderate based on who you want to give access to the comment section on the front-end of your website, effortlessly.
So, here’s how you can use this new feature; check out the super easy steps given below:
Step 1: Navigate To ‘Disable Comments’ On Your Dashboard
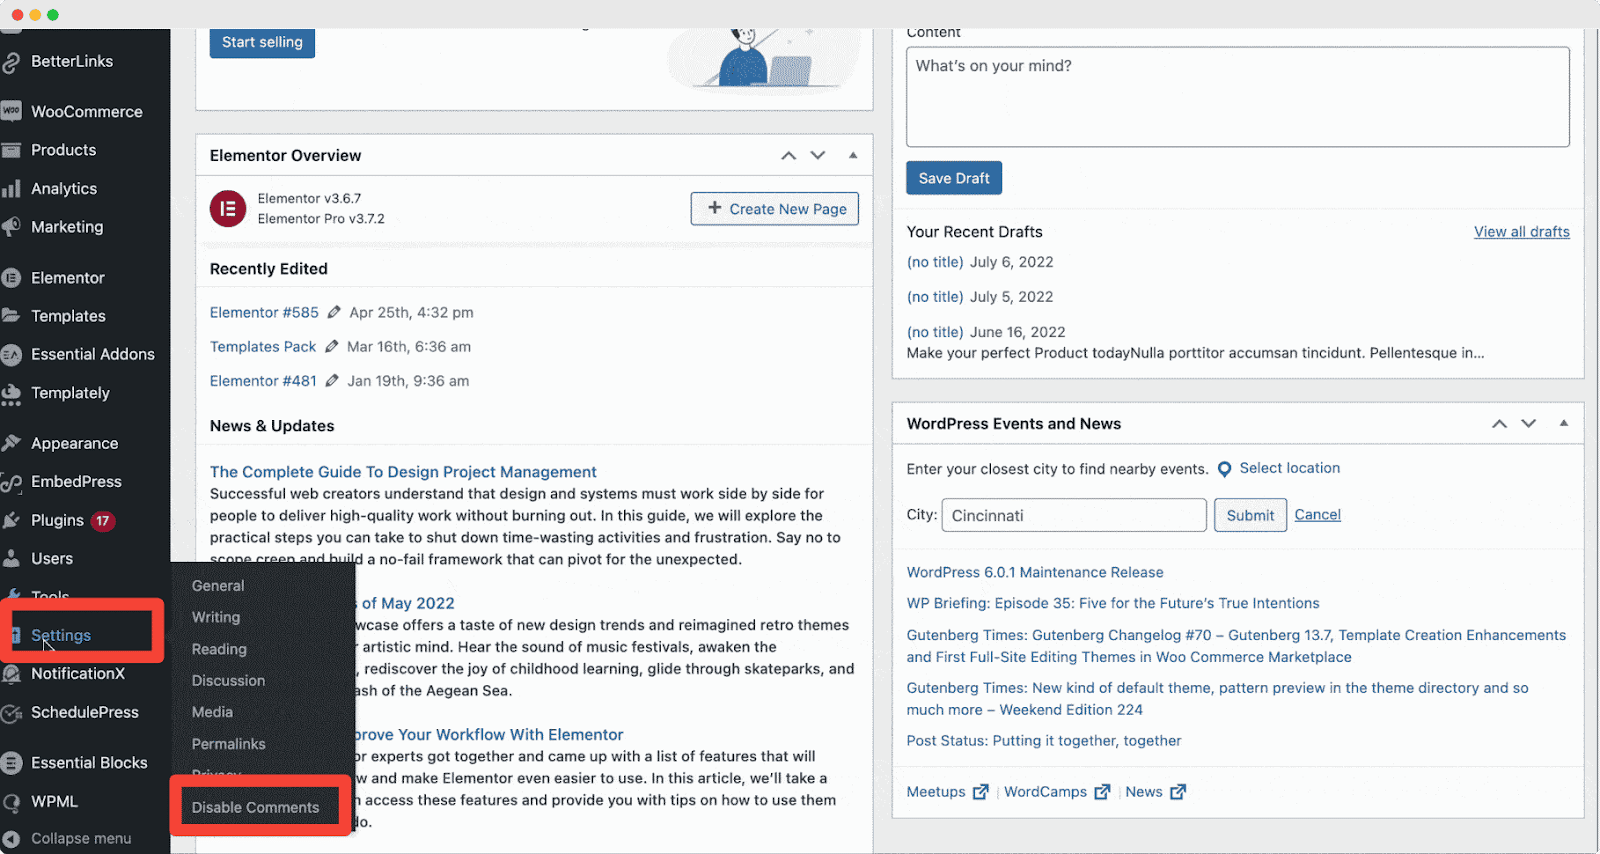
First, if you want to exclude Disable Comments settings for an individual user on your site, navigate to the Settings→ Disable Comments from the dashboard’s side panel. You can check out the image below to understand it with ease.
Step 2: Enable ‘Exclude Disable Comments’ & Select User Roles
Doing so will take you straight to the Disable Comments user interface on your dashboard, where you can find the new feature with just a little scroll down the page. Simply toggle on the ‘Exclude Disable Comments settings based on User Roles’ option to enable the feature in a single click.
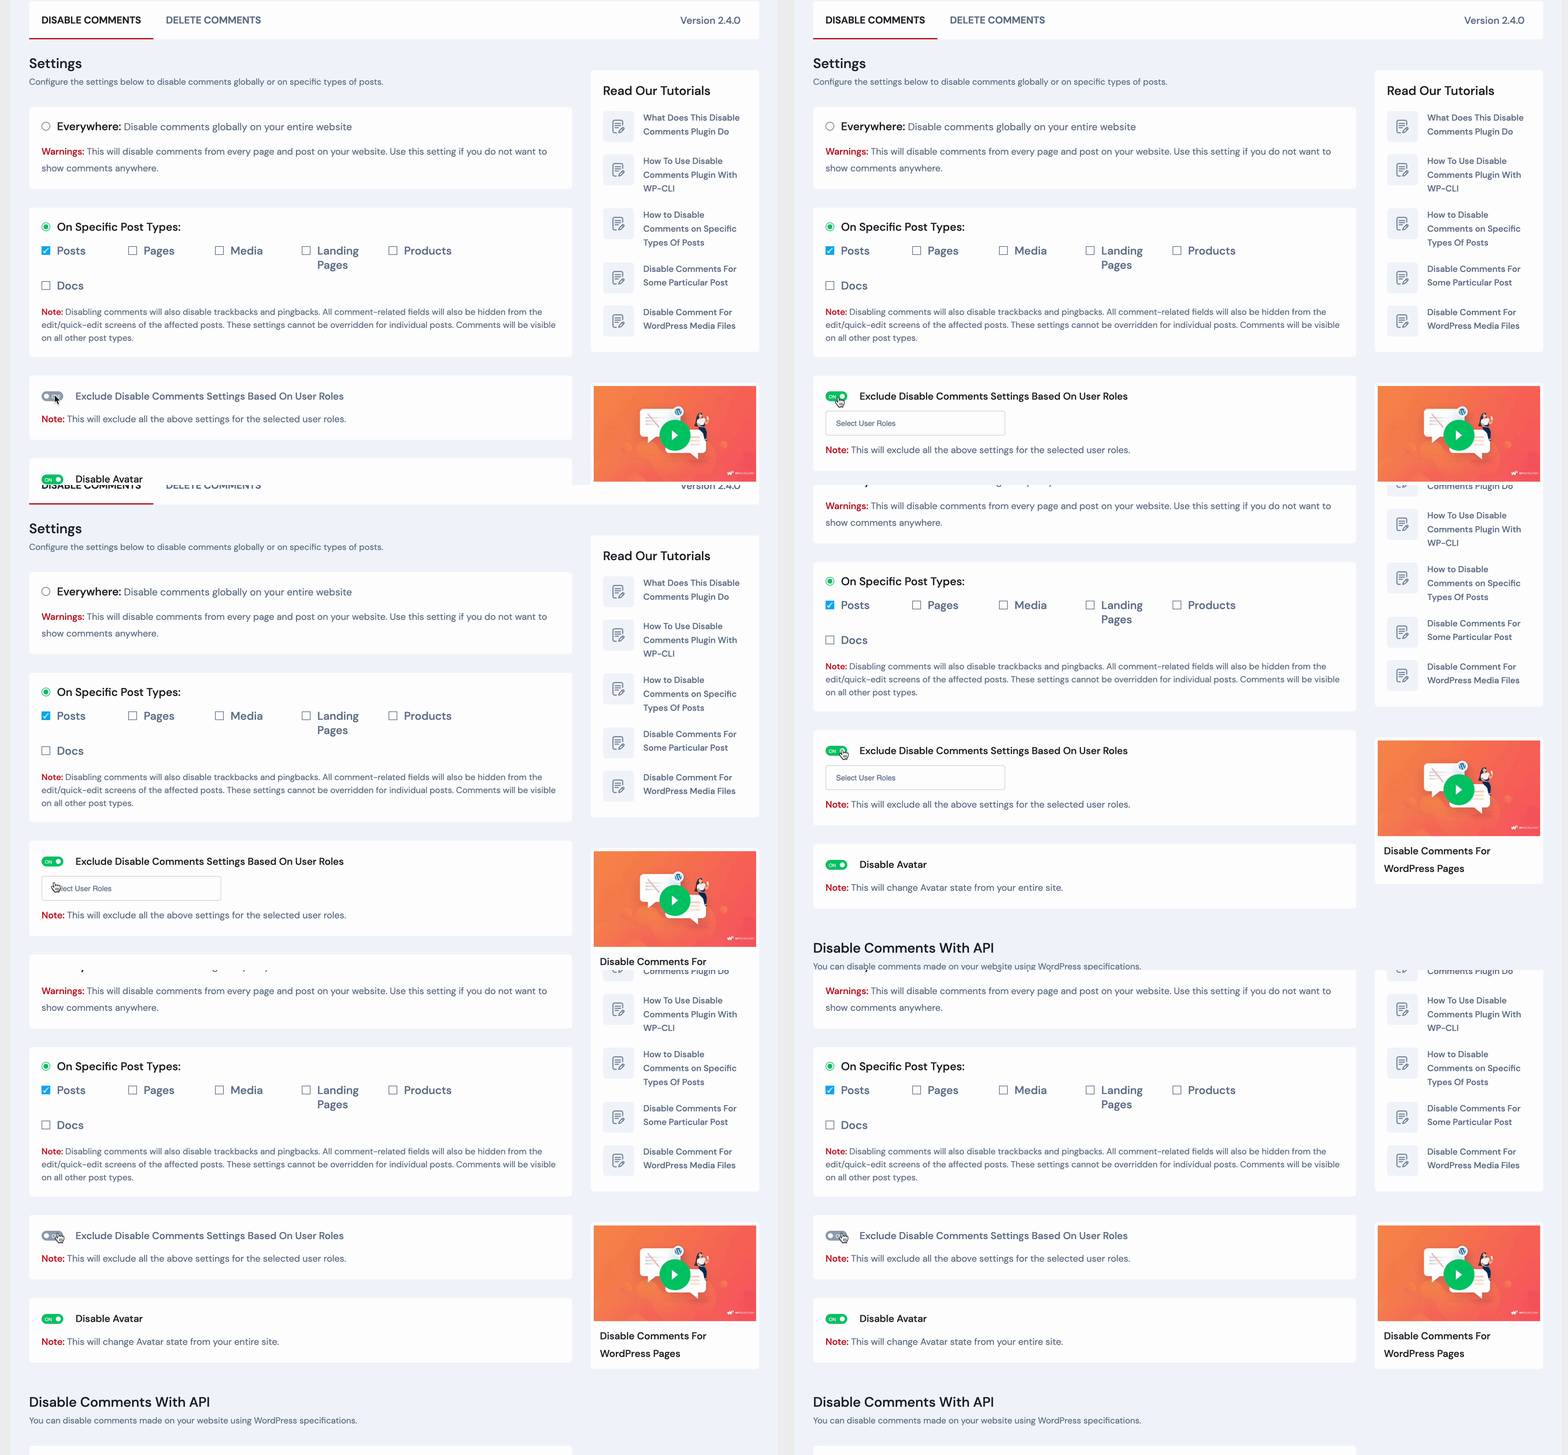
Toggling on this feature will instantly bring you a responsive drop-down menu featuring a list of all the roles of multi-authors and users of your site. By simply selecting roles from this menu, you can now easily distinguish which users will be able to get access to, view, or comment on your website, and others who will not have this exclusive permission.
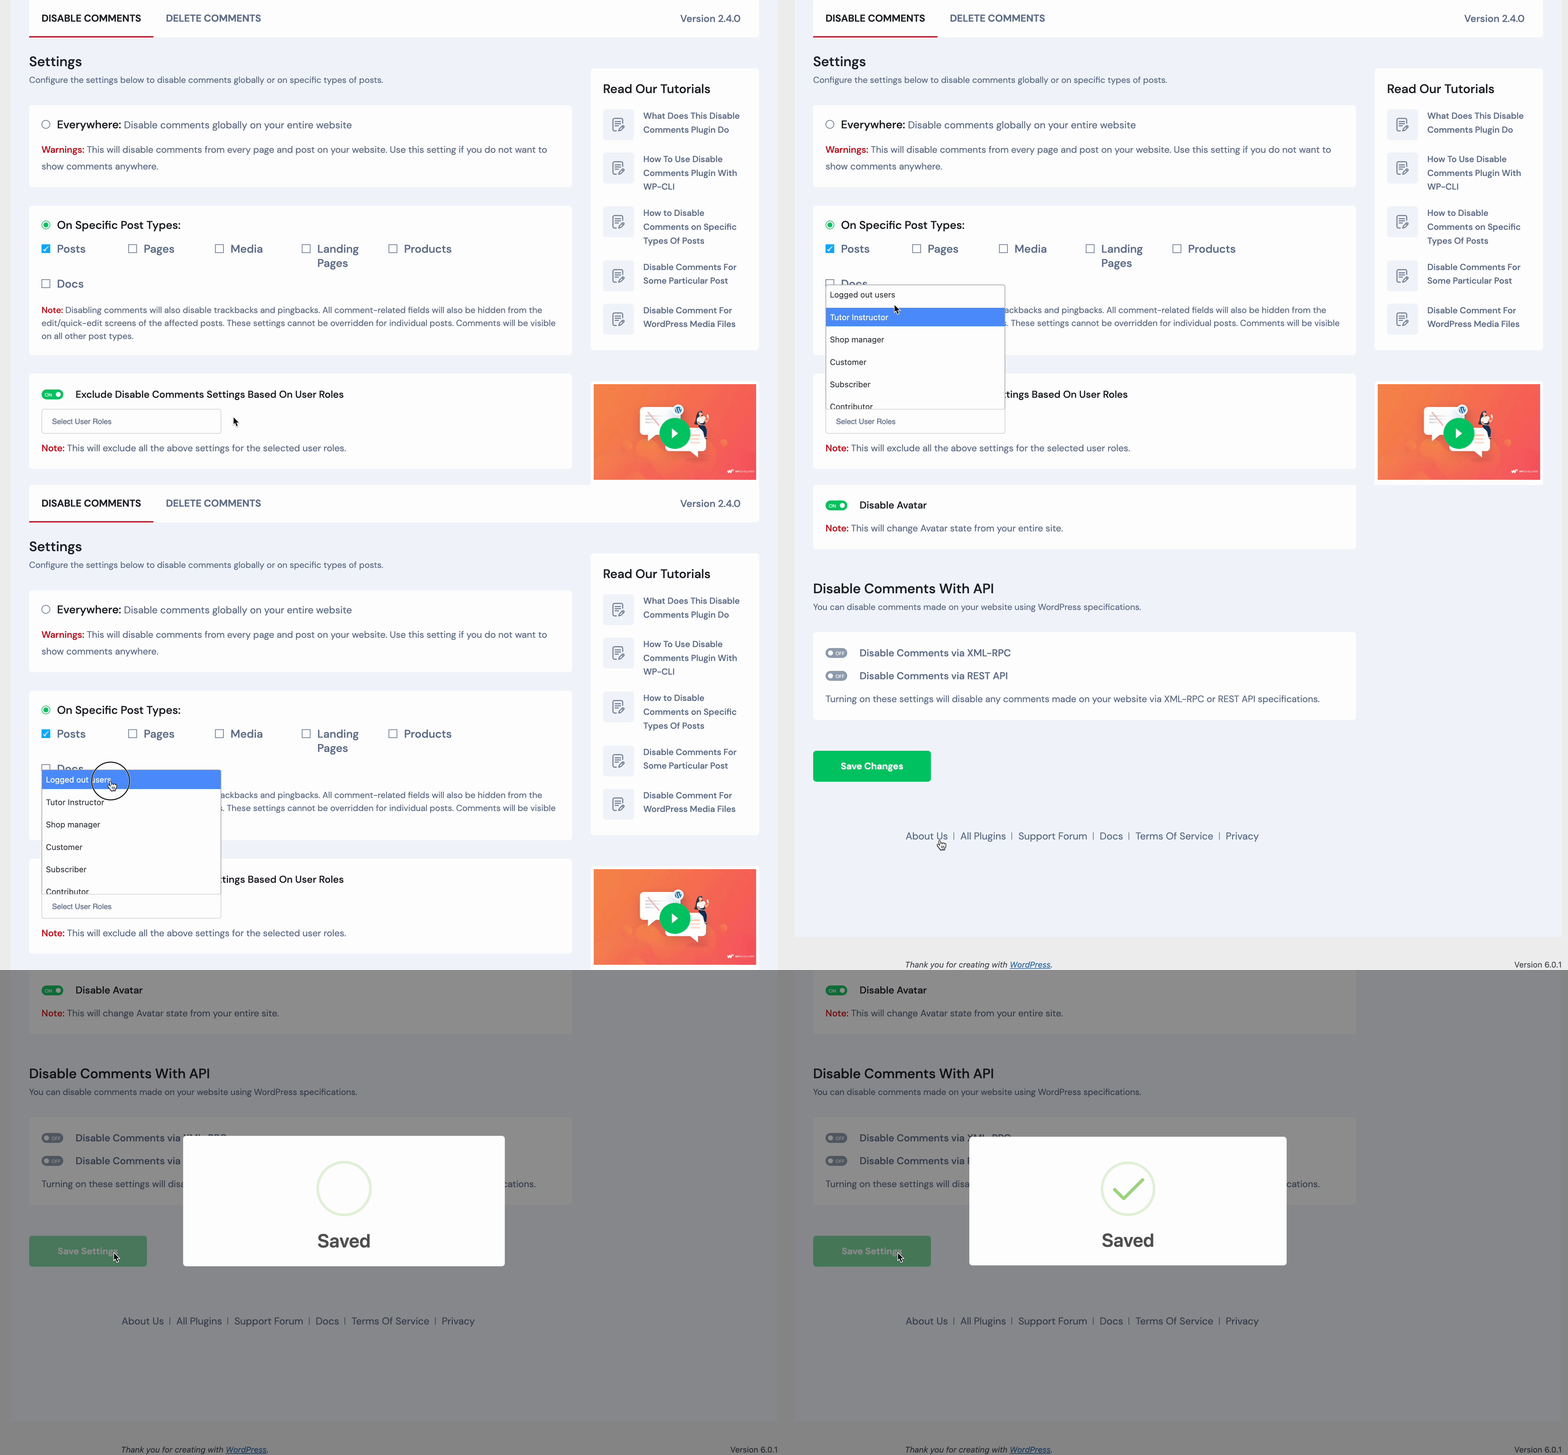
Note: The user roles you choose from the menu will GET ACCESS to see your website comments section and provide comments as well. The settings and options that you have enabled using Disable Comments will be excluded from applying to them.
On any regular multi-author blogging website, you will be able to choose from the following user roles:
⭐ Logged-out users
⭐ Authors
⭐ Subscribers
⭐ Editors
⭐ Contributors
⭐ Administrator
You can also get access to exclude Disable Comments settings for customers, shop managers, and others if you are running an eCommerce site. Other options might also be available based on your website settings. When you have selected the user roles will and will not get access to view or disable the comment section on your site, simply scroll down and hit the ‘Save Changes’ button.
A Real Use Case Scenario For Example Of The Outcome
Going back to the last image from Step 2, you can see that ‘Logged-out Users’ have been chosen from the drop-down menu to ‘Exclude Disable Comments Settings’ based on user roles. This means that only logged-out users have been given access and can see your comments section on your WordPress site to provide comments.
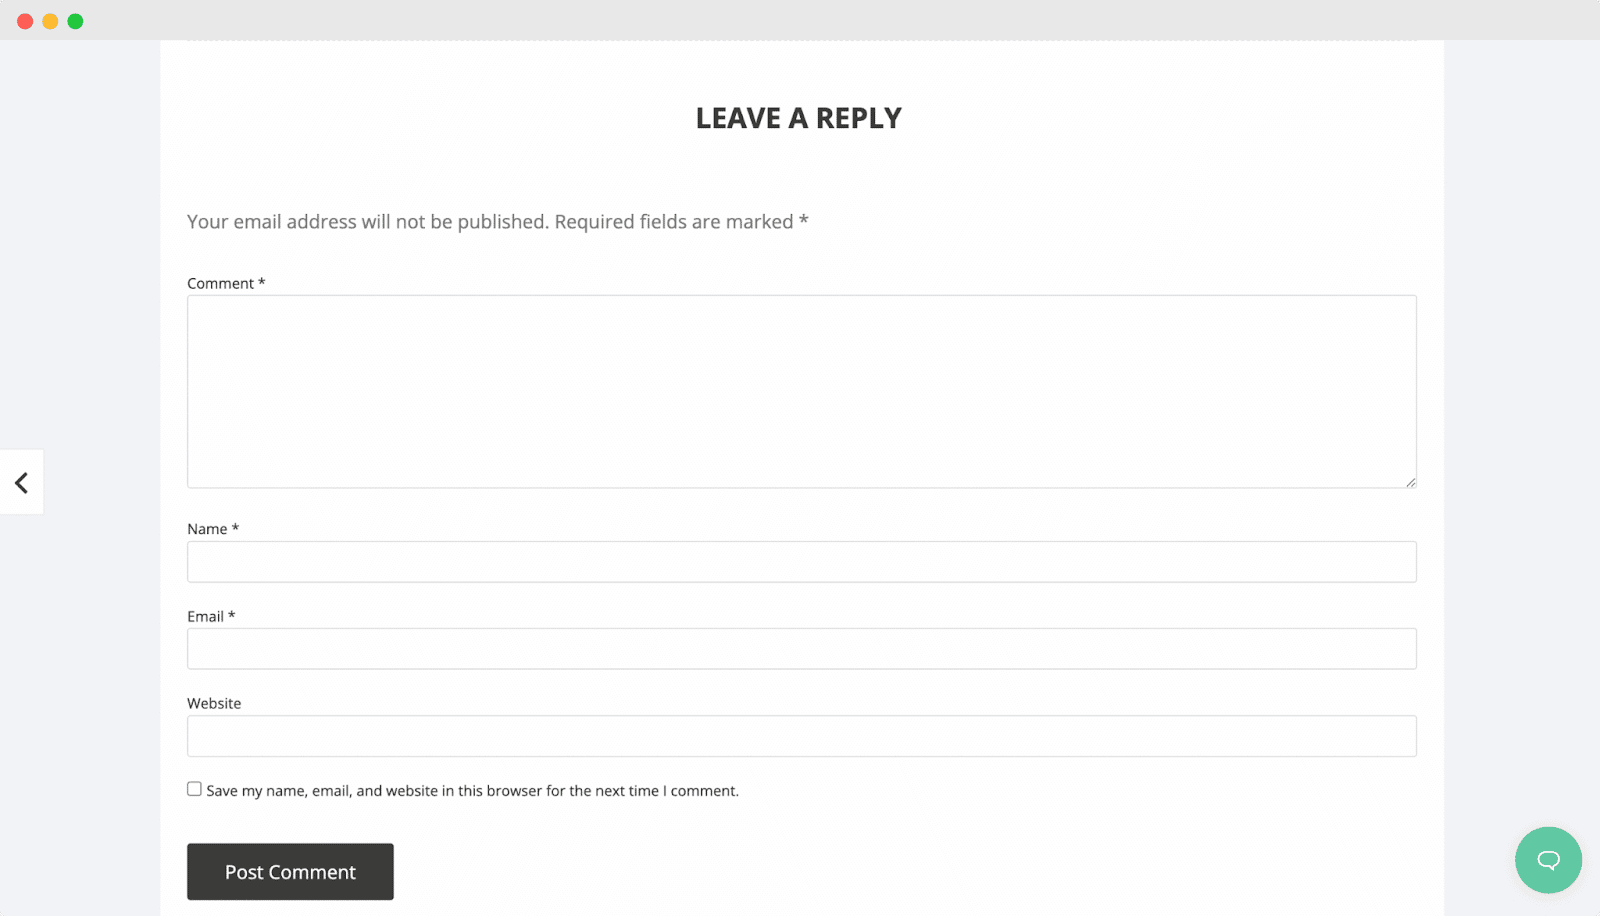
And that’s it. This is how, following some simple steps, you can easily exclude Disable Comments settings based on user roles and customize which user types get the exclusive access.
Bonus: More Amazing Features Of The Disable Comments
But not just these. Using Disable Comments, you can protect your website from spam comments, from any post type, page, and media in WordPress with ease. From allowing you to take global control over all comment-related settings on your website or multi-sites:

⭐ Disable or delete comments as needed, based on comment type
⭐ Disable comments via XML-RPC & REST-API
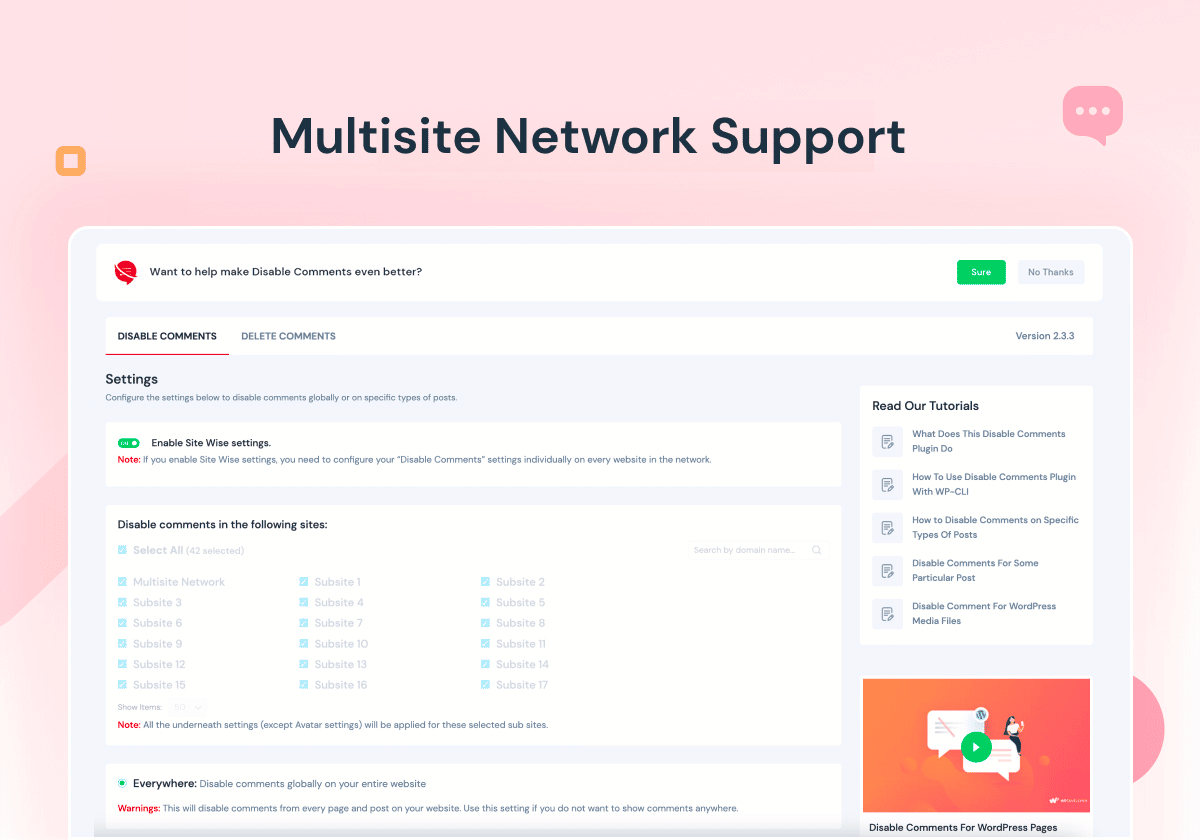
⭐ Fully disable or delete comments on a multi-site network supported
⭐ Manage multiple networks’ subsites or entire networks’ comments in advance
⭐ Hide all “Comments” links from the Admin Menu and Admin Bar
⭐ Hide all comment-related sections from the WordPress Dashboard, and much more.
We hope you have found this quick tutorial useful. Try out all the other features of Disable Comments for free, and share your experience with us in the comments below. For more fun tutorials, news, and tips and tricks, make sure to subscribe to our blog or join our friendly Facebook Community.
How To Easily Exclude Disable Comments Settings For Different User Roles?
Want to include or exclude Disable Comments settings on your WordPress website, based on different user roles? Now, get complete control over who you give access to view and comment on your site, and much more with the latest update from Disable Comments. Follow our detailed guide below to manage and disable comments on your entire network or individual sites in just a few minutes.
Why Should You Customize The Access Of Your Site’s Comment Section?
WordPress comes with a built-in user management system and some predefined user roles and permissions. As an administrator of a WordPress website, you can add or remove users, moderate the comment sections, and assign custom permissions.
When you have multiple users on the same website, you might want to give access to only a few of them to review and moderate comments. When disabling the comment sections, you might not want to deprive subscribers of their ability to comment on your blogs and product pages.
This is why you need a solution that offers you all the facilities and lets you disable comments or exclude the settings for particular users. And we have the perfect solution for you.
How To Exclude ‘Disable Comments’ Based For Different User Roles?
Disable Comments – the most popular, free WordPress plugin for preventing spam on your website with over 1 million happy users worldwide – is now here to take your site protection facilities to new heights. With the release of Disable Comments v2.4.0, you can now get your hands on the latest, exclusive feature to exclude the tool’s settings based on custom user roles and set custom permissions.
Now, when you update to the latest version of this plugin, you will find the outstanding new feature to ‘Exclude Disable Comments Settings Based On User Roles’. Regardless of the type of users, you can fully control and customize their permissions. You can moderate based on who you want to give access to the comment section on the front-end of your website, effortlessly.
So, here’s how you can use this new feature; check out the super easy steps given below:
Step 1: Navigate To ‘Disable Comments’ On Your Dashboard
First, if you want to exclude Disable Comments settings for an individual user on your site, navigate to the Settings→ Disable Comments from the dashboard’s side panel. You can check out the image below to understand it with ease.
Step 2: Enable ‘Exclude Disable Comments’ & Select User Roles
Doing so will take you straight to the Disable Comments user interface on your dashboard, where you can find the new feature with just a little scroll down the page. Simply toggle on the ‘Exclude Disable Comments settings based on User Roles’ option to enable the feature in a single click.
Toggling on this feature will instantly bring you a responsive drop-down menu featuring a list of all the roles of multi-authors and users of your site. By simply selecting roles from this menu, you can now easily distinguish which users will be able to get access to, view, or comment on your website, and others who will not have this exclusive permission.
Note: The user roles you choose from the menu will GET ACCESS to see your website comments section and provide comments as well. The settings and options that you have enabled using Disable Comments will be excluded from applying to them.
On any regular multi-author blogging website, you will be able to choose from the following user roles:
⭐ Logged-out users
⭐ Authors
⭐ Subscribers
⭐ Editors
⭐ Contributors
⭐ Administrator
You can also get access to exclude Disable Comments settings for customers, shop managers, and others if you are running an eCommerce site. Other options might also be available based on your website settings. When you have selected the user roles will and will not get access to view or disable the comment section on your site, simply scroll down and hit the ‘Save Changes’ button.
A Real Use Case Scenario For Example Of The Outcome
Going back to the last image from Step 2, you can see that ‘Logged-out Users’ have been chosen from the drop-down menu to ‘Exclude Disable Comments Settings’ based on user roles. This means that only logged-out users have been given access and can see your comments section on your WordPress site to provide comments.
And that’s it. This is how, following some simple steps, you can easily exclude Disable Comments settings based on user roles and customize which user types get the exclusive access.
Bonus: More Amazing Features Of The Disable Comments
But not just these. Using Disable Comments, you can protect your website from spam comments, from any post type, page, and media in WordPress with ease. From allowing you to take global control over all comment-related settings on your website or multi-sites:
⭐ Disable or delete comments as needed, based on comment type
⭐ Disable comments via XML-RPC & REST-API
⭐ Fully disable or delete comments on a multi-site network supported
⭐ Manage multiple networks’ subsites or entire networks’ comments in advance
⭐ Hide all “Comments” links from the Admin Menu and Admin Bar
⭐ Hide all comment-related sections from the WordPress Dashboard, and much more.
We hope you have found this quick tutorial useful. Try out all the other features of Disable Comments for free, and share your experience with us in the comments below. For more fun tutorials, news, and tips and tricks, make sure to subscribe to our blog or join our friendly Facebook Community.
Tasnia Rahman
Share This Story
Figma to WordPress Conversion: Bridging the Gap Between Design & Development Instantly
A Step-by-Step Guide: Add Categories And Tags to WordPress Media Library
How to Transform Elementor Form into a Payment Form? [2025]
What Is New in Essential Addons for Elementor 6.0?
Products By WPDeveloper
Essential Addons
Enhance your Elementor page building experience with 90+ elements.
NotificationX
Best FOMO, Social Proof, Sales Popup for WooCommerce, EDD and more.
BetterDocs
Best Documentation & Knowledge Base Plugin for WordPress.
Join 6 Million+
Happy Customers
Subscribe For The Latest Updates
No charge. Unsubscribe anytime.