Wouldn’t it be great if you could directly schedule links from social accounts? This is now achievable if you manage your WordPress posts using SchedulePress. SchedulePress 4.2.0 is now available, where we have improved social sharing with LinkedIn and Pinterest social to make it easier for auto-sharing WordPress posts and pages.
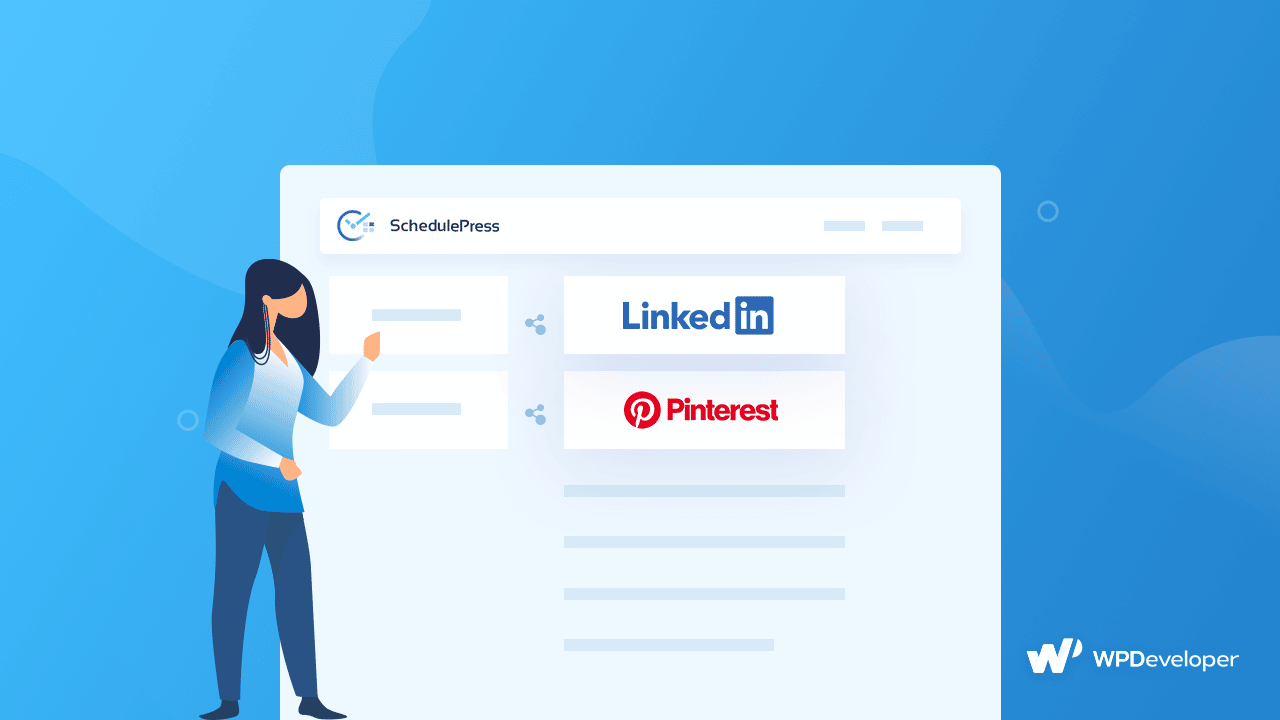
SchedulePress Brings Social Sharing For Effortless Link Scheduling
To make your life easier, the newest release of SchedulePress allows you to add your personal Linkedin and Pinterest social profile so that anybody can save time rather than going through the complicated process of getting the API key, App Id Key, and much more.
Auto Social Sharing From Personal LinkedIn Account
SchedulePress allows you to share your scheduled WordPress posts on LinkedIn automatically. You can automate the sharing of your blog content by linking your LinkedIn account to SchedulePress. Additionally, with its ‘Instant Share‘ functionality, you can share your post on LinkedIn whenever you want.
Easy Auto Social Sharing From Pinterest Account
SchedulePress allows you to share WordPress posts to Pinterest automatically. You can automate the sharing of your blog posts by integrating Pinterest with SchedulePress.
You can also use SchedulePress to distribute your WordPress posts on multiple Pinterest accounts at the same time. This feature is quite useful if you want to increase your social media presence and provide your company with much-needed attention.
Quick Guide: How To Enable Auto Social Sharing?
SchedulePress allows you to share your scheduled WordPress posts on LinkedIn automatically without any difficulty. Follow this step-by-step guide to enable social sharing from your LinkedIn account.
Step 1: Retrieve LinkedIn API Keys
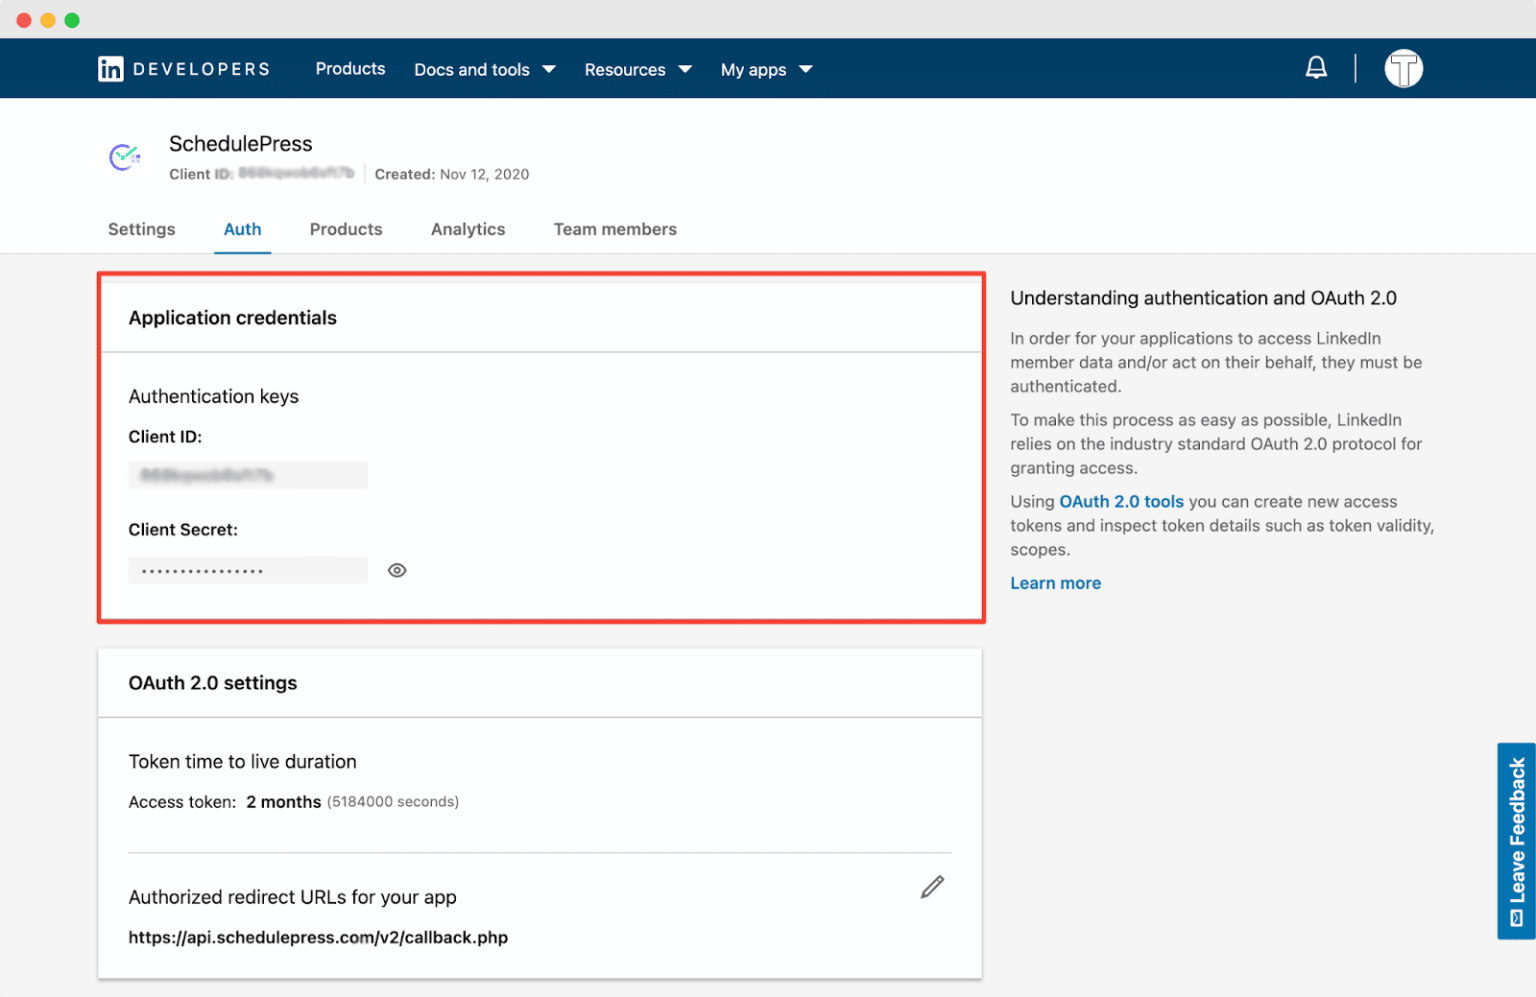
First, acquire your API Keys from your LinkedIn Developer Account. You first must ensure that you have previously established a LinkedIn App. You must provide the following information: App Name, App Logo, Privacy Policy URL, and so on.
Make sure your Company page is also linked to the App. If you do not already have a Company page, you can create one by clicking on this link.
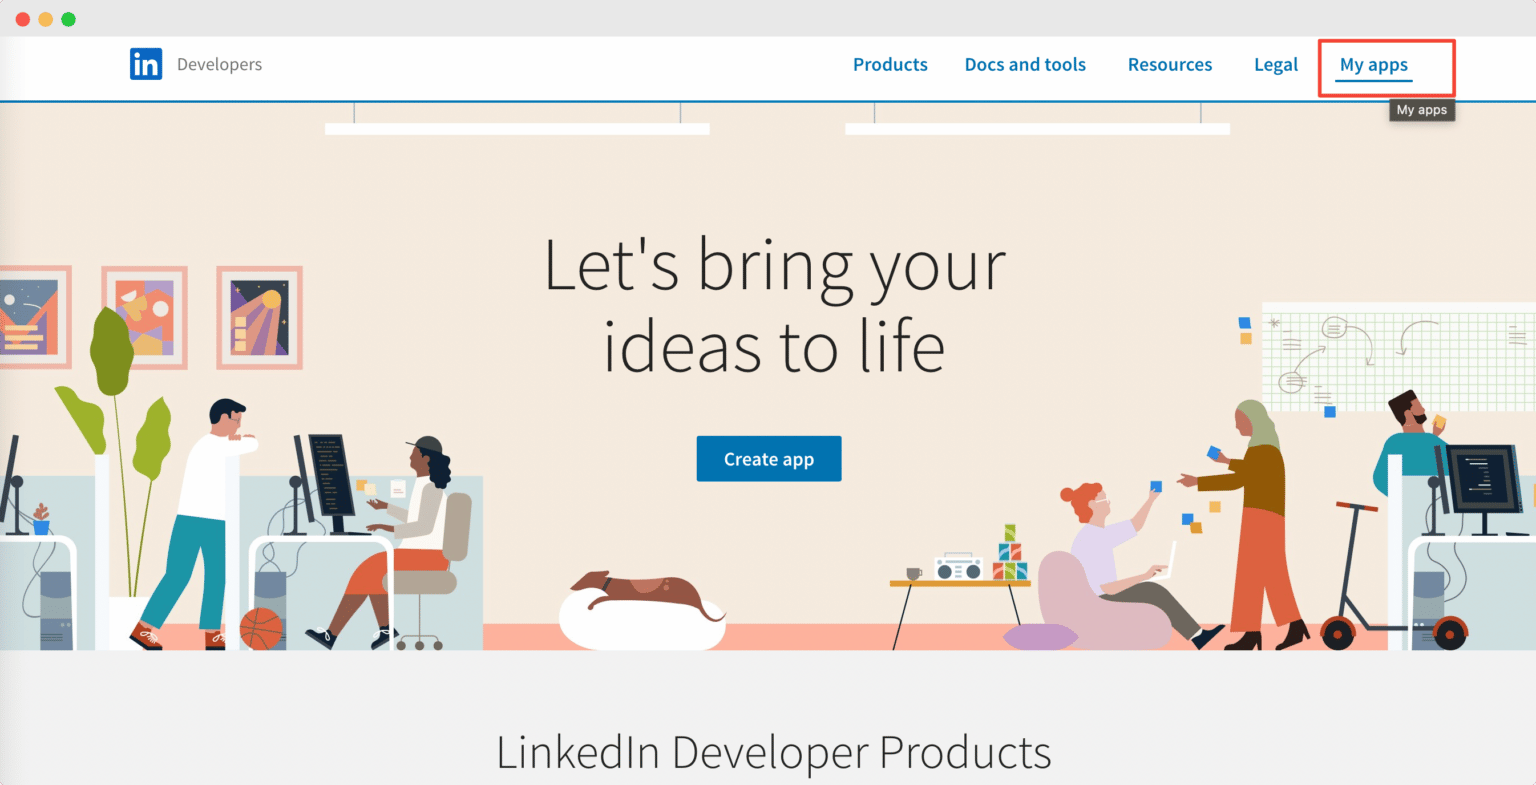
Take note of the URL “https://api.schedulepress.com/v2/callback.php” and paste it into the ‘Redirect URLs‘ option under ‘OAuth 2.0 Settings.’
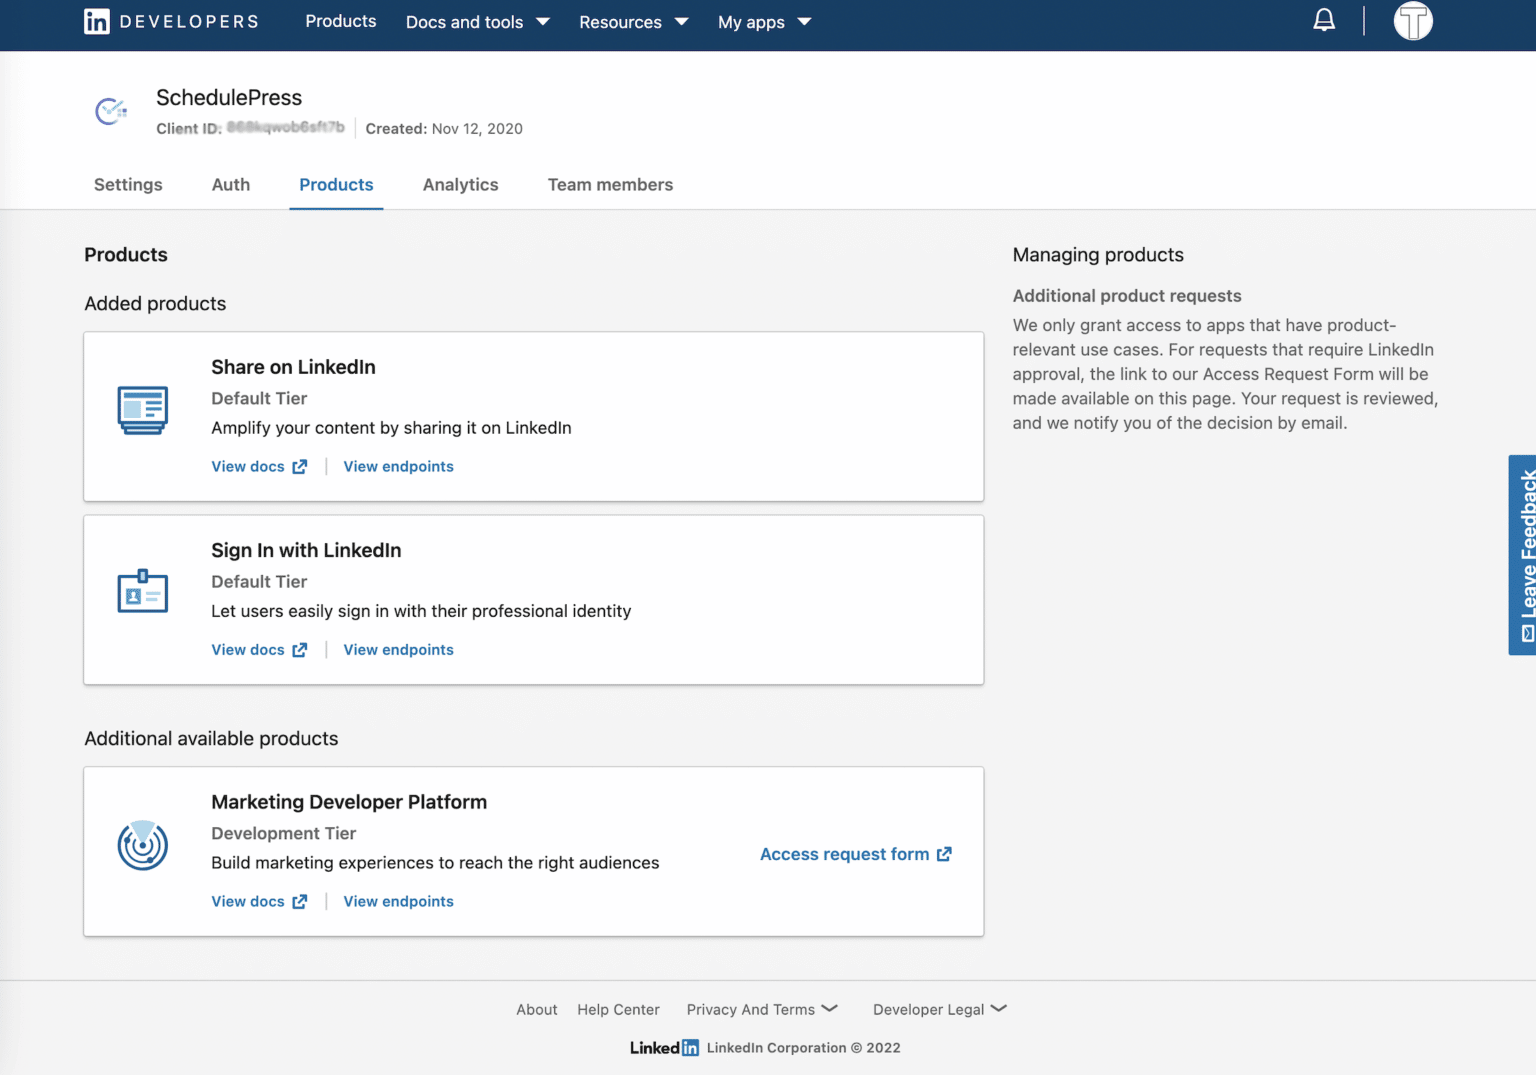
You need to Assure the ‘Share On LinkedIn‘ and ‘Sign in with LinkedIn‘ options are enabled by going to the ‘Products‘ menu in the LinkedIn app.
Step 2: Configure SchedulePress Social Profile
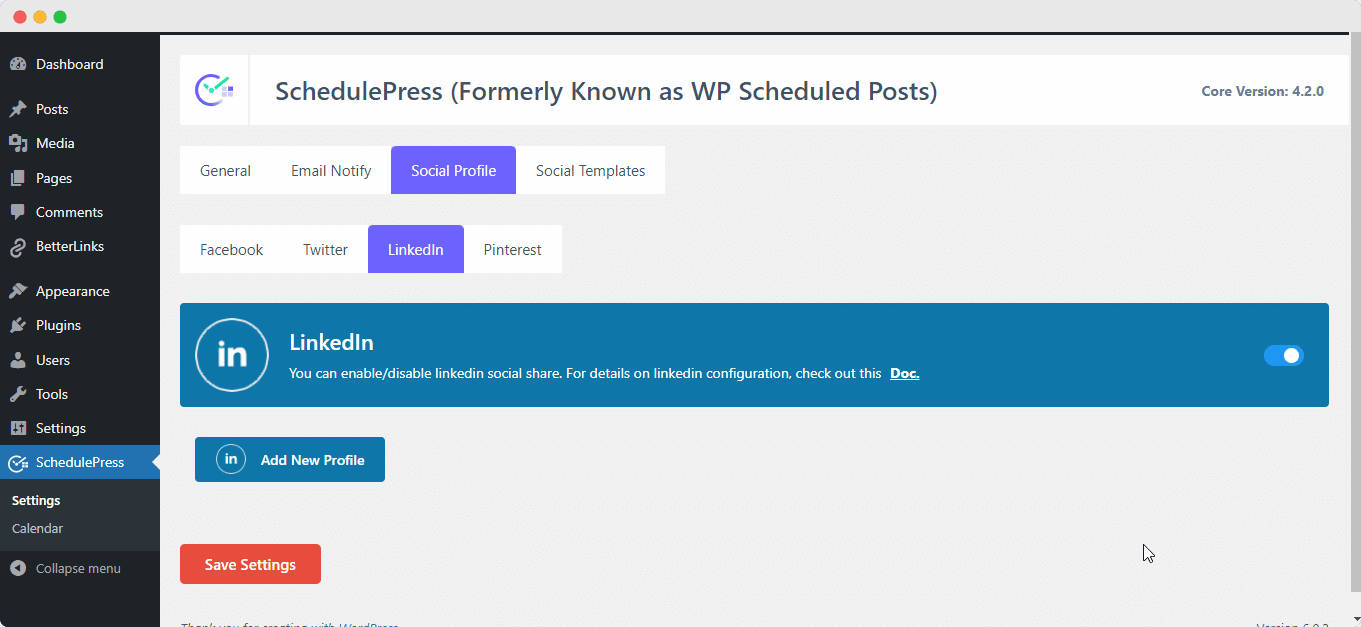
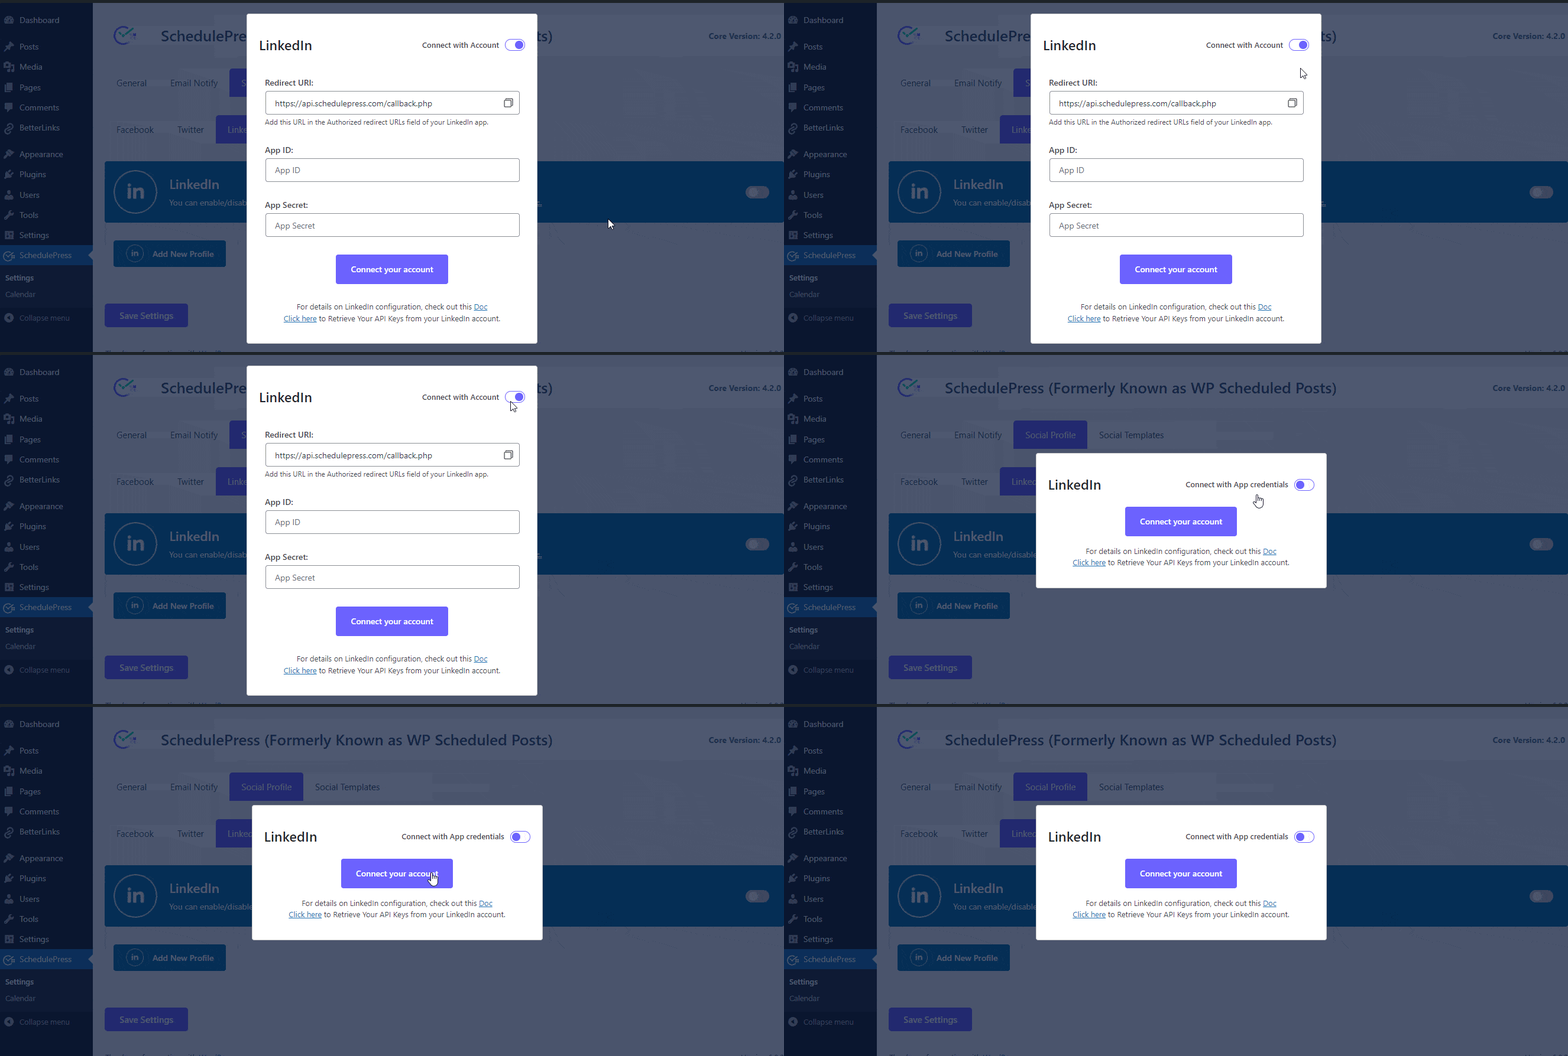
Navigate to wp-admin →SchedulePress → Settings on your WordPress Dashboard. Then, go to the ‘Social Profile‘ page and select the ‘LinkedIn’ option. Make sure the LinkedIn option is turned on. Then, just click ‘Add New Profile‘ to link your LinkedIn profile to SchedulePress.
Here you will have two options. You can either connect your LinkedIn account with your app credentials or you can directly connect your LinkedIn account.
The first method is to connect your LinkedIn account with the ‘App ID’ and the ‘App Secret’ keys. If you have followed the mentioned steps then you can easily get these keys without breaking any sweat.
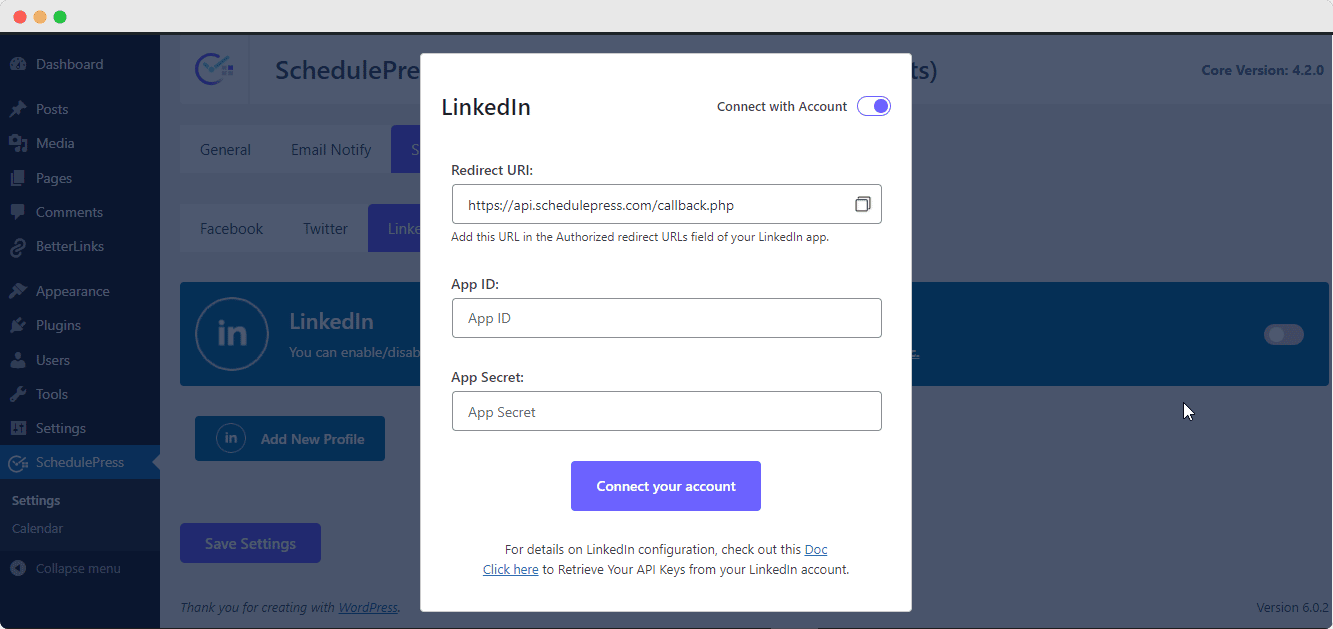
And the alternative method is easier. Here you don’t need any App id or similar credentials to configure the LinkedIn profile. All you have to do is toggle on the ‘Connect With Account’ option and afterward, you can simply connect your personal LinkedIn account in SchedulePress.
Step 3: Share Your WordPress Post On LinkedIn
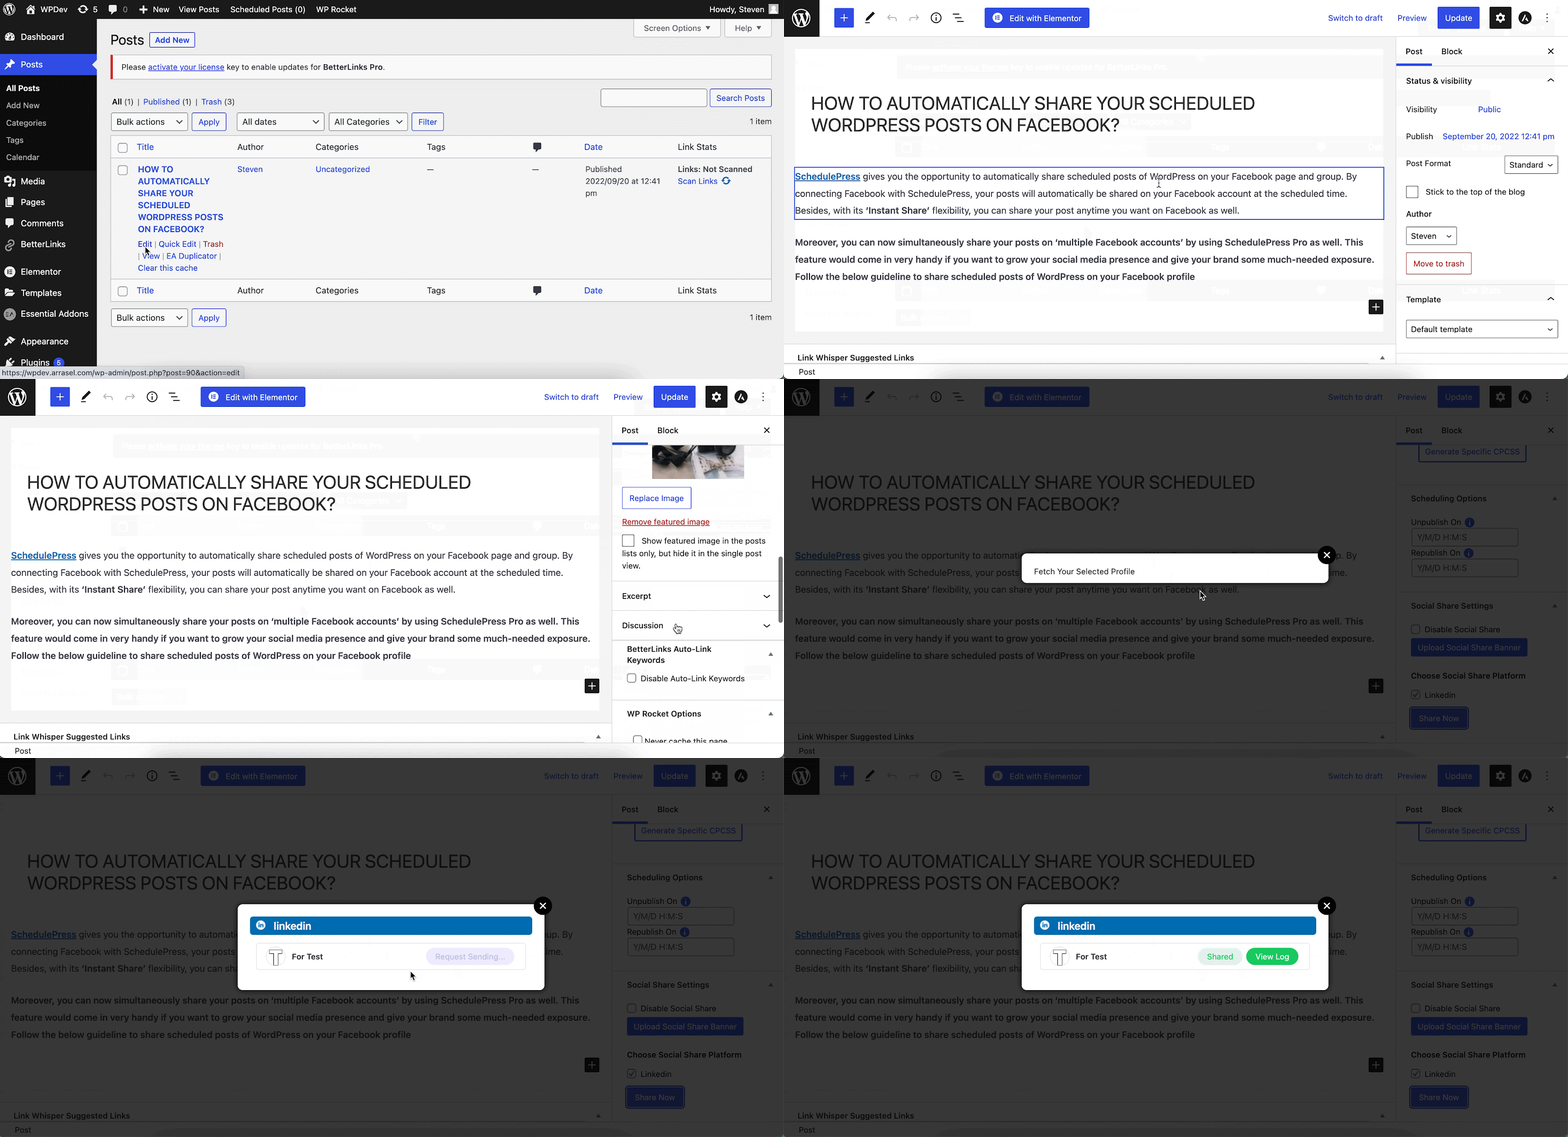
If you schedule your WordPress post, it will be shared on your LinkedIn account automatically. Moreover, if wanted, you can instantly publish your live post on LinkedIn. To do so, go to your post’s ‘Social Share Settings‘ and select the ‘LinkedIn‘ social sharing platform. Simply click the ‘Share‘ button, and your article will be shared on your LinkedIn account right away.
Step 4: See Your Shared Post On LinkedIn
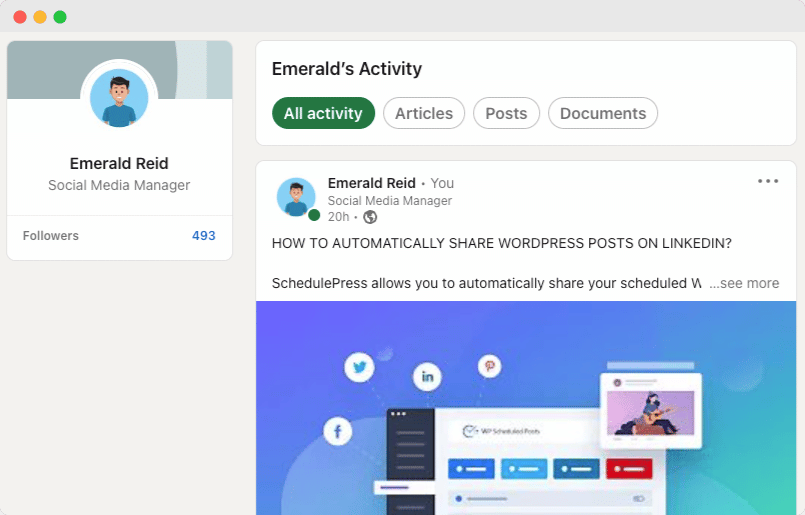
As all of the above steps are finished, WordPress posts will be automatically shared on the LinkedIn profile when they go live. This is how it will look on your LinkedIn profile.
This is how, with the help of SchedulePress, you can easily explore and configure the advanced auto social share feature from the new release.
How To Enable Pinterest Auto Social Sharing?
You can easily automate the sharing of your blog posts by integrating Pinterest with SchedulePress. Follow this step-by-step guideline to easily auto-share links from your Pinterest account.
Step 1: Create App In The Developer Account
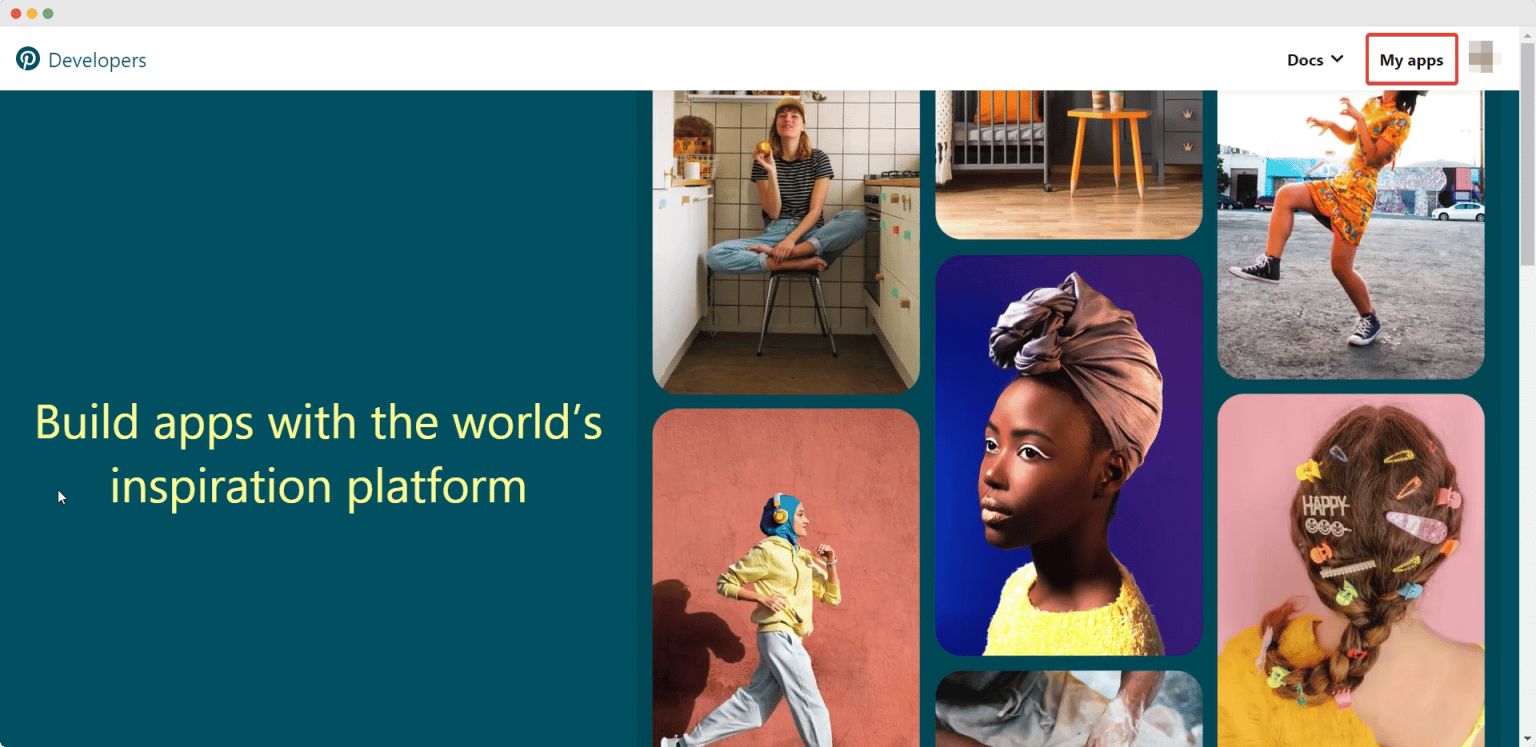
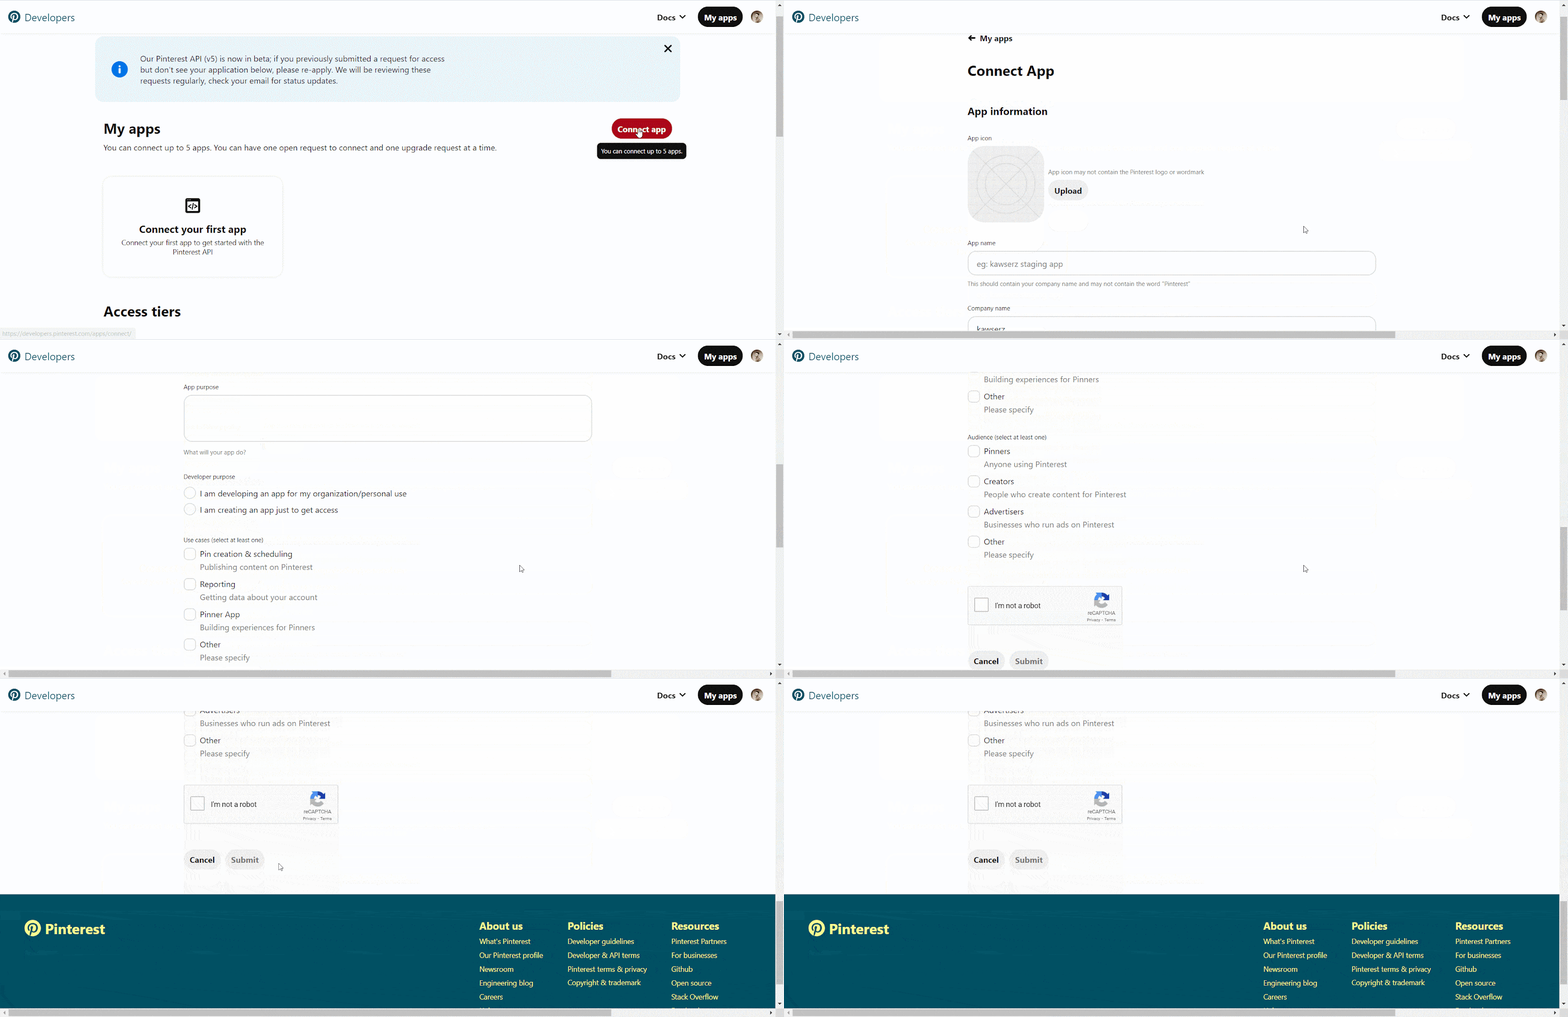
To start, log in to your Pinterest Developer Account and create an app. You can skip this step if you already have an app. Click ‘My apps‘ after login into your Pinterest Developer Account. Following that, you will be taken to the ‘Apps’ page.
Step 2: Input Necessary Credentials
Now, click the ‘Connect app‘ button to be redirected to a new page where you’ll need to provide some necessary information about the app you are developing. Simply fill out the essential details about your Application. After that, click the ‘Submit’ button, and your application will be generated successfully.
Step 3: Configure SchedulePress Social Profile
Navigate to SchedulePress→ Settings from your WordPress dashboard and click on the ‘Social Profile’ tab. Here, you can simply head over to the Pinterest tab and toggle the option to enable auto-sharing on Pinterest.
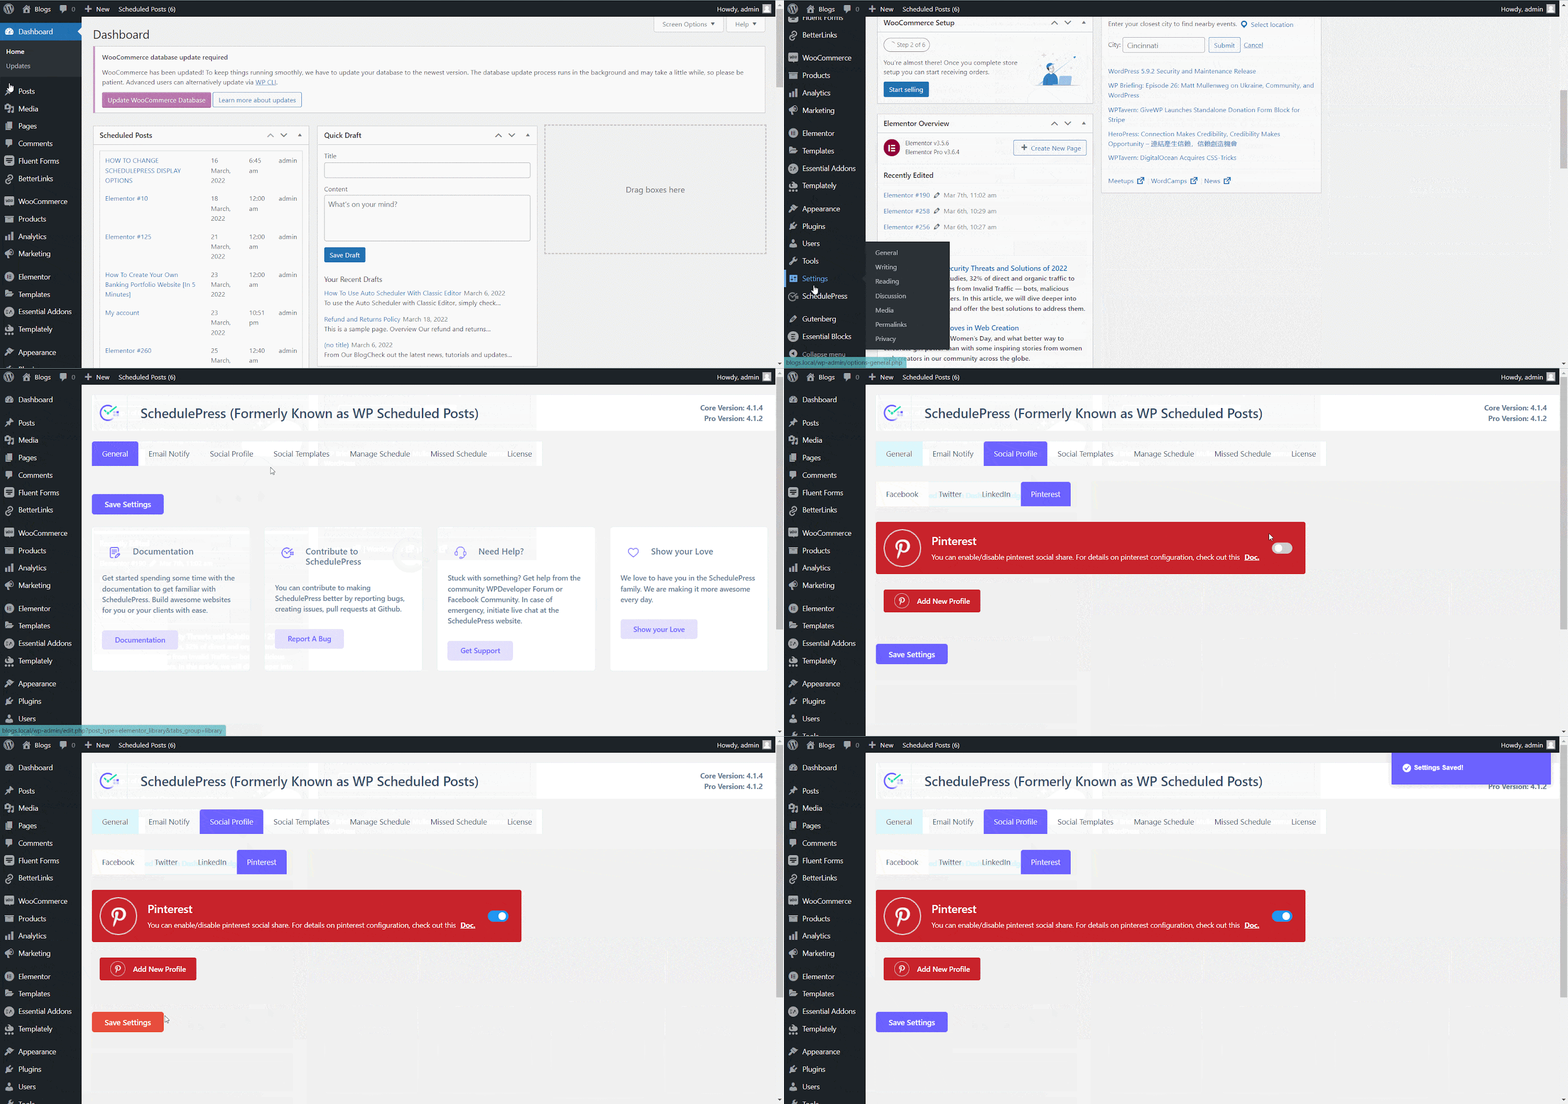
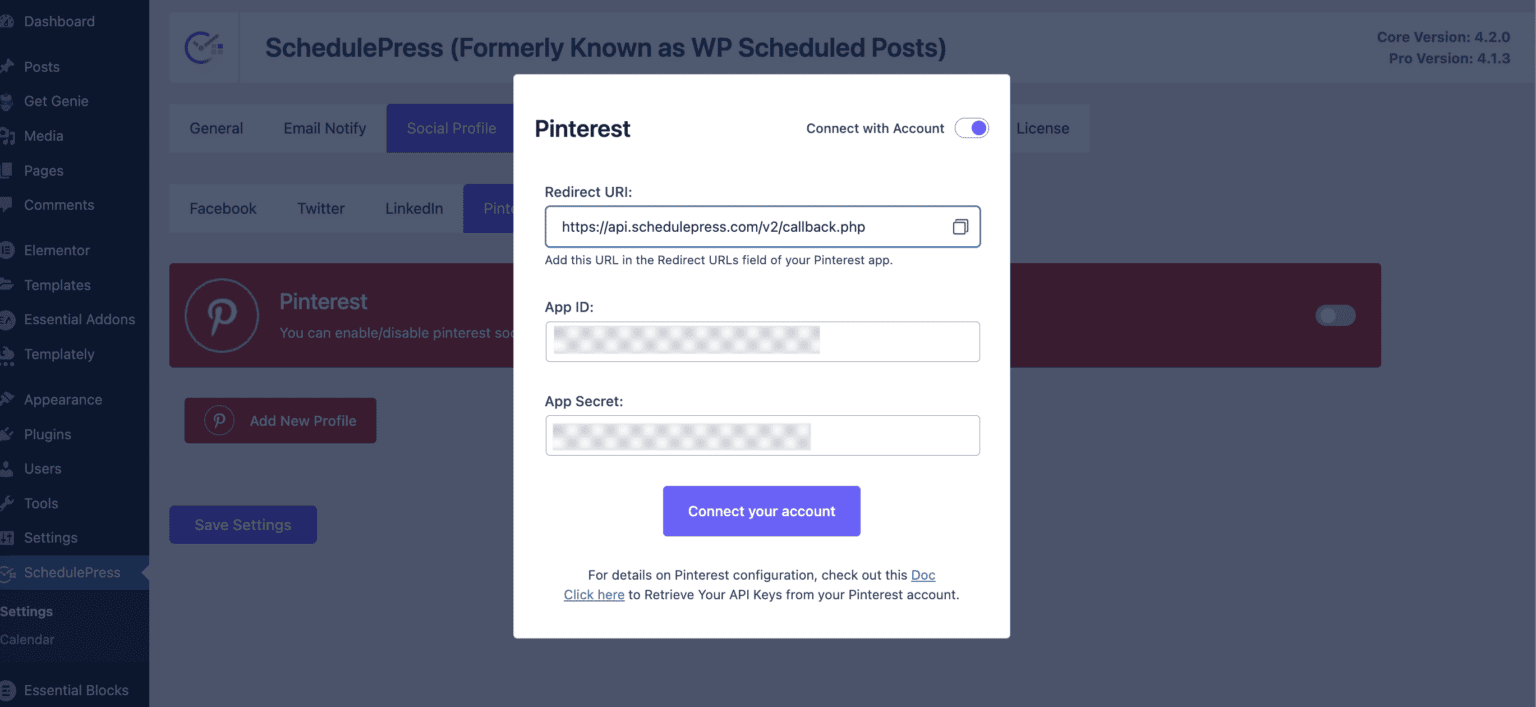
Afterward, click on the ‘Add New Profile‘ button. Here you will have two options. You can either connect your Pinterest account with your app credentials or you can directly connect your Pinterest account.
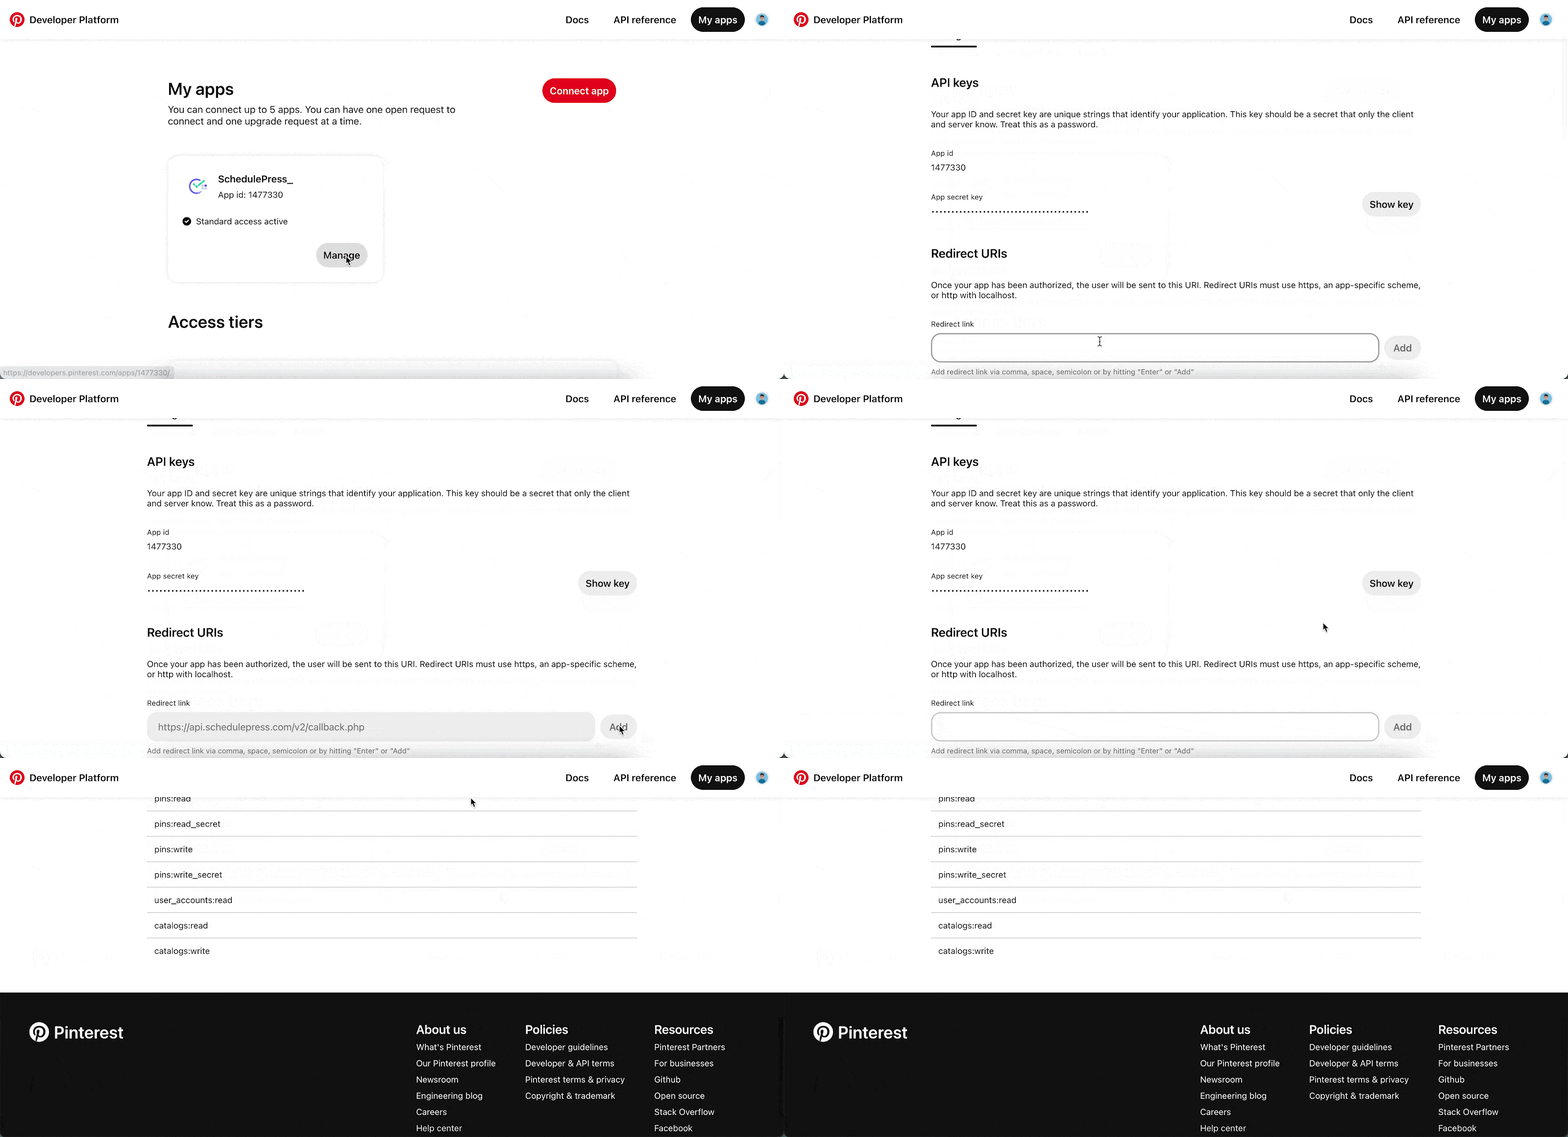
Now let us explore the first method. Here, go to SchedulePress→ Settings→ Social Profile→ Pinterest → Add New Profile and copy the Redirect URI from SchedulePress so you can enter it in the Pinterest app Redirect URIs section as well.
Your app will be reviewed. You can obtain your Pinterest API keys after your app has been authorized. The ‘App ID‘ and ‘App Secret‘ can be found on your Apps page. You can copy them from this page.
For the second method, you need to just connect your personal Pinterest account. Pinterest will detect your account and you can easily share posts on Pinterest with ease.
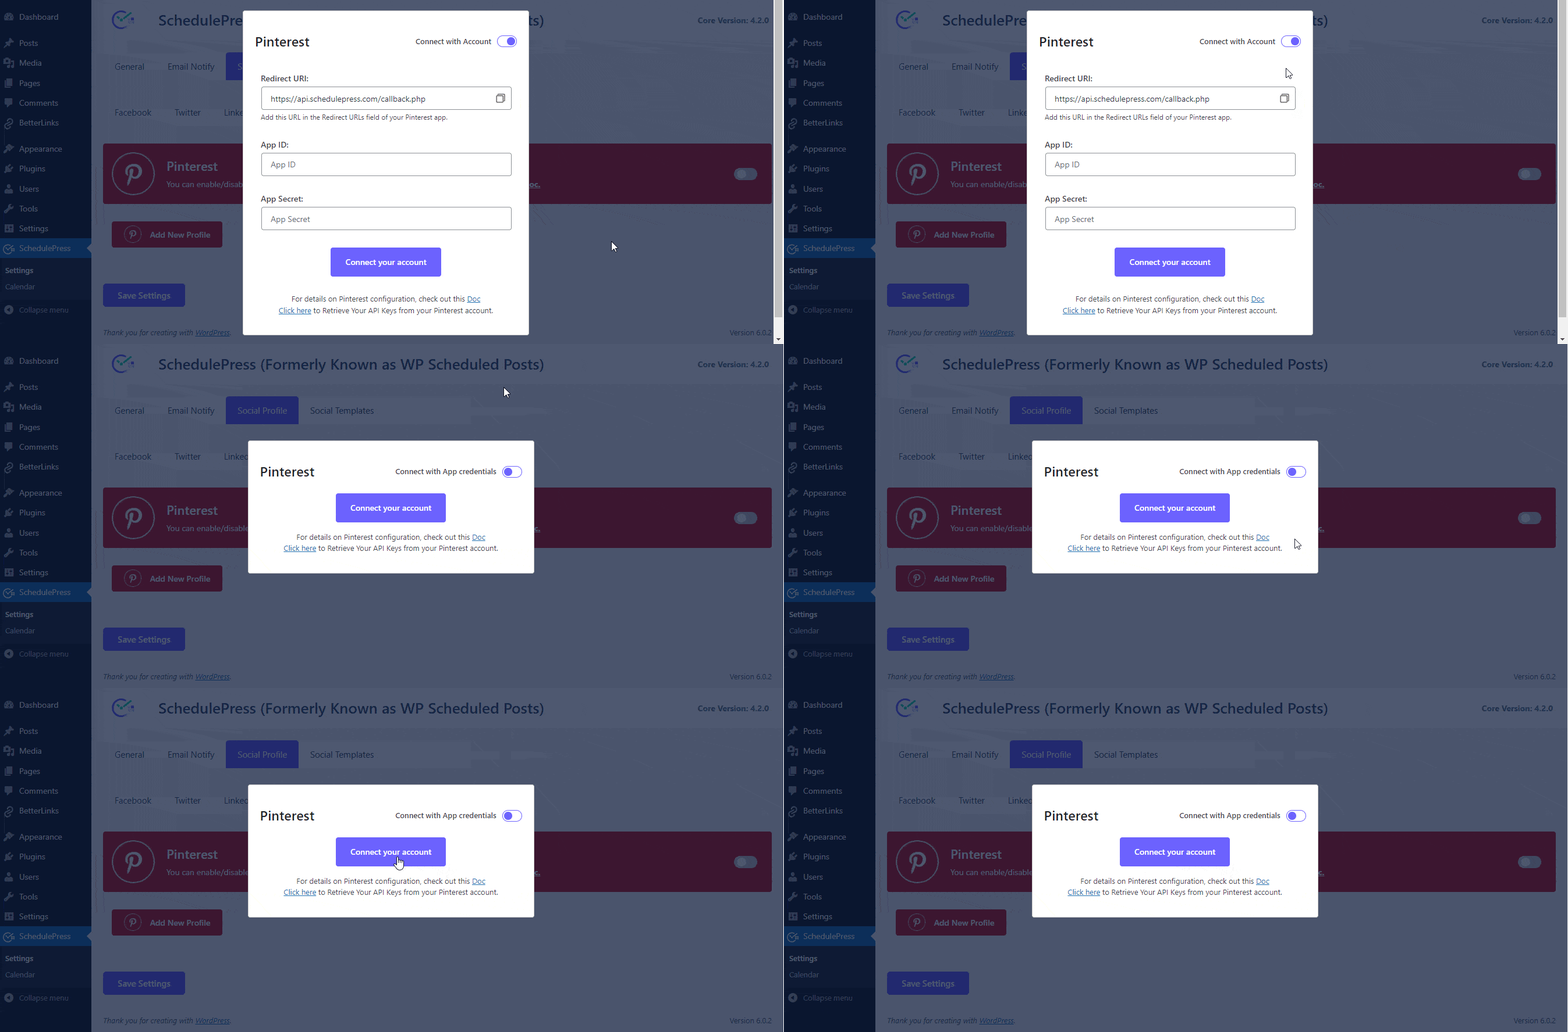
After you are done, click on the ‘Save Settings‘ button. By simply following the previous steps, you can add a new profile and connect multiple user accounts with SchedulePress.
Step 4: Share Your WordPress Post On Pinterest
If you schedule your WordPress post, it will be immediately shared on your Pinterest account. Moreover, if required, you can directly share your current post on Pinterest. Navigate to your post’s ‘Social Share Settings‘ and select the ‘Pinterest‘ social sharing platform. Simply click the ‘Share‘ button, and your article will be shared on your Pinterest board right away.
You can also submit a custom ‘Social Share Banner‘ for your Pinterest banner if you wish.
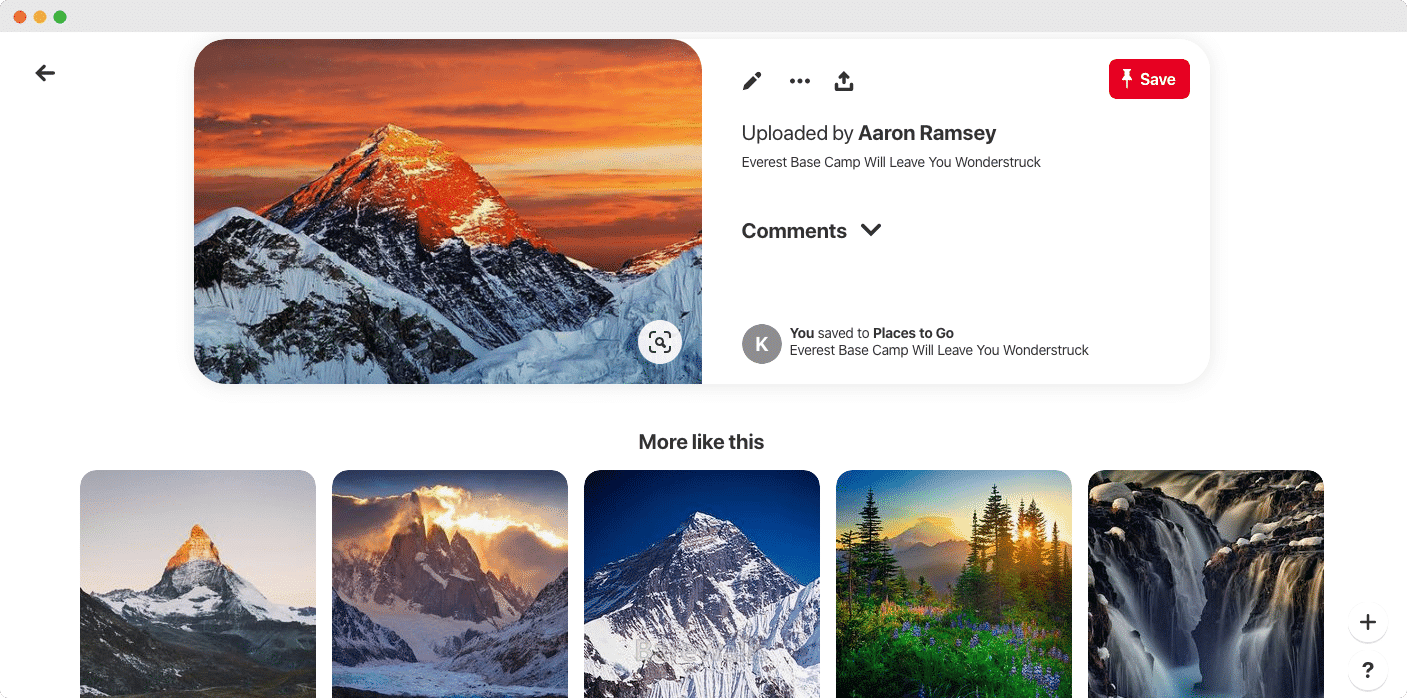
After all of these previous steps are finished, this is how the WordPress posts will appear on your Pinterest profile. With the auto social share feature from SchedulePress, you will save valuable time by just integrating your Pinterest account rather than going through the process of creating an App Id.
Effortlessly Automate Your Content Workflow With SchedulePress
We are eager to hear about your opinions and experiences with SchedulePress v4.2.0. Please share your thoughts in the comments section or by joining our Facebook community. Subscribe to our blog today to stay up to speed on the newest SchedulePress news and releases.


