Are you planning to drive more sales for your business? Then you should definitely implement the FOMO marketing technique on your website. It’s a very popular & trending way to make your visitors complete the purchase process. With the introduction of NotificationX, you can now effortlessly show Sales Notification for your WordPress Sites for Free & improve the conversion rates.

⚡ Significance Of Showing Sales Notification On Your Website
Are you familiar with the term ‘FOMO’ term? Well, it is short for ‘Fear of Missing Out’. That might give you a bit of an idea about what it means. Basically, It is a marketing technique that is used to create urgency among users regarding a product or a service. So, your visitors would show interest in purchasing from you. This is why it is very important to implement this fascinating marketing strategy on your website and improve your conversion rate.
By using the ‘FOMO’ technique, you can prompt anxiety among your website visitors for subscriptions, discount offers, or special services. Suppose, if you display a ‘Subscription’ notification popup while mentioning who has signed up for the newsletter, that would certainly create a sense of urgency among people. S0, they would begin to regret missing out on something exciting. As a result, those users would end up subscribing to your newsletter to not feel left behind.
The same applies to the Sales Notification as well. By adding social proof, your website would automatically become a lot more credible to your visitors. By showing who has bought your product, it massively helps you instantly win the user’s trust. They are more likely to take action because of their innate fear of missing out. As a result, people end up purchasing the product and increase your conversion rates.
There are not many Plugins available if you are searching for a way to implement this magnificent FOMO marketing technique on your WordPress website. Some of them are either premium Plugins or not very reliable. However, with the help of NotificationX, you can now display captivating notification popups on your site without any effort. And the best part is, you can do it for absolutely Free.
Now, let’s guide you through how you can easily display Sales Notification on your WordPress website by using NotificationX in just a few steps.
💡 How You Can Show Sales Notification On Your WordPress Website
The first thing you will be required to do is to install & activate NoficiationX plugin. After you are done with the initial steps, you need to configure the settings and customize the Notification popup as per your wish.
Step 1: Configure Your Sales Notification
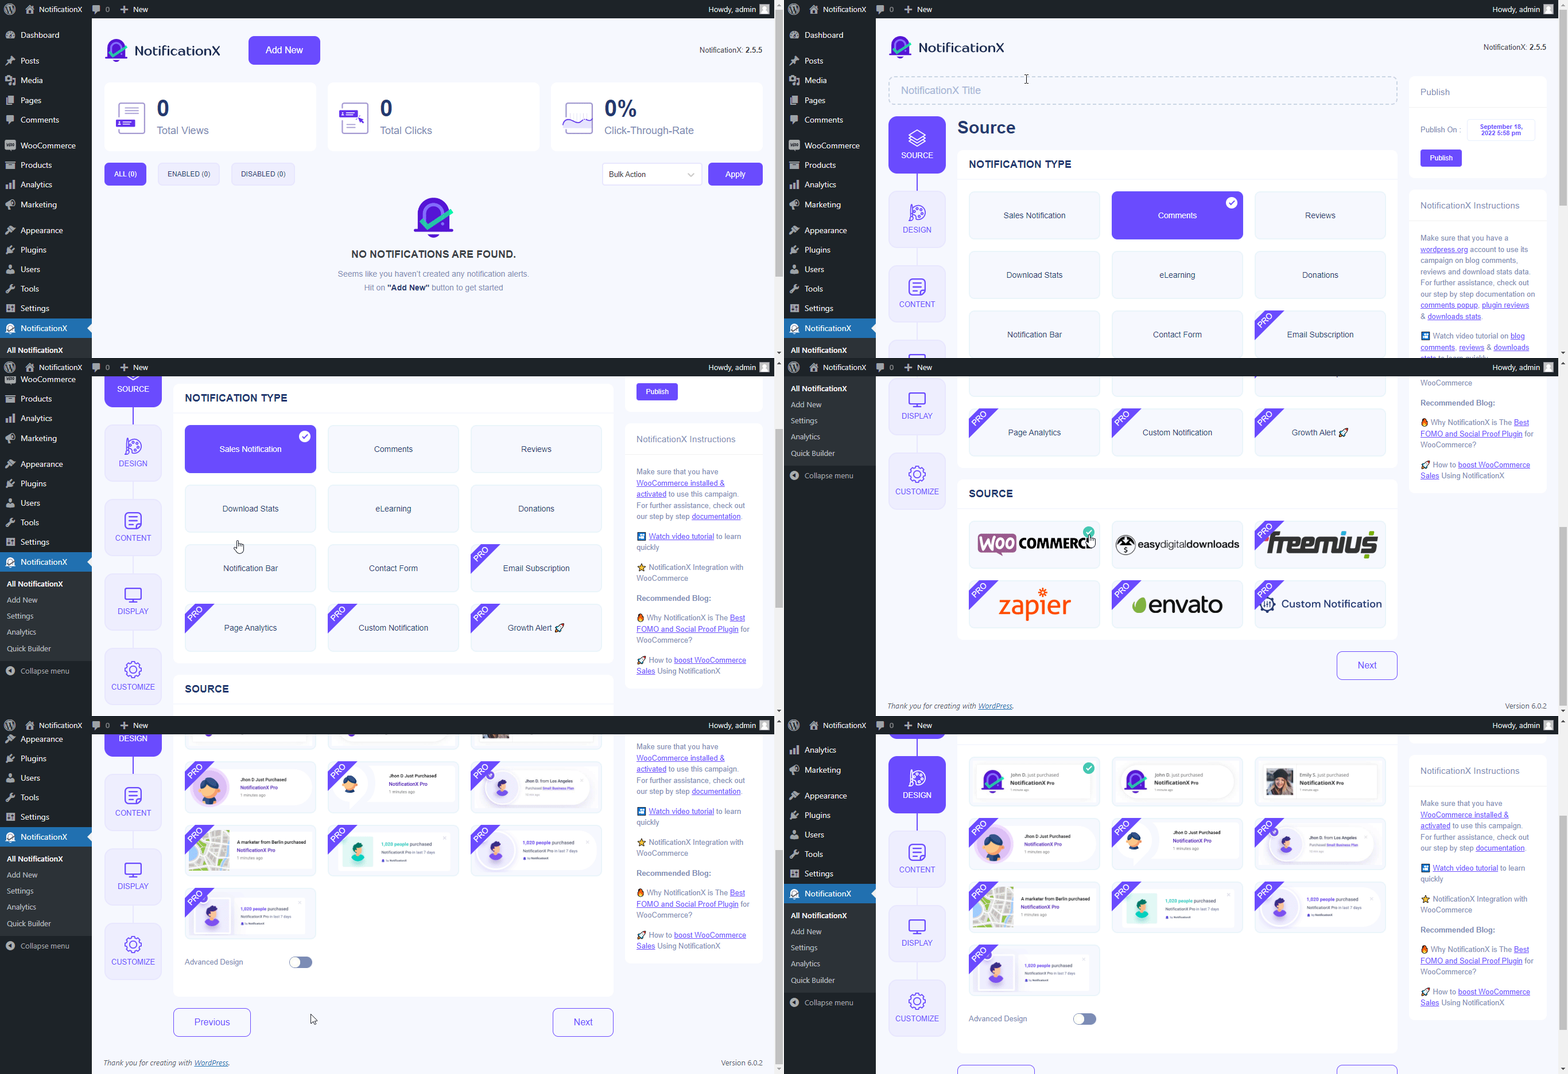
To create a ‘Sales Notification’ popup, you will need to go to your WordPress Dashboard. Afterward, navigate to wp-admin → NotificationX. There are two ways you can display an amazing sales alert. You can either use the ‘Quick Builder’ or the default ‘NotificationX Builder’. Since the later one has much more customization options, we will be showing this option for the purpose of this tutorial.
There are Five different tabs available from which you can pick your preferred options. From the ‘Source’ tab, you will have to choose ‘Sales Notification’ as your Notification Type. Based on the e-commerce plugin you are using, you can select either WooCommerce or Easy Digital Downloads.
Step 2: Pick A Theme For The Sales Notification
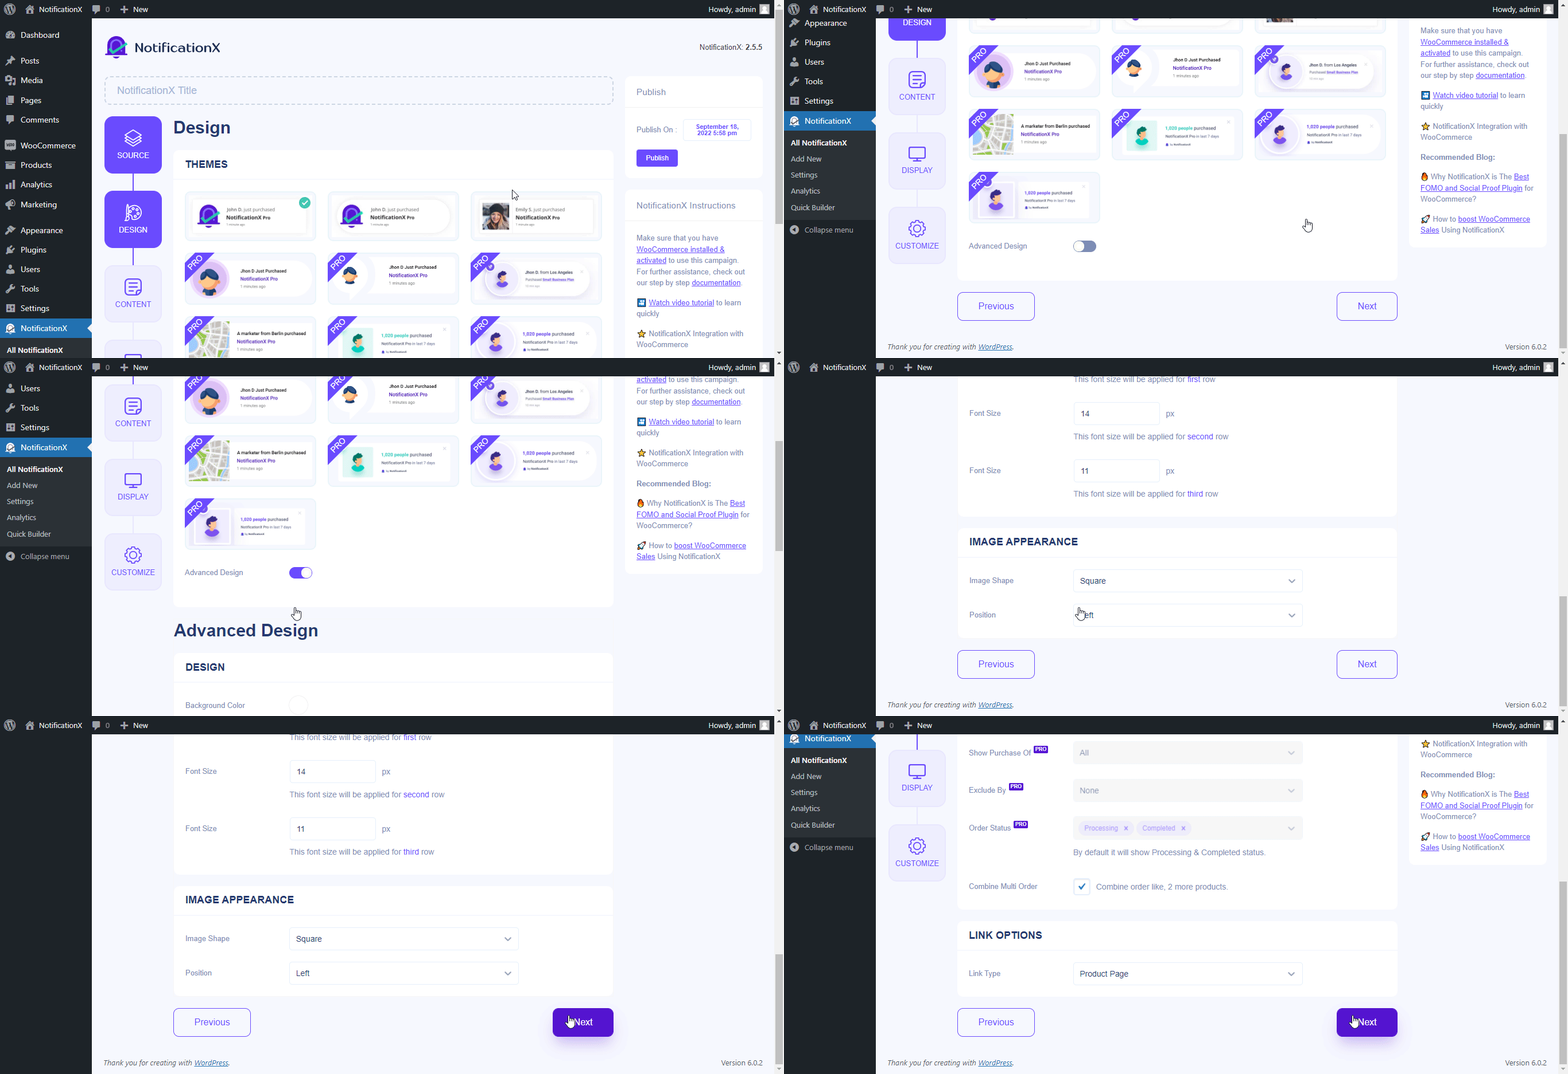
The ‘Design’ tab gives you the freedom to pick a Theme for the Sales Notification that you are building. Simply just choose your preferred template and you would be good to go. If you wish to, you can even add more styling to it as well. The ‘Advanced Design’ option allows you to change the colors of the whole layout. You can even modify the ‘Image Appearance’ and ‘Typography’ as well.
Step 3: Customize Your Sales Notification Alert
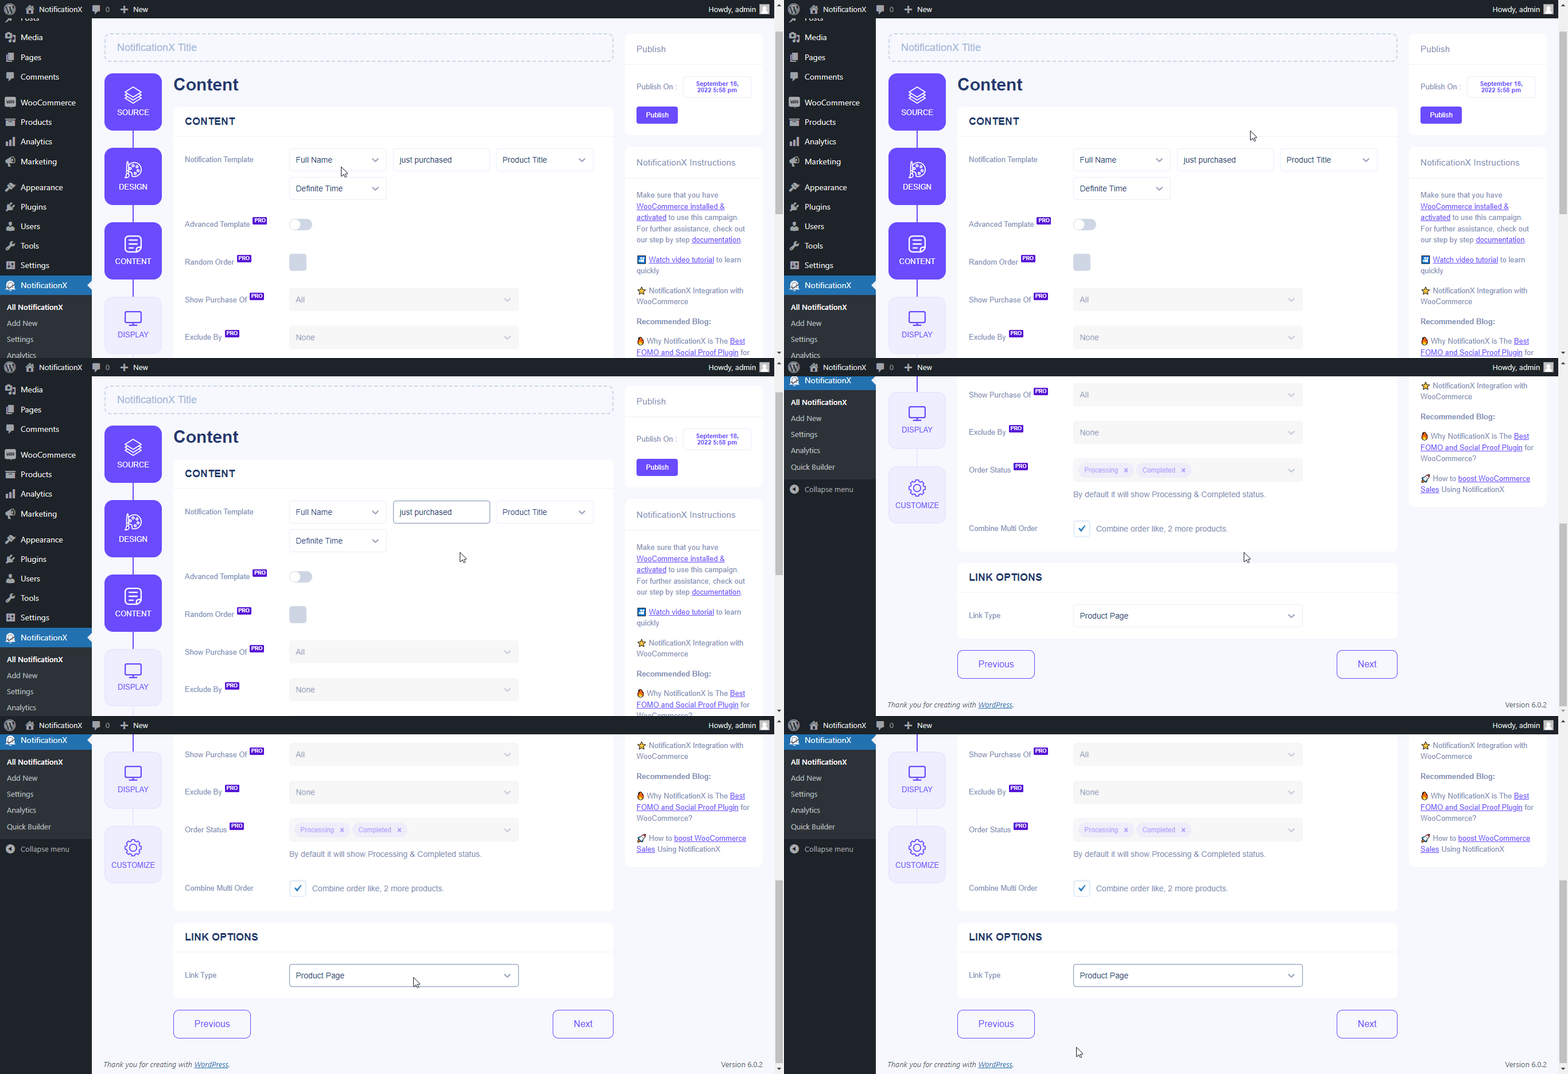
After you are done with the previous step, you will be provided with a ‘Notification Template’. From the ‘Content’ tab, you will have the freedom to add your own texts which will then be shown as a Sales Notification. Besides, you can even add a link to redirect the users from it as well. The best part is that you have the freedom to display notification alerts based on certain products. If you want, you can even exclude specific products as well.
Step 4: Set Your Sales Alert Display
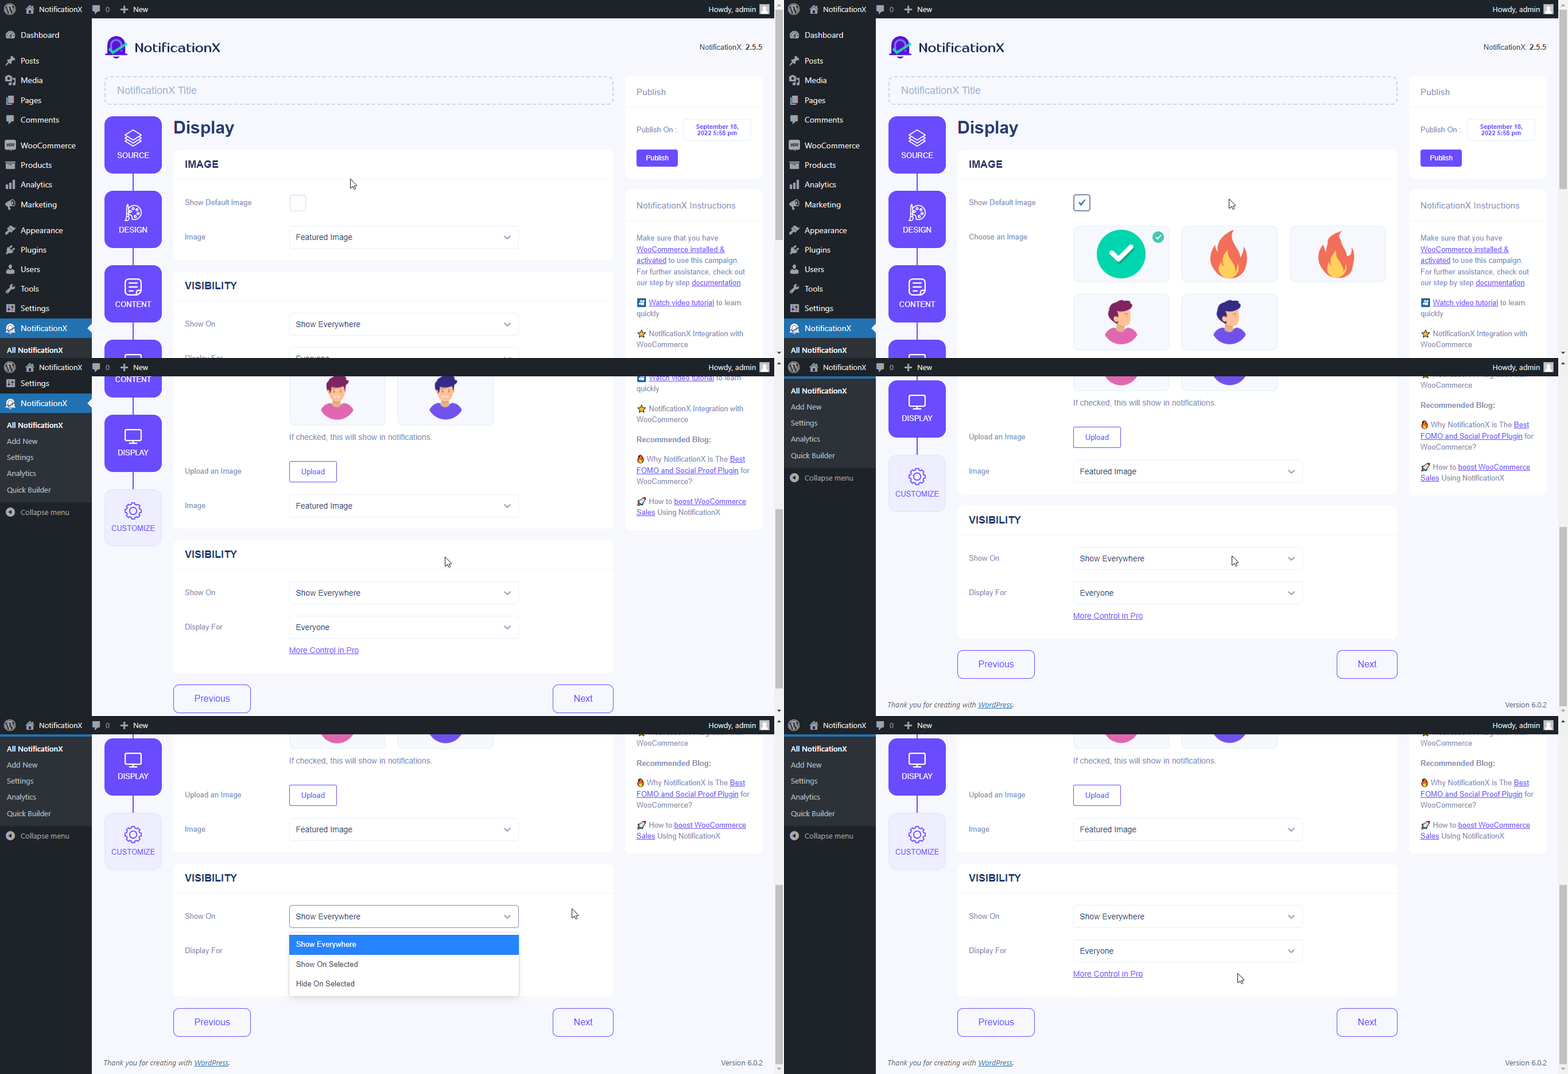
If the users who have purchased your product don’t have any avatar, you will have the capability to set a ‘Default Image’ for them. You can also decide to show the Product Image in the popup. On the other hand, you will have full control over where and when you want the Sales Notification to appear on your website.
Step 5: Customize Your Sales Alert Appearance
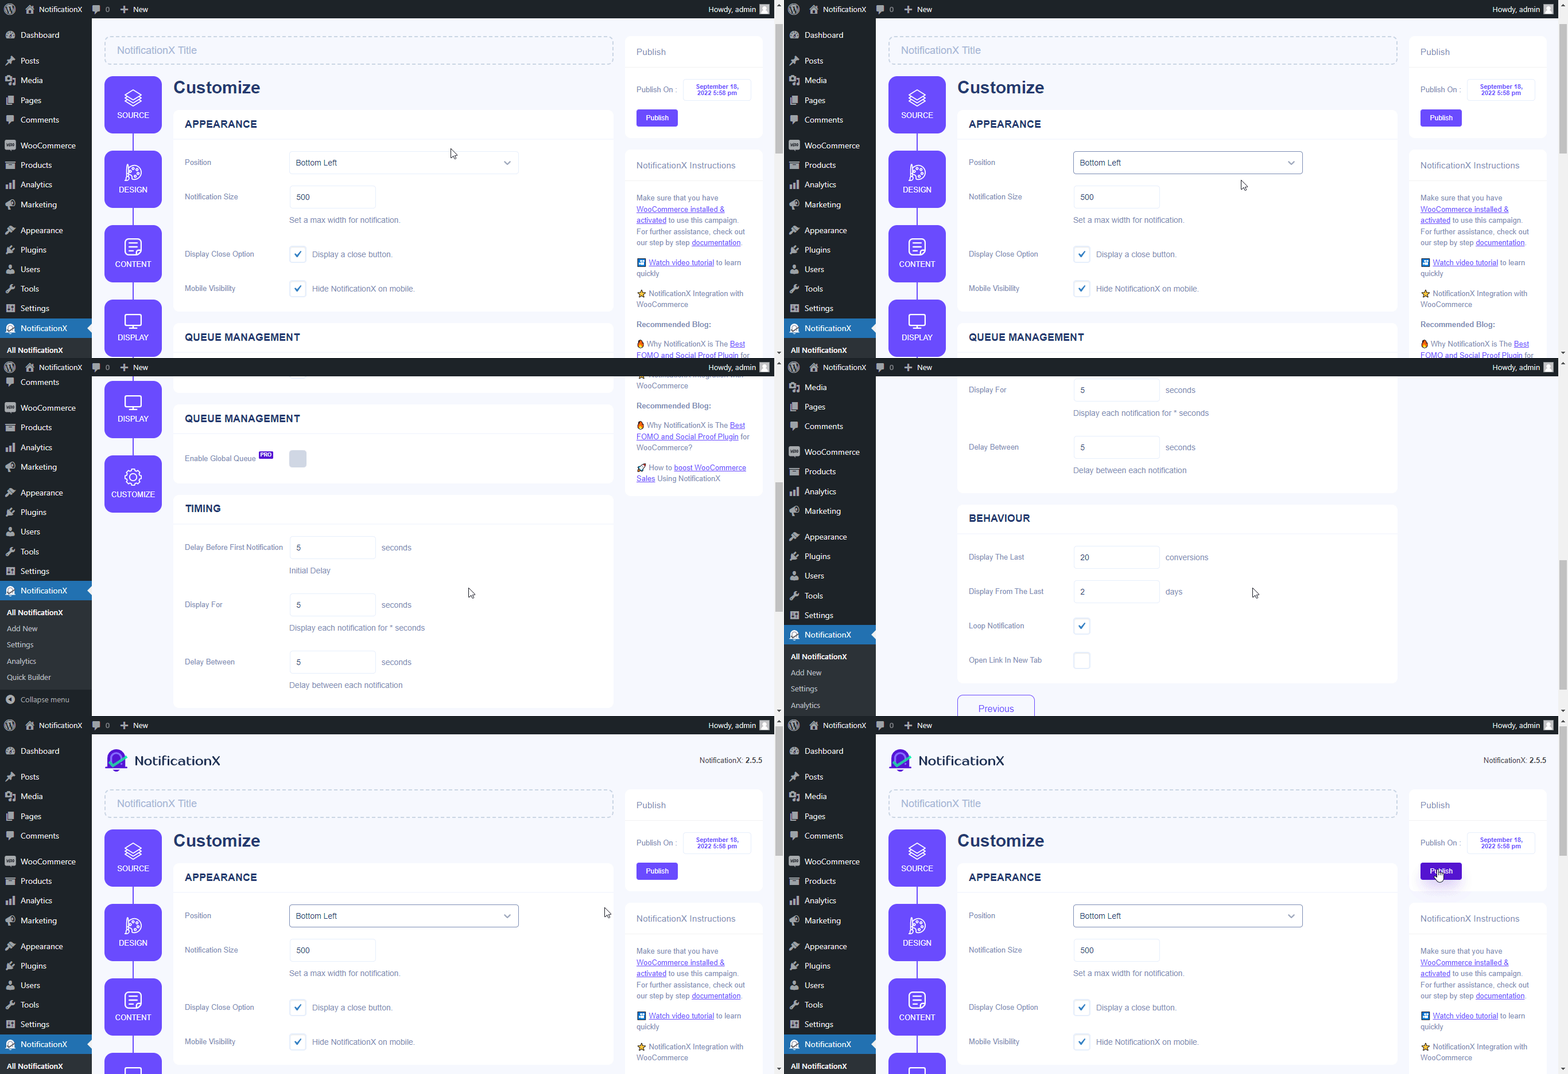
Now, let’s switch to the ‘Customize’ Tab which allows you to set the Position of the notification alert. After the first popup is shown, you can control after how long the next one will appear from the ‘Timing’ section. On top of that, you will have the freedom to define the number of recent conversions which will be considered for the Sales Notification. Once done, simply click on the ‘Publish’ button and it will go Live.
Final Outcome
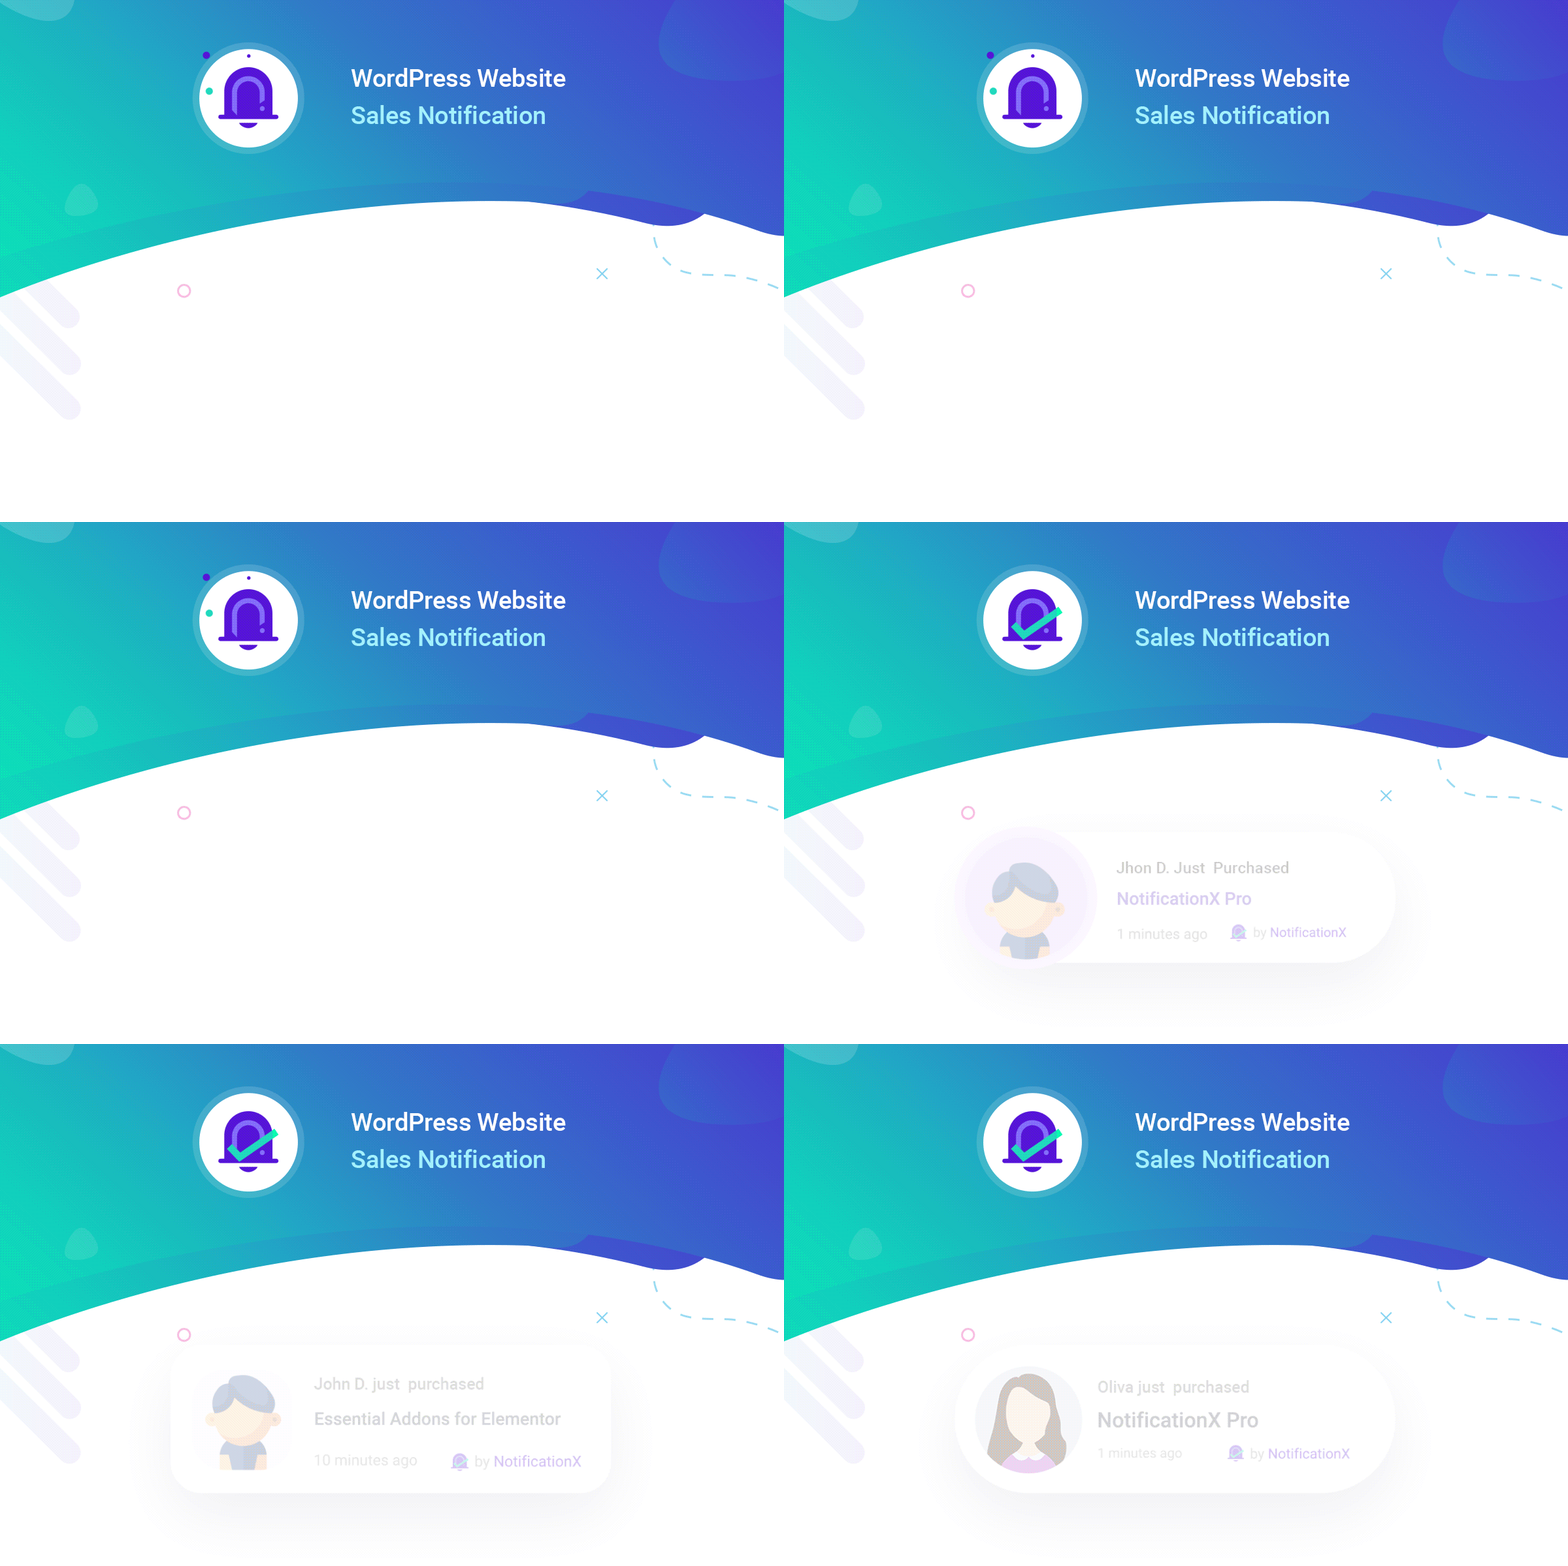
After you have finished configuring all these steps above, this is how your Sales Notification will appear on your WordPress website. You can easily just play around and get your expected outcome.
💡 Boost Your eCommerce Revenue With Sales Notification
To sum up, we have talked about the importance of implementing the FOMO technique for your business and how it can definitely boost your sales rate. So, now that you know how to show sales notifications on your website, why don’t you start playing around with the NotificationX Plugin today?
Have you found our blog useful? If you do, then please subscribe to our blog and join our Facebook community for regular updates. Also, feel free to reach out to our dedicated support team if you face any difficulties while setting up Sale Notification on NotifcationX.


