Want to build a single page template in WordPress? With Elementor Theme Builder, you can create stunning customzied templates within minutes. This way, you can create a reusable template for every single page in your WordPress website. You won’t even need to touch a line of code to do this.
Ready to get started? Read on below to find out how you can build a single page template using Elementor Theme Builder.
Table of Contents
Why Do You Need Single Page Templates?
Single page templates are a great way to save tons of time designing your web pages from scratch. Once you have a basic template, you can apply it for every single page in your website. At most, you have to do some minor customization and add your own content to each individual page. But, the basic design and layout will remain the same for every page, giving your website a consistent, uniform look. This way, a single page template can make it easier and faster to design websites.
How To Build Single Page Template Using Elementor Theme Builder
Most people usually assume that website designing requires coding knowledge. But, in the era of page builders like Elementor, anybody can design stunning websites without touching a line of code. All you have to do is use the drag-and-drop editor to place widgets like buttons and forms anywhere on your web page.
With Elementor Theme Builder, creating a single page template is easier than ever. In fact, Elementor Theme Builder lets you create templates for all parts of your website. This includes headers, footers, single posts, archives page and much more. This way, you no longer need to rely on the design and layouts of a WordPress theme. You can design your own custom theme for your website with Elementor Theme Builder.
Want to find out more? Then read these step-by-step guidelines to find out how you can build single page templates using Elementor Theme Builder.
Note: The Theme Builder is a feature that is only available with Elementor Pro. So, you must install both the free and premium versions of Elementor on your site.
Step 1: Open Elementor Theme Builder
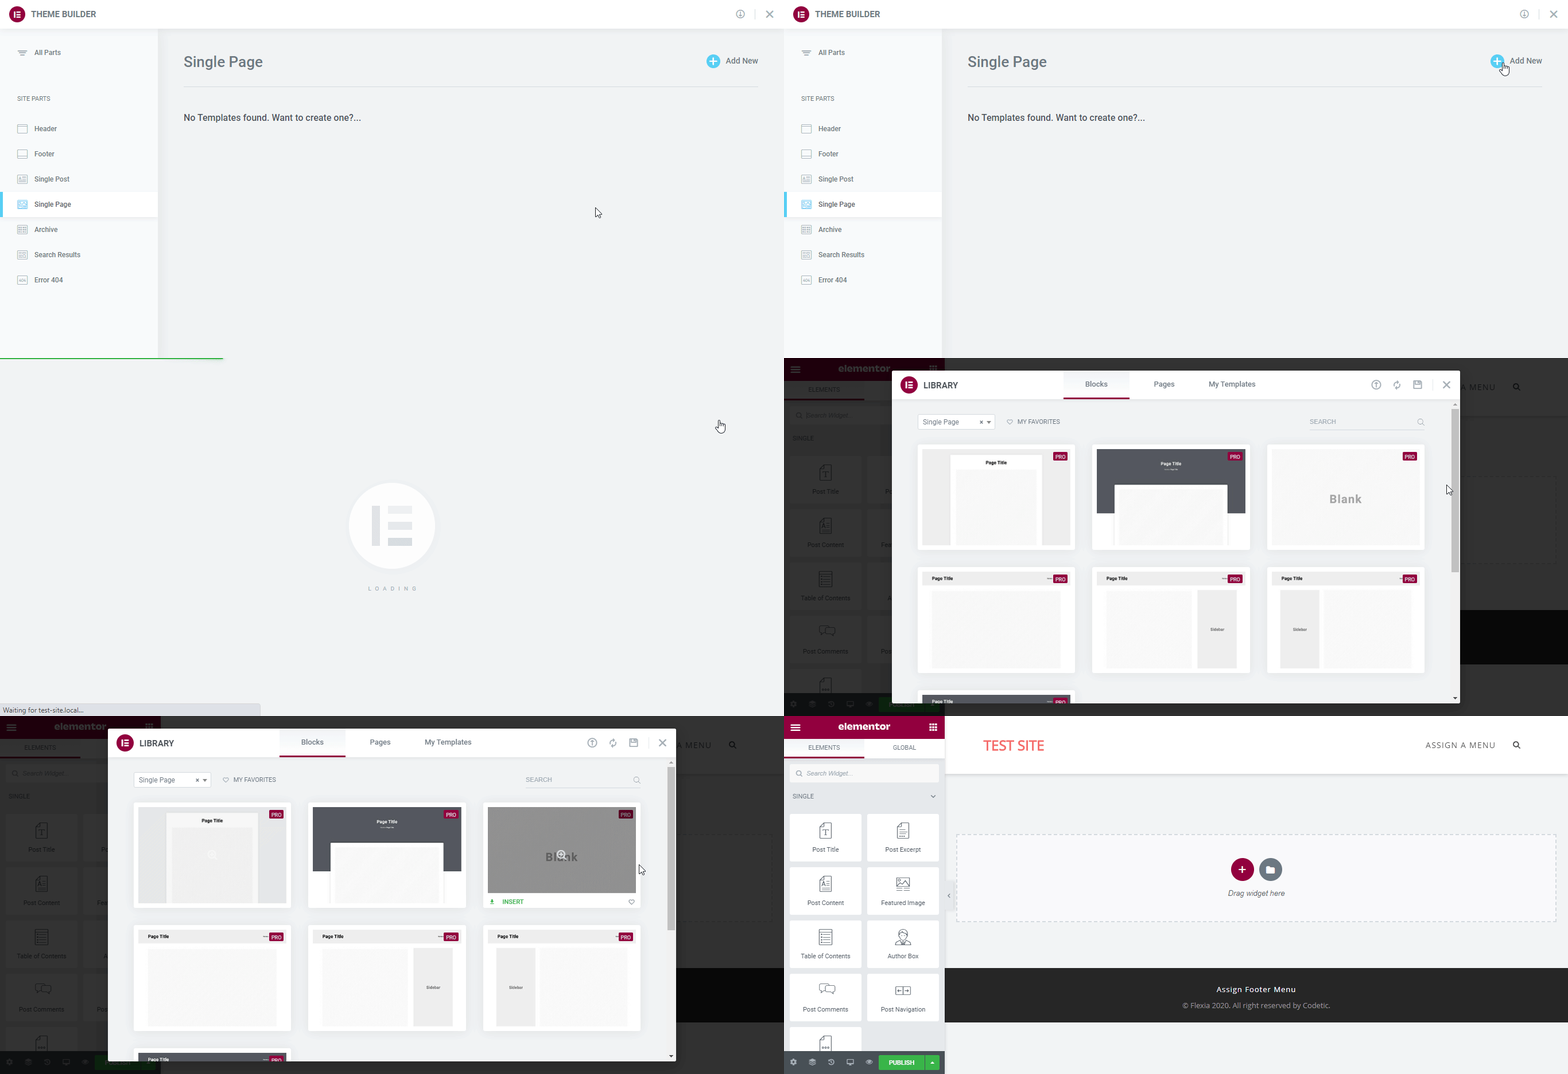
First, head over to your WordPress dashboard and navigate to Templates→ Theme Builder. This will take you to the Theme Builder interface, where you will get an overview of your whole website.

Step 2: Create A Single Page Template In Elementor Theme Builder
As you can see, the Elementor Theme Builder lets you create templates and customize every part of your site. In this tutorial, we will only focus on creating the single page template.
To do this, click on ‘Single Page’ from the left side panel and then click on ‘Add New’. A popup will appear displaying some ready single page templates from Elementor Template Library. If you want, you can use these templates and customize them. Or, you can build your own custom single page template from scratch.

Step 3: Add Page Title, Content, And Other Essential Elements
Search for the ‘Page Title’ element from under the ‘ELEMENTS’ tab in Elementor Editor. Then, drag and drop it anywhere on your page to activate it. This is a dynamic element, which means it will automatically display the name of your page. You can then customize the page title to suit your style. You can add custom colors and typography. Or, you can use global colors and fonts for a more consistent, uniform appearance.
Do the same with other essential elements for your single page template. For example, the ‘Post Content’ element will display the content of your page. Similarly, you can use the ‘Featured Image’ element to add featured images to your single page.
There are tons of more elements available with Elementor to create stunning pages. But, if you want more options, then try Essential Addons For Elementor. With this elements library for Elementor, you will get than 70+ elements to enhance your Elementor experience.
Step 4: Customize The Layout Of Your Single Page In Elementor
You can customize the layout of your single page template in Elementor Theme Builder. To do this, click on the section you want to customize and then head over to the ‘Layout’ tab. Then, play around with the settings to make your single page more visually appealing. For this tutorial, we are only going to change the ‘Content Width’. This way, the single page template will have a more streamlined appearance.
Step 5: Set Conditions And Publish Single Page Template
Now that your single page template is ready, all that’s left to do is set conditions for where you want to display it. When you click on the ‘Publish’ button, a popup will appear. From here, you can add conditions to decide where this single page template should be applied.
After you are done setting the conditions, click on ‘Save & Continue’. Your single page template is now published. You can save this template and reuse them for every single page throughout your website. Or, you can create more single page template designs for other pages in your website.
Final Outcome
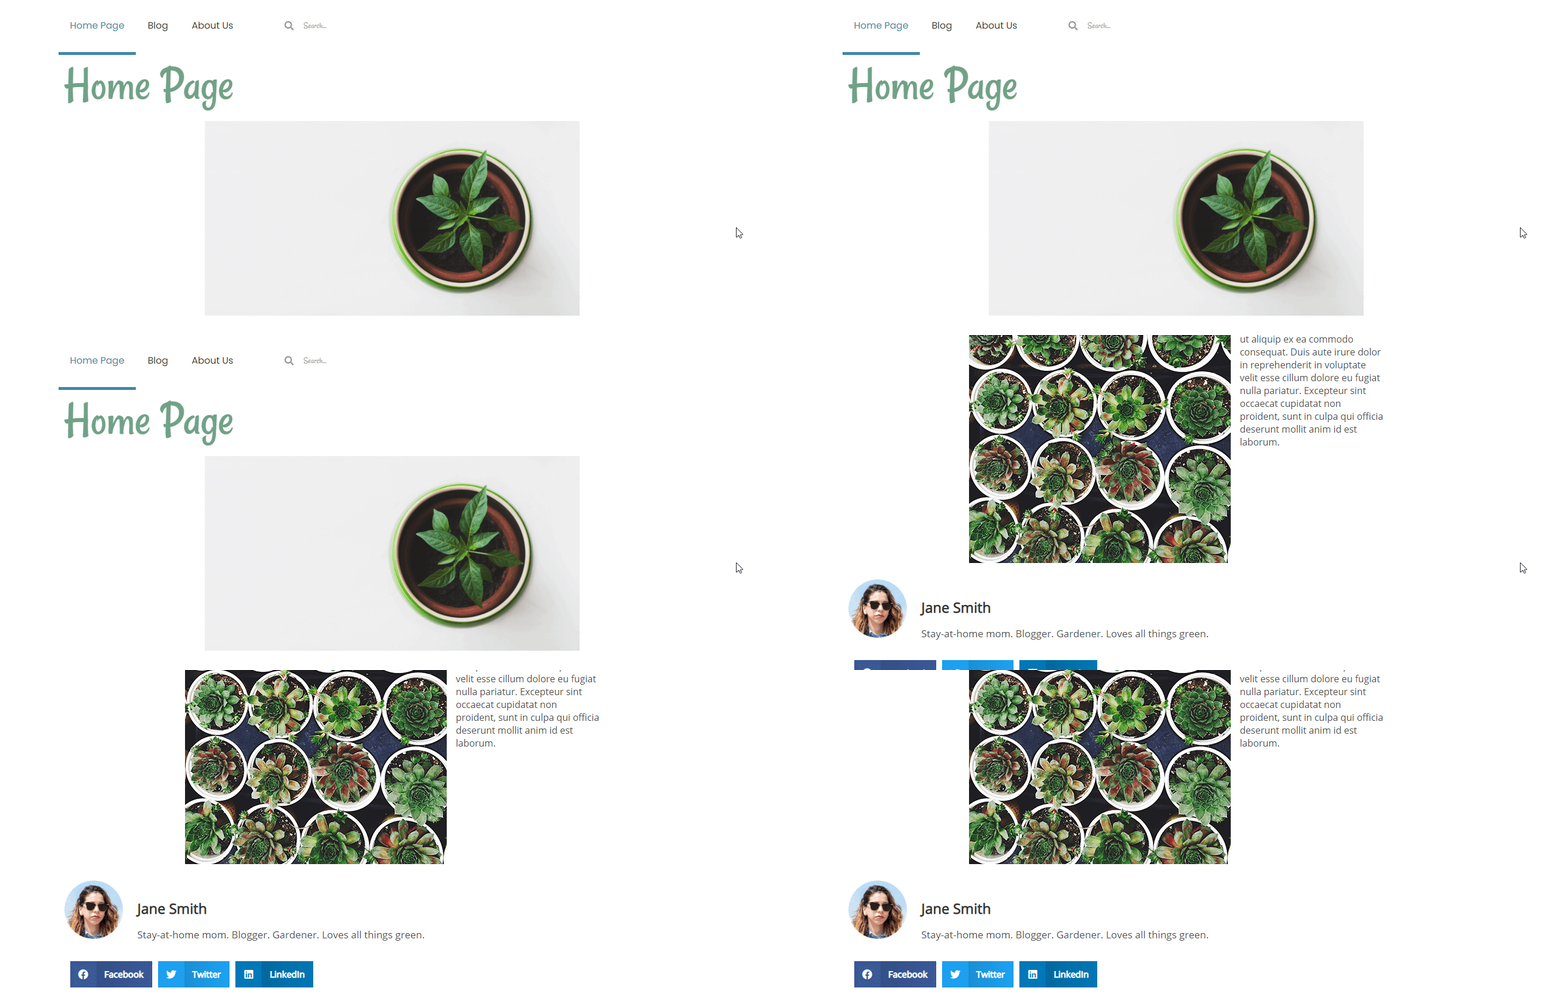
By following these simple, easy steps, you can create a stunning single page template using Elementor Theme Builder. It takes less than 10 minutes to set it all up, and you do not have to touch a line of code to do it.

Get Stunning, Ready-To-Use Templates For Elementor
Don’t want to build single page templates from scratch? In that case, check out the ready-to-use Elementor templates from Templately. With these 400+ FREE ready templates, you can create beautiful websites with only a few clicks. .
Enjoyed this post? Let us know your thoughts in the comments below, and make sure to join our Facebook Community to connect with other website creators like yourself.


