Just finished installing WordPress? Congratulations! You are one step closer to kickstarting your own, brand new website to dominate your target industry. But there are a few other essential steps you need to take after installing WordPress before you can launch your site and get it noticed by visitors from around the world.

There are multiple ways in which you can configure, customize, and organize your website to skyrocket conversions instantly. But before you can get started with publishing content or displaying products on your site, there are some things you need to do in the site backend to set it up properly. And for first-time WordPress users, it is usually quite intimidating to figure out which steps are the most important and which needs to be taken care of first.
So, we bring you this detailed guideline & list for those of you who are new to this world-renowned content management system and want to start off with fulfilling the basic requirements after installing WordPress.
10 Most Essential Steps To Take After Installing WordPress
Right after you have completed the first step (i.e, installing WordPress), you will come across a completely blank slate which you can configure according to your business’ brand or however you want to establish yourself as in the industry. And to make the whole process a little easier, here’s a quick checklist of the top 10 most important things that you need to do right away to get your site off the ground and running.
⭐ Update Your Website Title, Tagline & Timezone
When you are setting up your new WordPress website, you need to start with the very basics. The most important things that you need to do, right off the bat, are update the Website Title and Tagline. These are the aspects of your website that visitors and search engines will notice first and decide what your new website is based on.
Now, the Title serves as the name of your website and can be found in the title bar of the browser, as well as in the header of your website. While the Tagline, on the other hand, is usually an optional short summary or brand motto also displayed on the browser’s title bar, next to the title.
However, they might appear elsewhere on the website too depending on the WordPress theme that you use, but more on themes later in the guide.
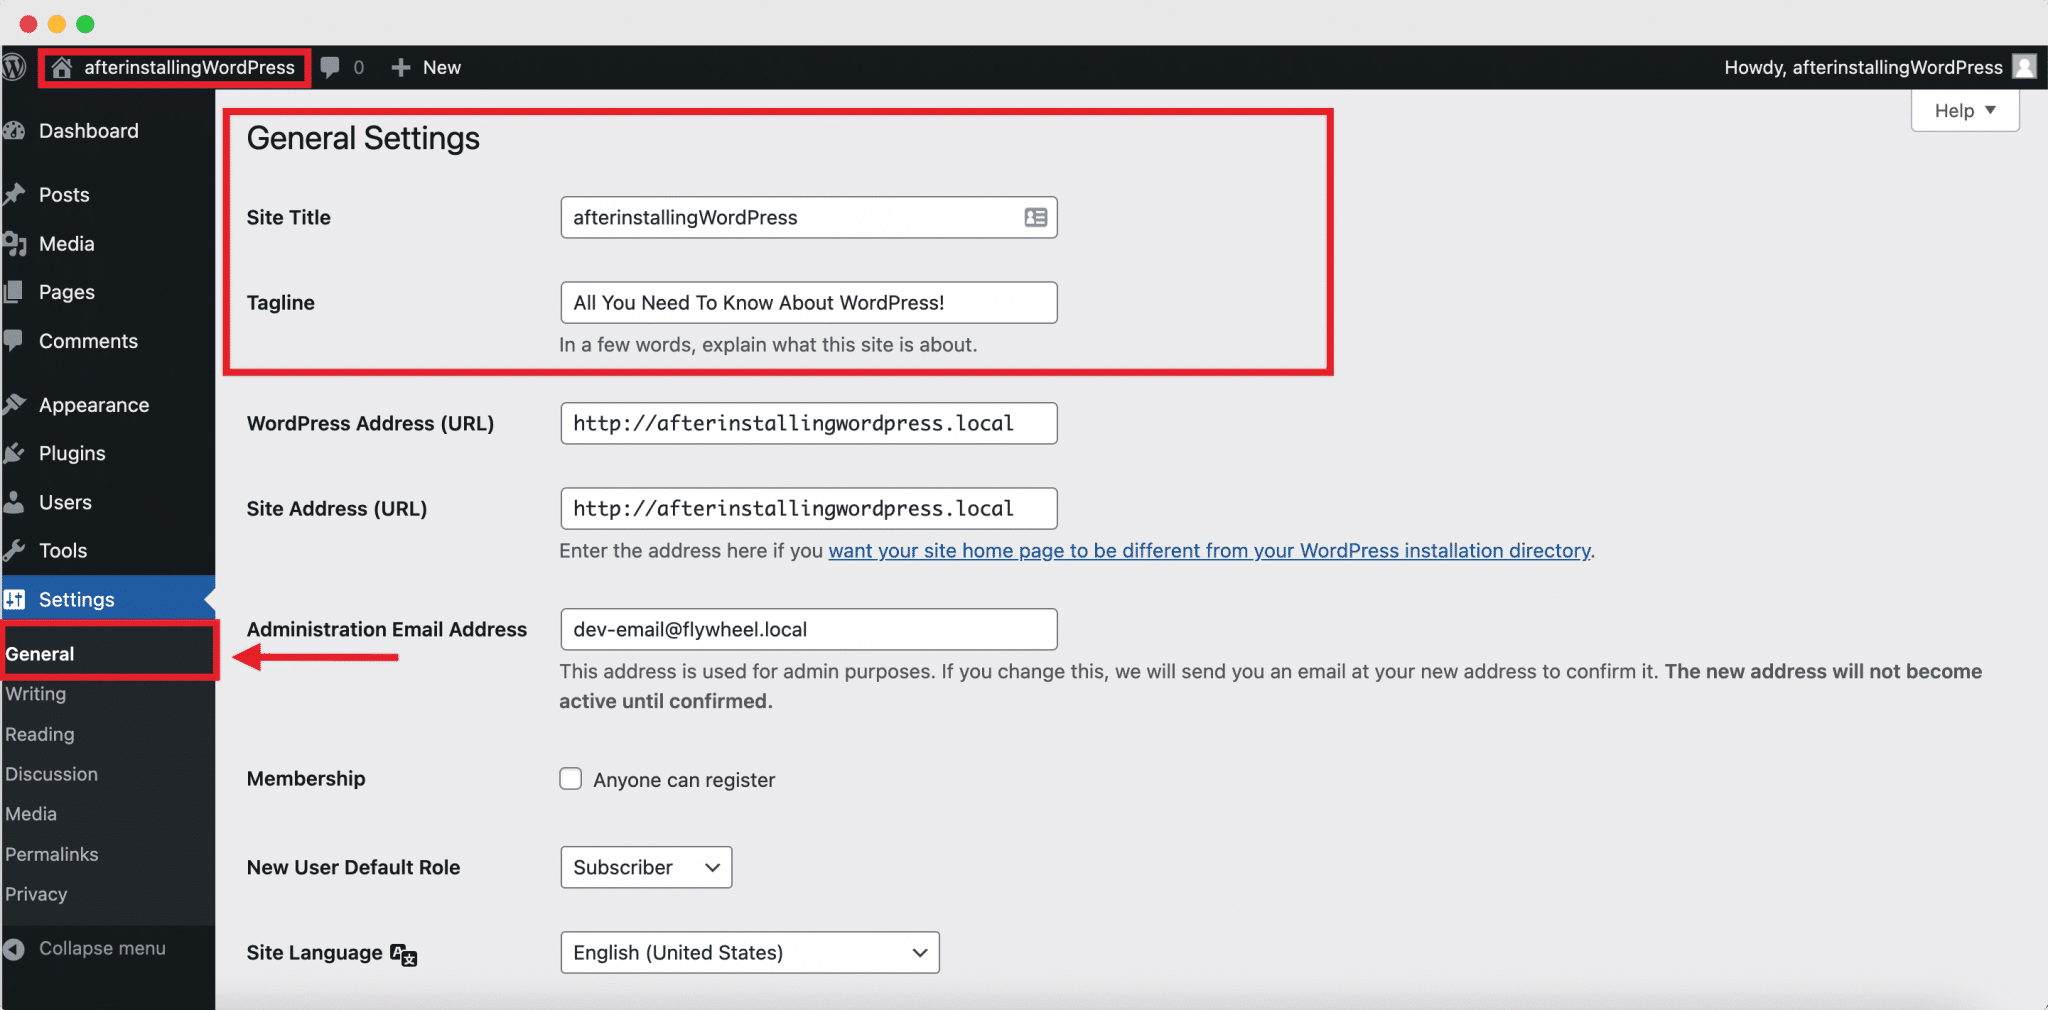
Giving your WordPress website a custom title and tagline is quite easy. You simply need to navigate to the Settings → General tab straight from the dashboard and input your preferred title and brand motto in just a few clicks.
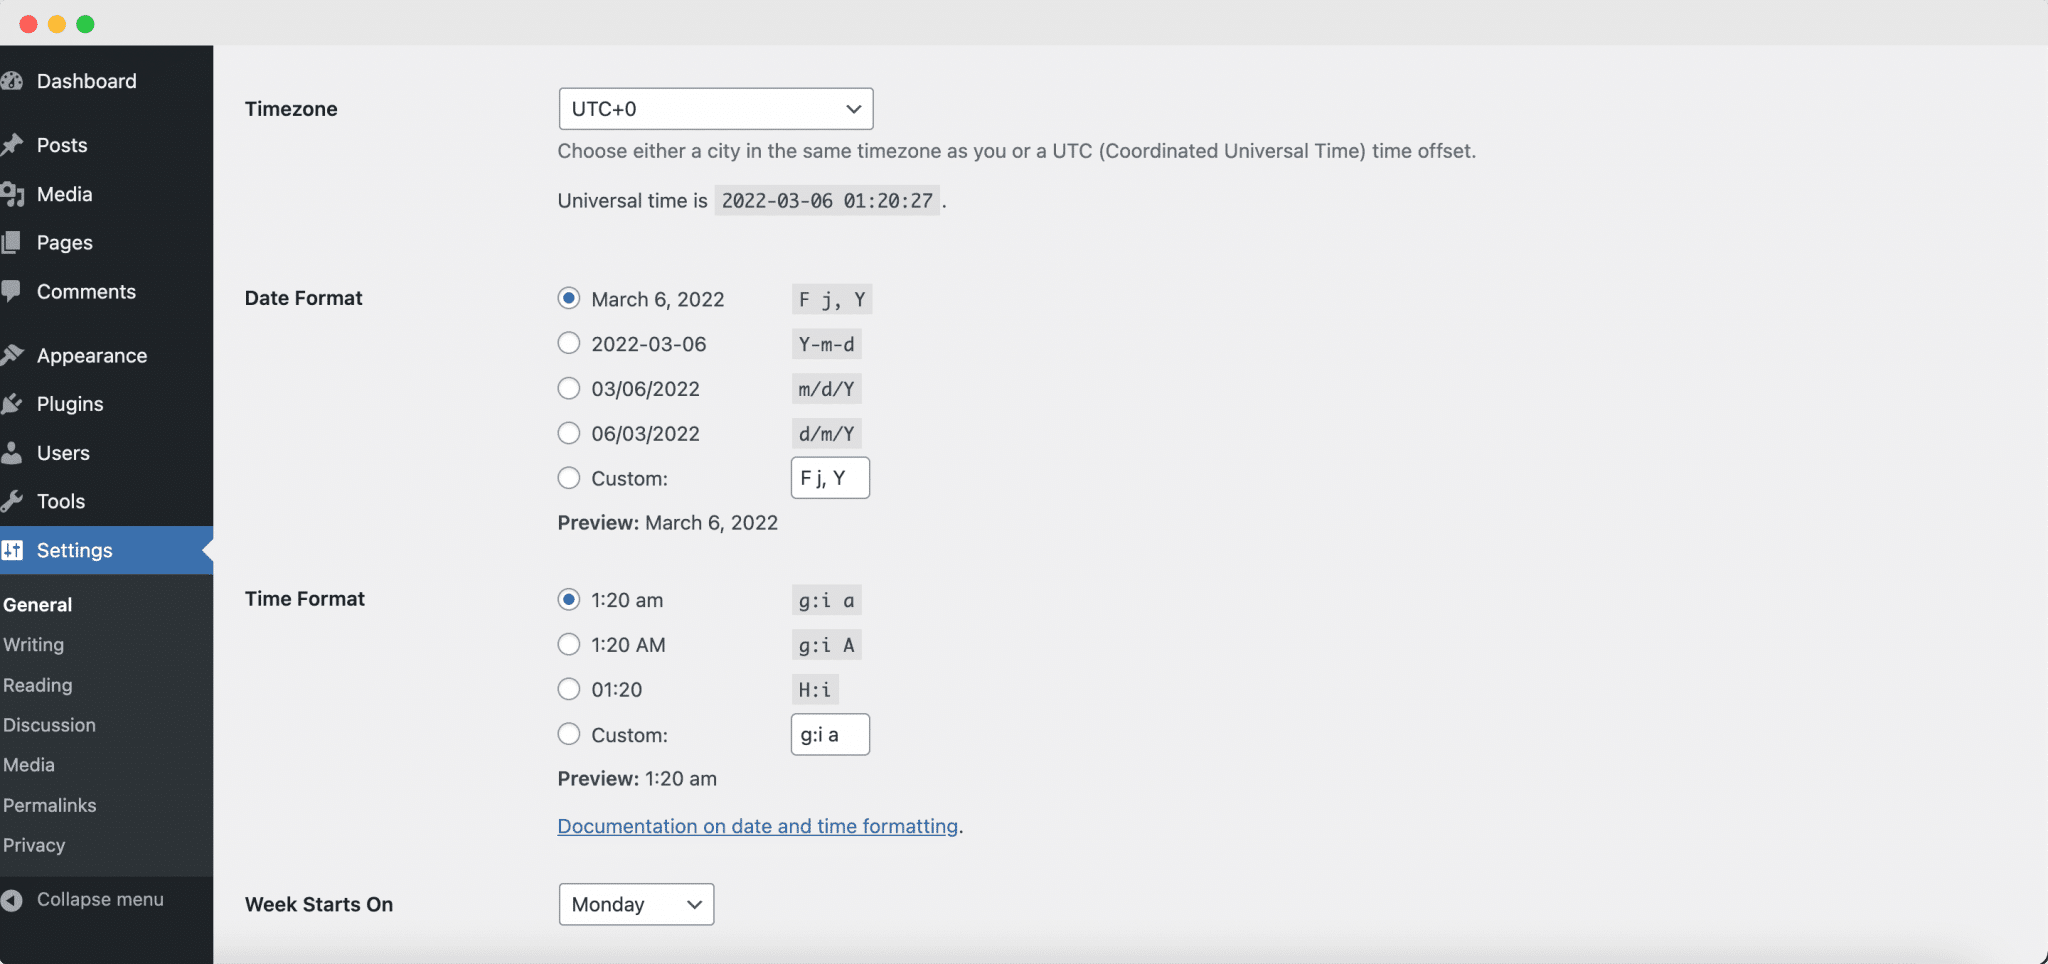
Once those are out of the way, it’s time to fix your website’s Time Zone. It might seem like an unnecessary step, but it is crucial to maintain if you want your site to be ready for content scheduling and automation in the long run. So while still in the General tab, adjust the date and time according to your own or your target audiences’ geolocation.
👨💻 Set Up Your Profile, Passwords & Avatar
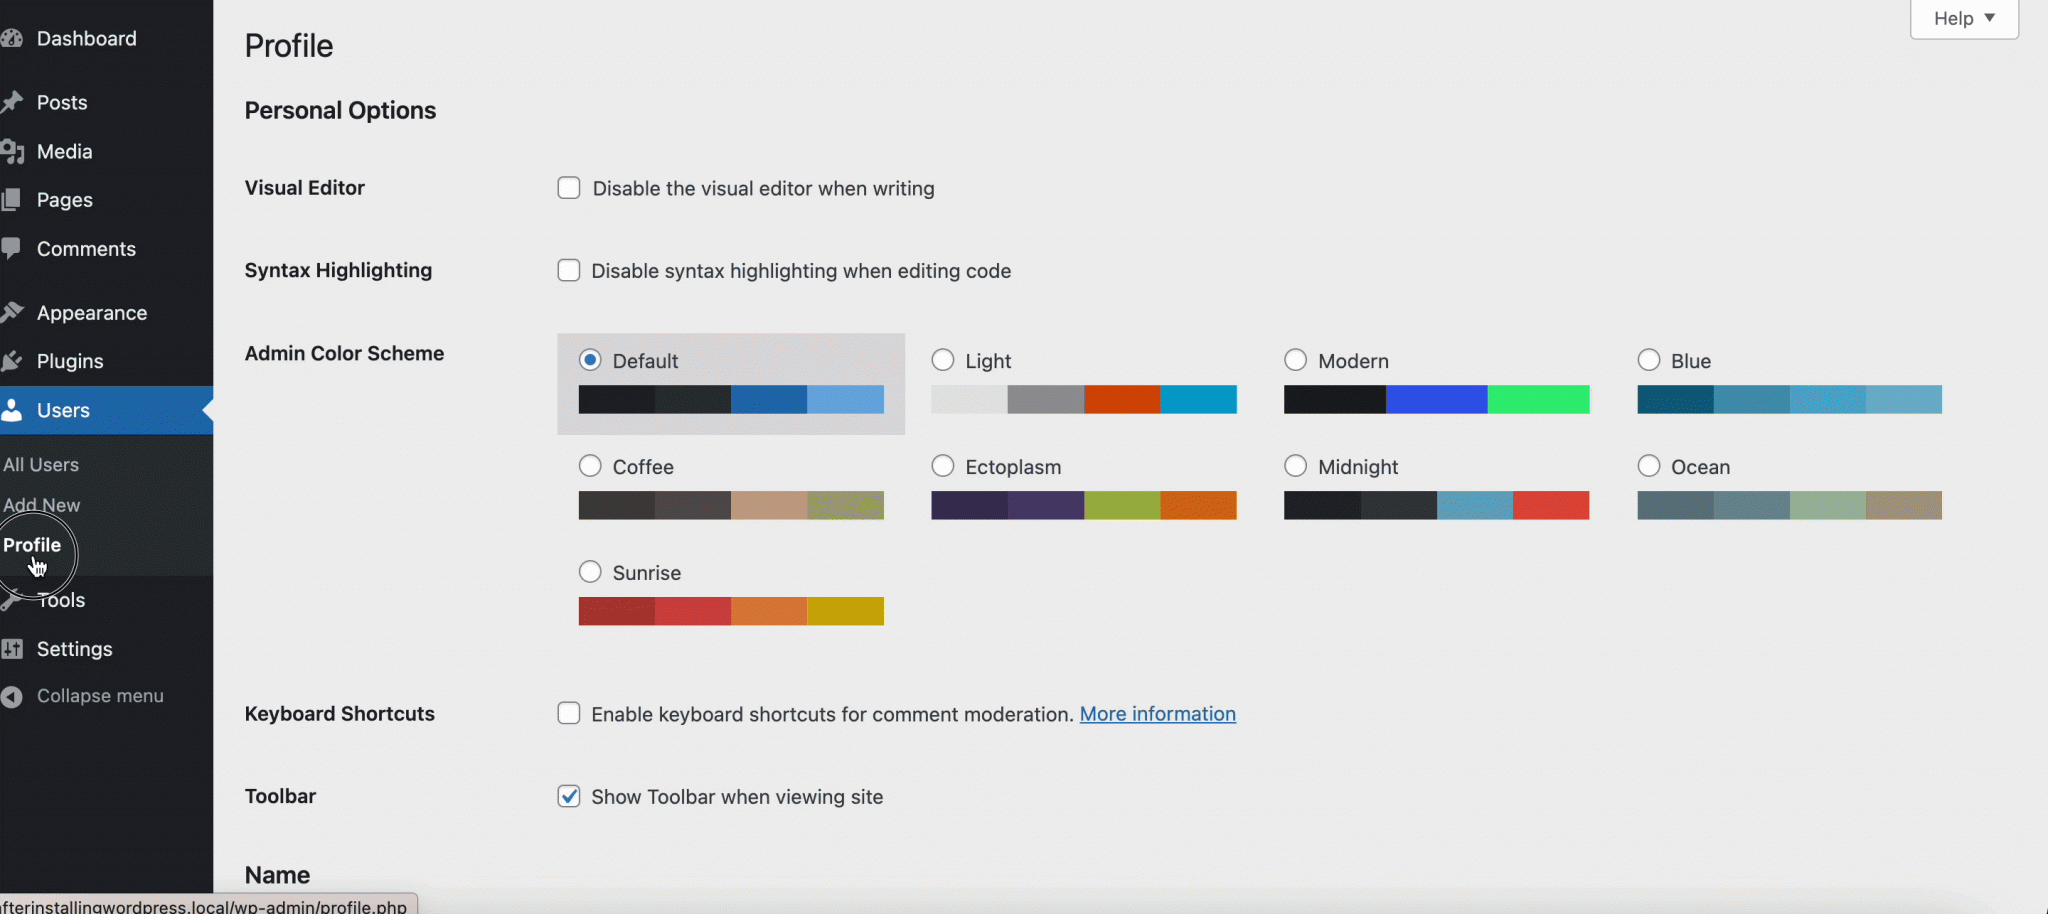
So, now that you have already configured the initial steps after installing WordPress, it’s time to add some basic information about yourself and set up your User Profile. This includes your first and last names, a display name and email address, social media links (optional), a short personalized biography, and more. To update all these, you simply need to go to Users → Your Profile from the dashboard side panel and fill in the details to complete your profile.
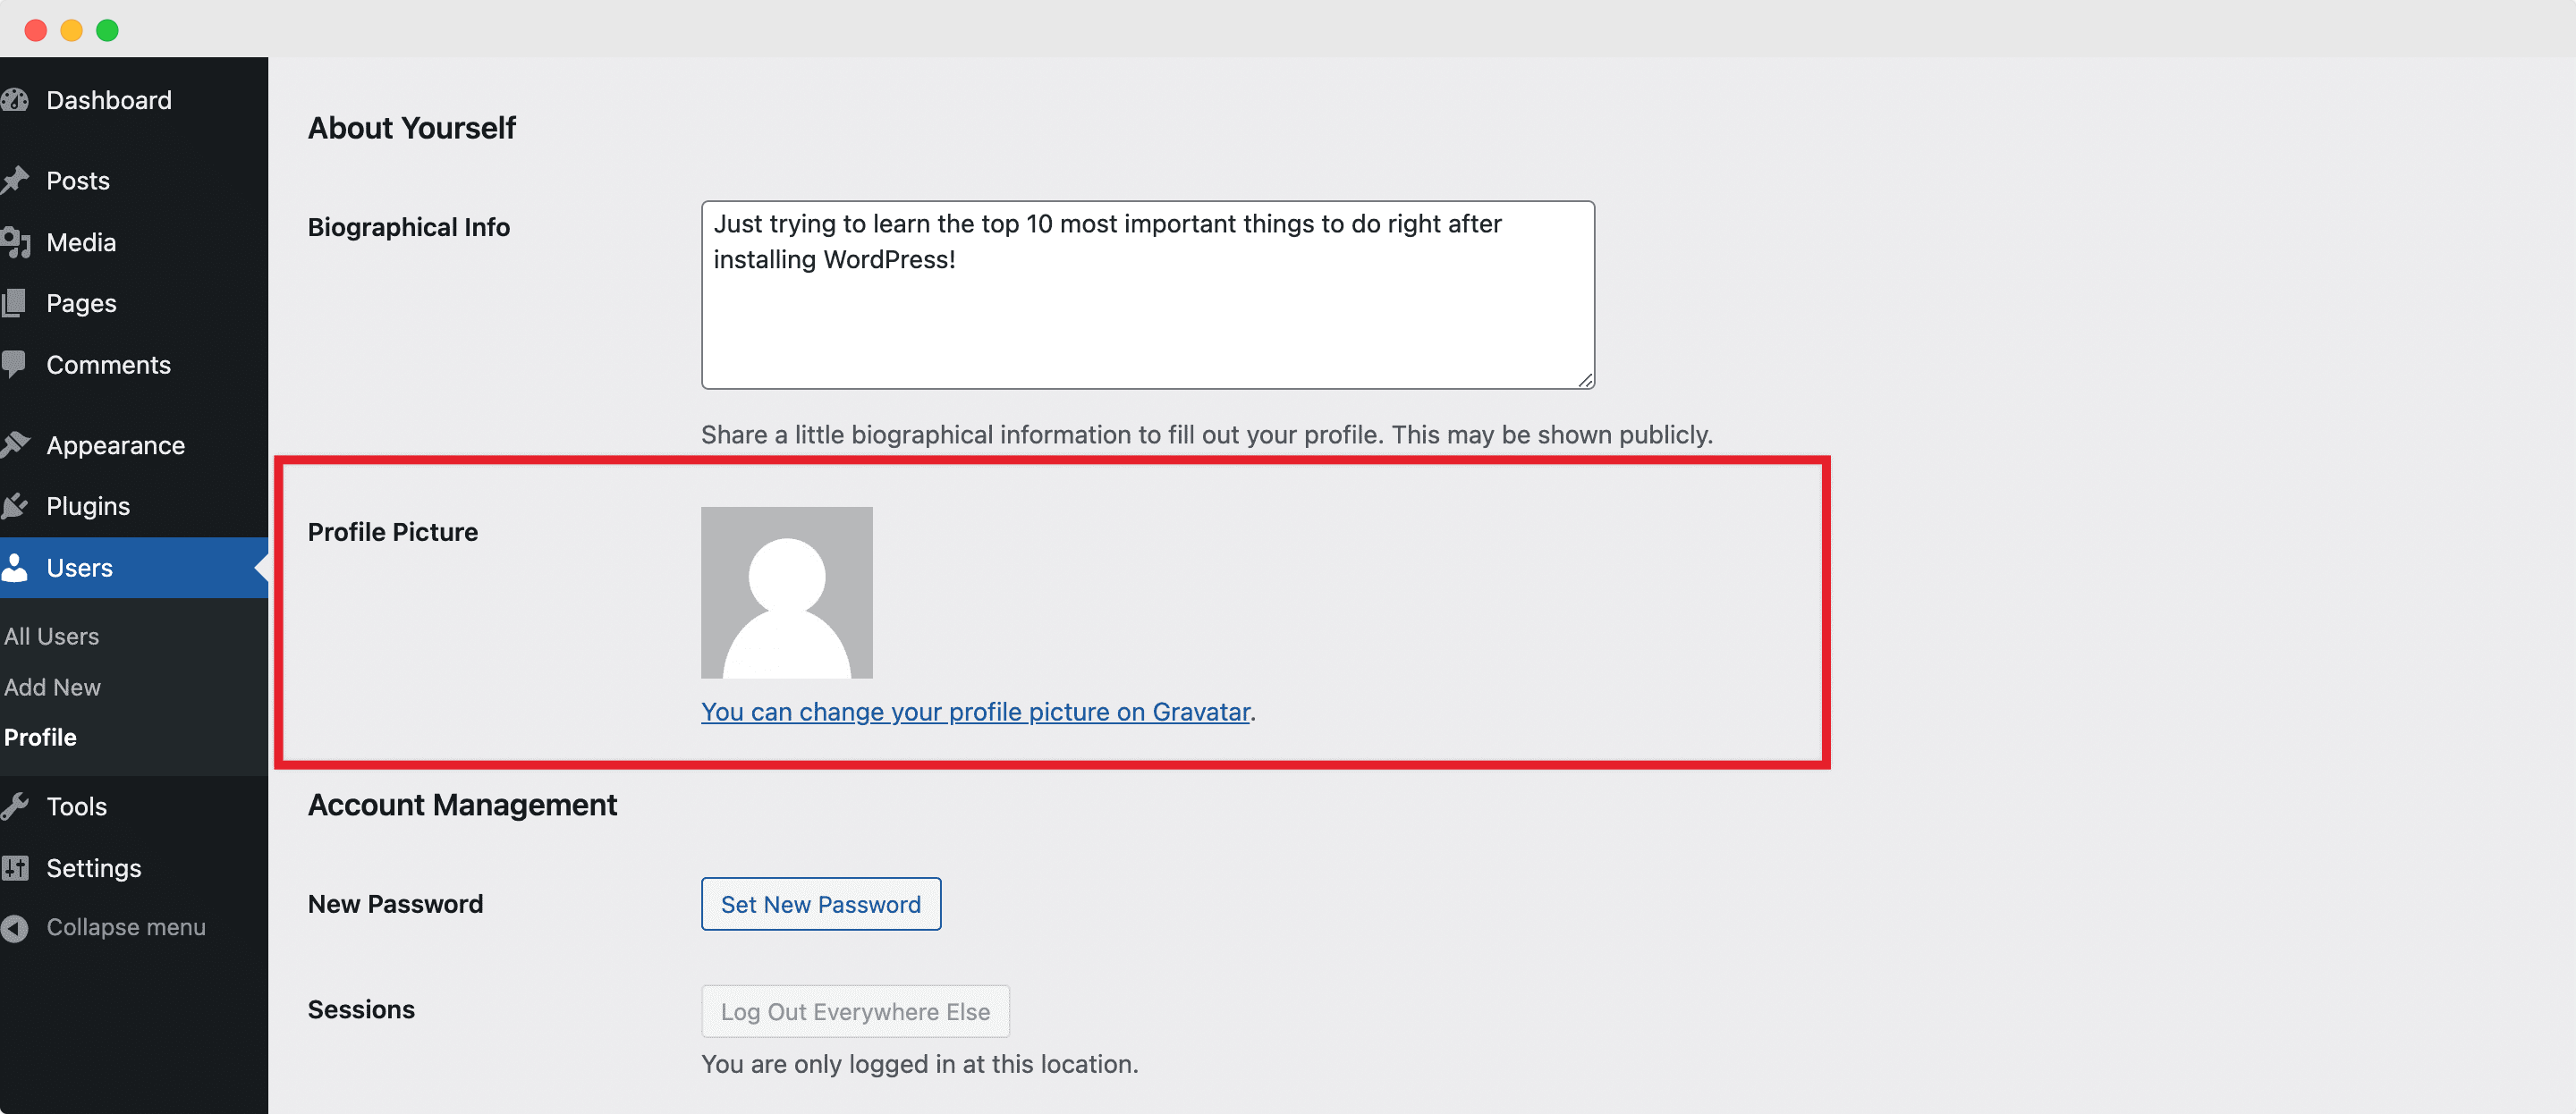
But that’s not where it ends. You also need to upload a profile picture or avatar that will appear when you post any blog content or comment on your site. And for that, WordPress requires you to create a Gravatar (Globally Recognized Avatar) using the email address linked with your WordPress account, which you must do separately from gravatar.com.
🔗 Establish Address URLs & Permalink Structure
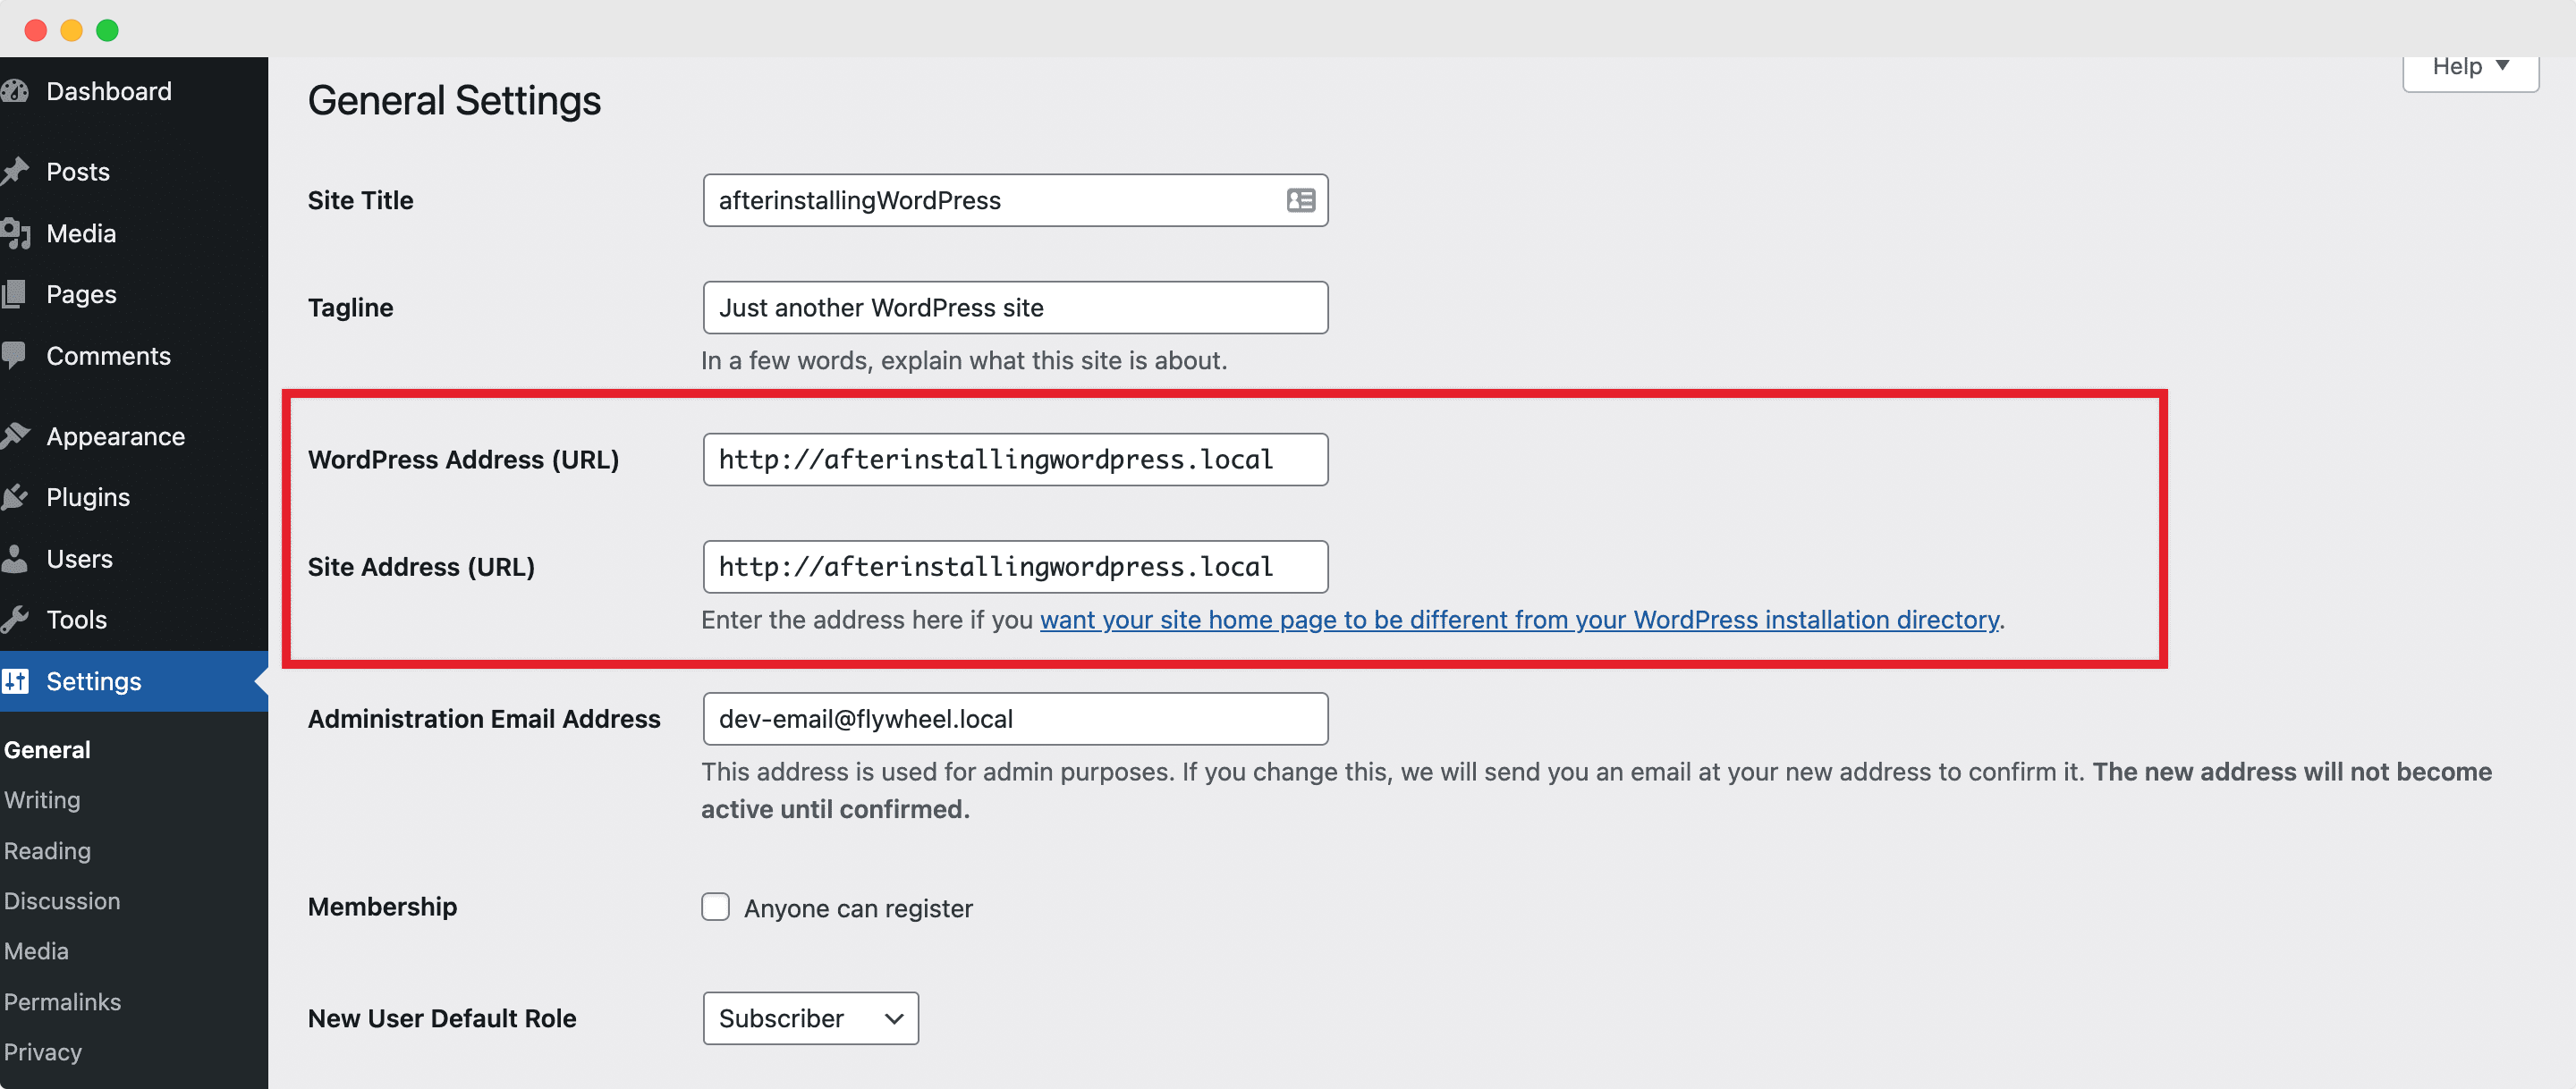
Then, you must choose a WordPress address URL & a site address URL. To put it more simply – you will have to enter the full URL of the directory containing your WordPress core files in the WordPress Address (URL) field. And for the Site Address (URL) field, you need to enter the address you want people to type to access or find your WordPress website.
Now, WordPress lets you choose between a www address URL and a non-www address URL. The choice is completely yours, but you should set it up properly in your WordPress admin panel during the early stages of the website setup. Simply go to the Settings → General tab, and fill both the WordPress URL and Site Address URL sections with your preferred version.
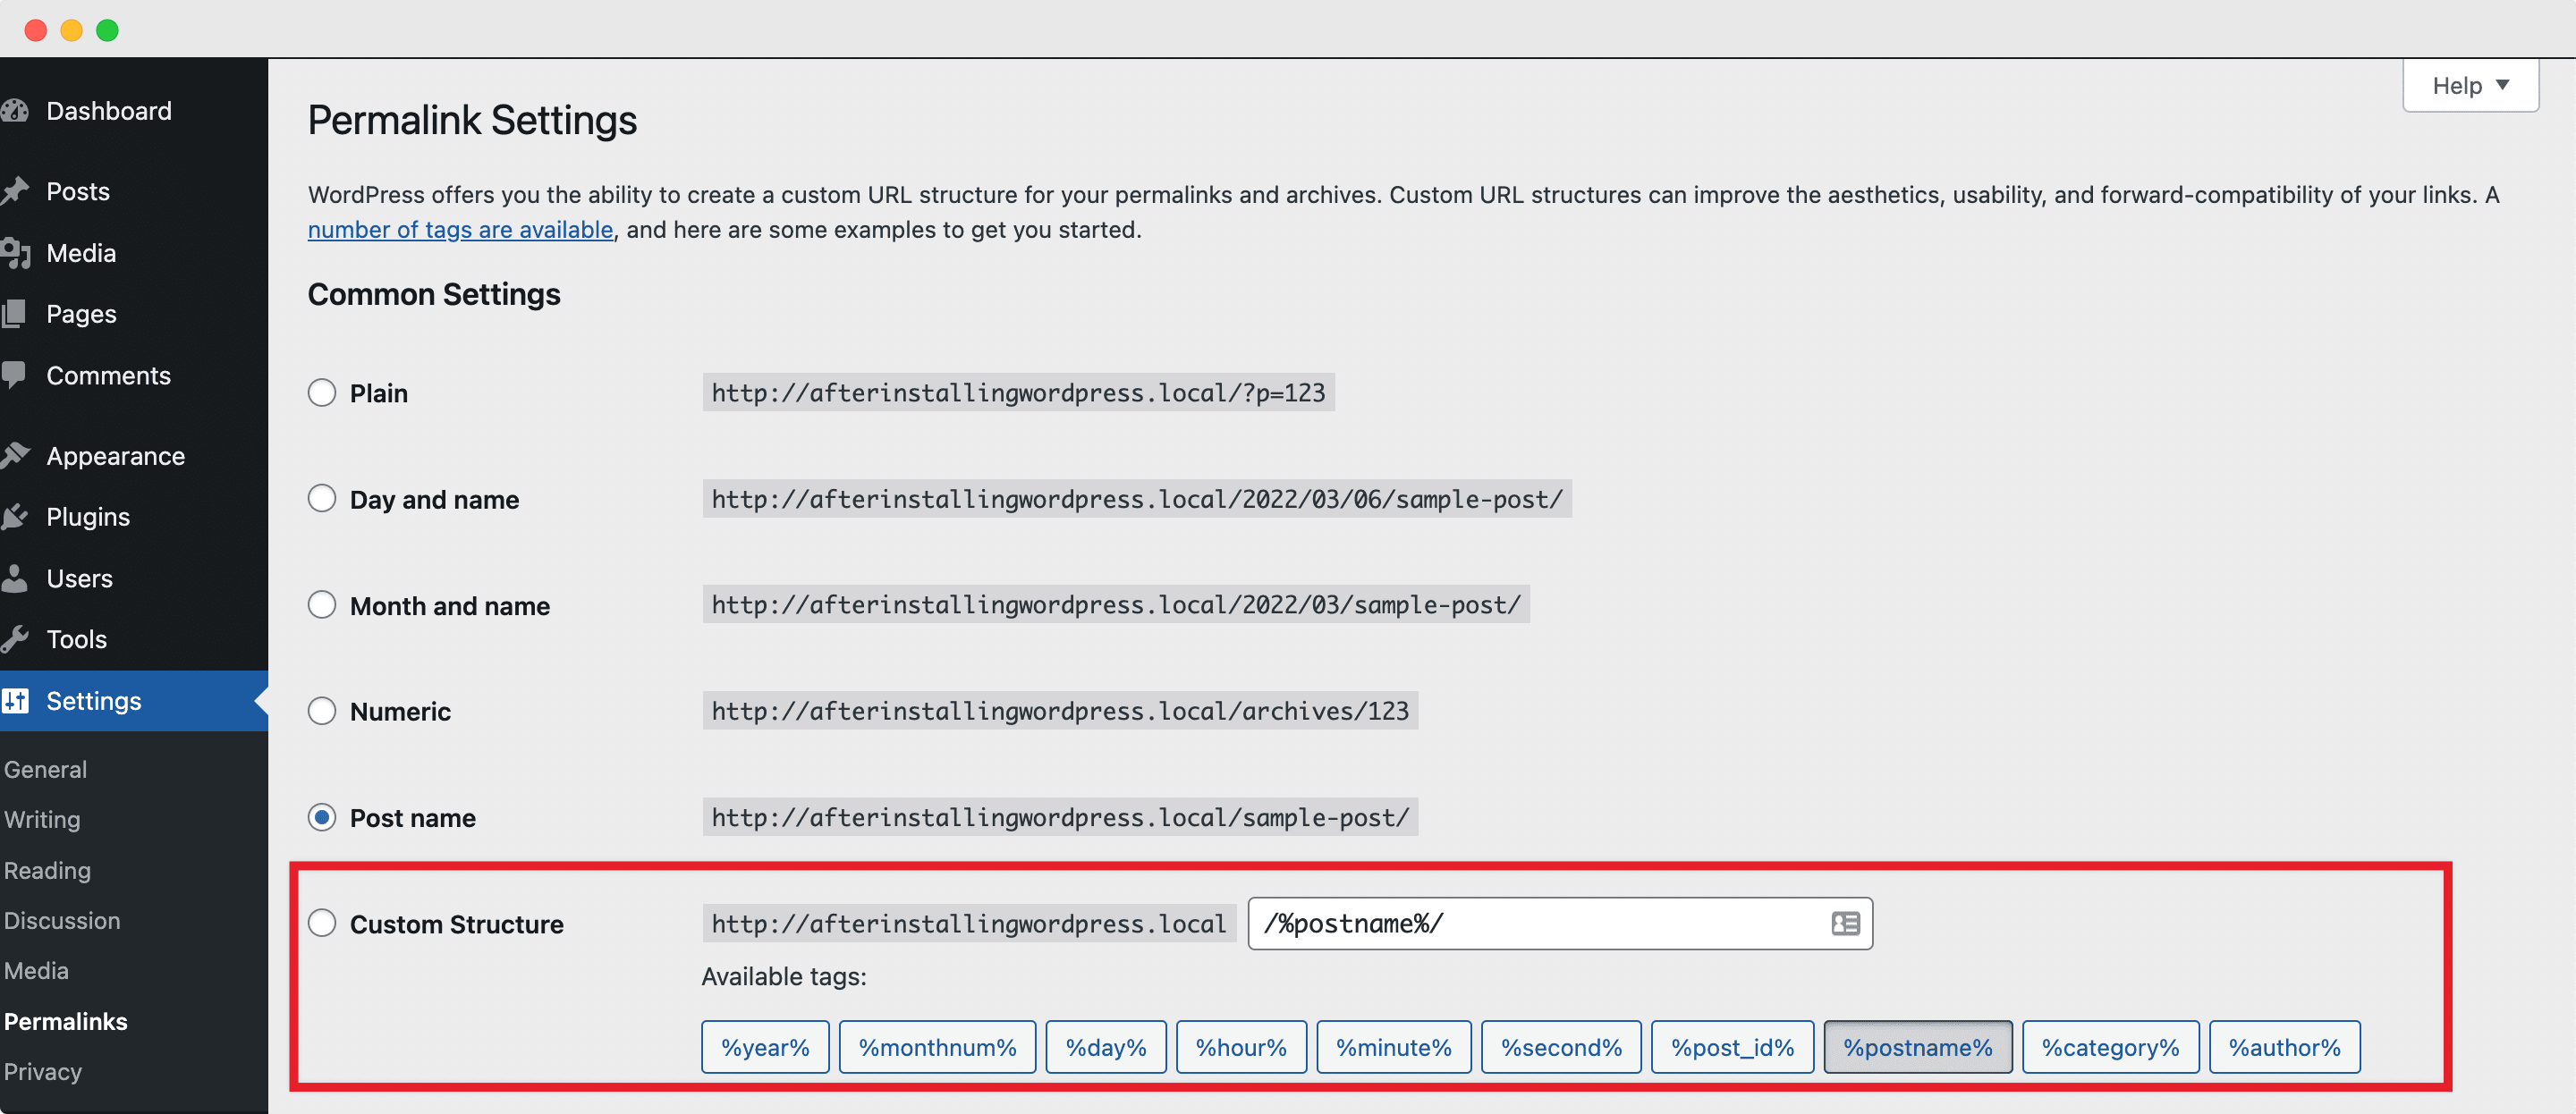
Another essential step that you need to do after installing WordPress is to change the permalink structure. Permalinks are quite literally the permanent links or URLs to specific pages, articles, and resources on your website, and once published they must never be changed.
So setting up a permalink structure beforehand is an important consideration for both user experience and search engine optimization (SEO). Here, WordPress helps you out by providing 5 default formats which you can easily choose from by going to your WordPress Settings → Permalinks tab. But you can also type in your own custom structure to ensure your WordPress website is truly unique.
🎨 Customize Appearance With A WordPress Theme
Every year, WordPress comes with its own default themes, but you can and should try out other ones and choose an appearance customizer that suits your brand. So next up, you need to remove previously installed themes right after installing WordPress in order to clean up and save space.

This time, you need to go to Appearance → Themes from the dashboard. Then, click on the theme you want to remove, ensure it is deactivated, simply delete the theme, and start off with a clean canvas to customize.
But as we all know, themes are essential for the complete design of your WordPress website. They determine your site’s appearance and fundamental functionalities throughout all of its pages and posts.
And so, once the default theme is removed, you need to install and customize a new one that goes with your brand or niche to bring your website to life. Explore through the thousands of free themes at WordPress.org, or choose a premium one.
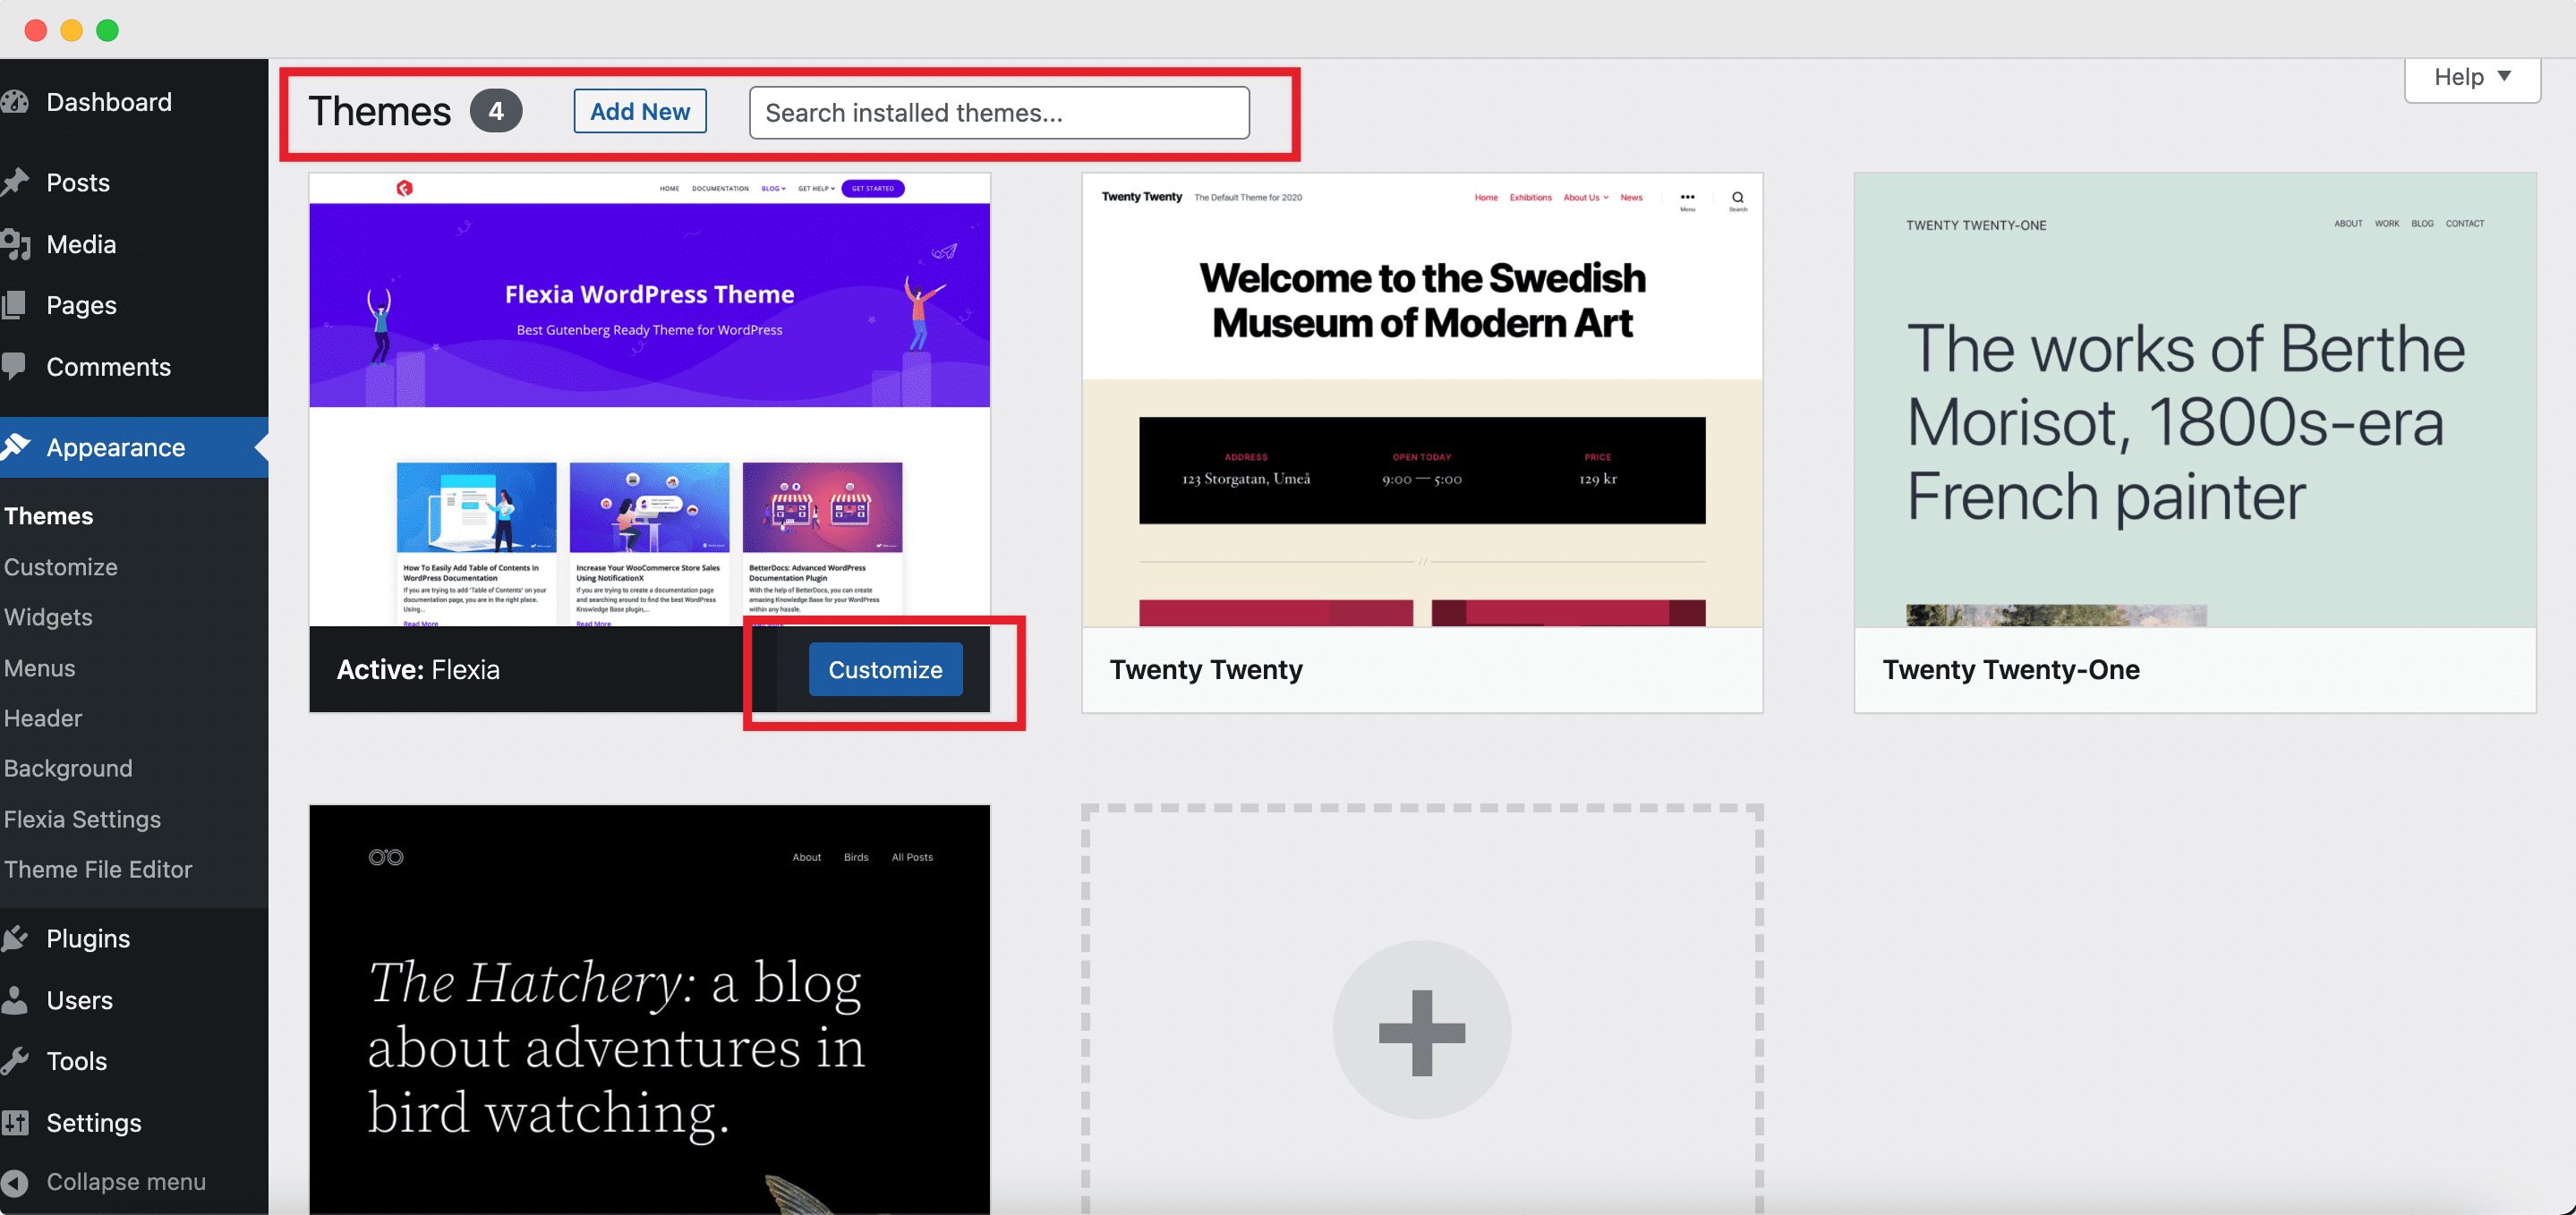
Once you have selected the one you want to use, go to Appearance → Themes → Add New to install and activate the new theme. And to customize it further to add more personality, widgets, or colors navigate to Appearance → Customize.
🏆 Upload Unique Favicon Or Site Icon
While we are still on the topic of appearance customization, we have another essential thing that you need to do after installing WordPress up on our list. You need to upload and add a favicon to your site.
A favicon is a small visual graphic from your brand logo that specifies your site across the web and is usually unique to your website only. Uploading the favicon is quite easy from the WordPress customizer. For this, Appearance → Customize → Site Identity, and from there upload the image you want to utilize as your new WordPress website’s site icon. But do remember that, the image must be a square of at least 512 * 512 pixels, and you do need to hit the ‘Publish’ button to save changes when you are done.
📊 Connect Your WordPress Site To Google Analytics
Now that you are almost done with the basic steps to follow after installing WordPress, it’s time you ensure your website performs well and reaches your conversion goals. And there’s no tool better to monitor your site’s performance and statistics than Google Analytics.
So the next step for anyone starting with a brand new WordPress website would be to connect it to Google Analytics in order to be able to analyze website traffic, user behavior, among other insightful data.
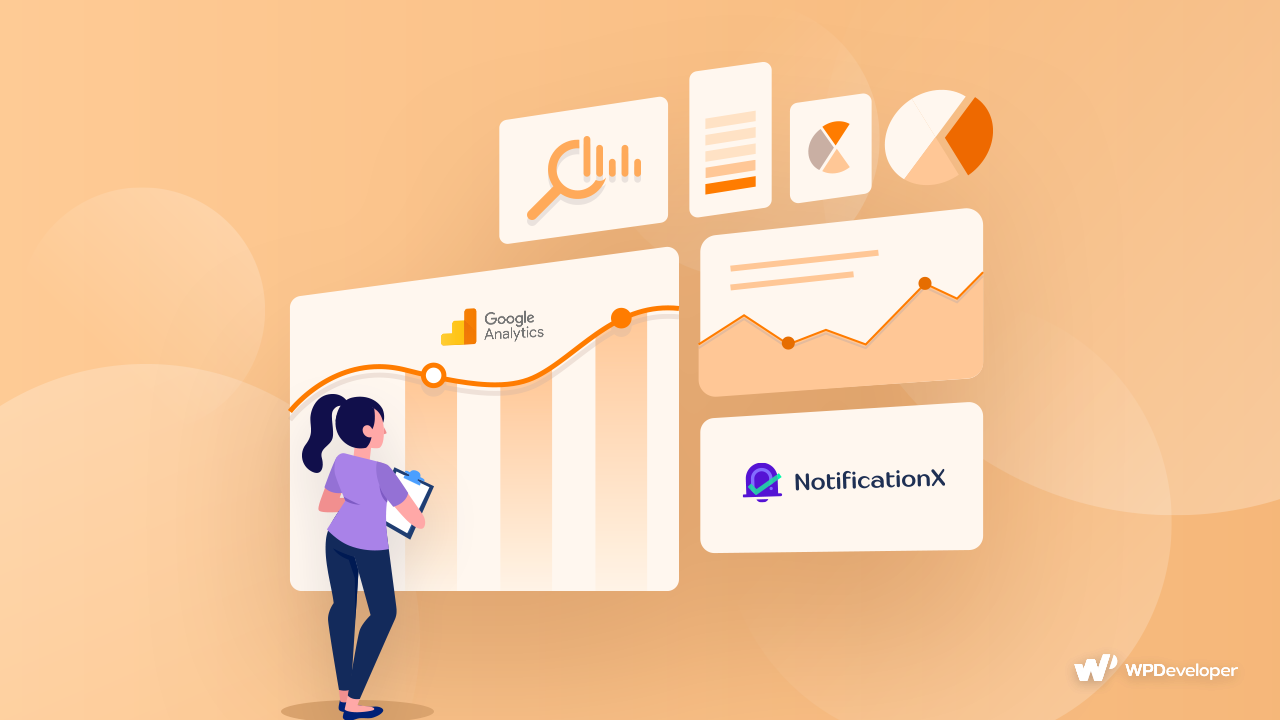
This will not only help you understand your audience better but also assist you in making more successful management decisions. Virtually all successful businesses track their operational data to influence management decisions, meaning you certainly can’t afford to neglect your own data.
📄 Remove Dummy Content & Publish Interactive Pages
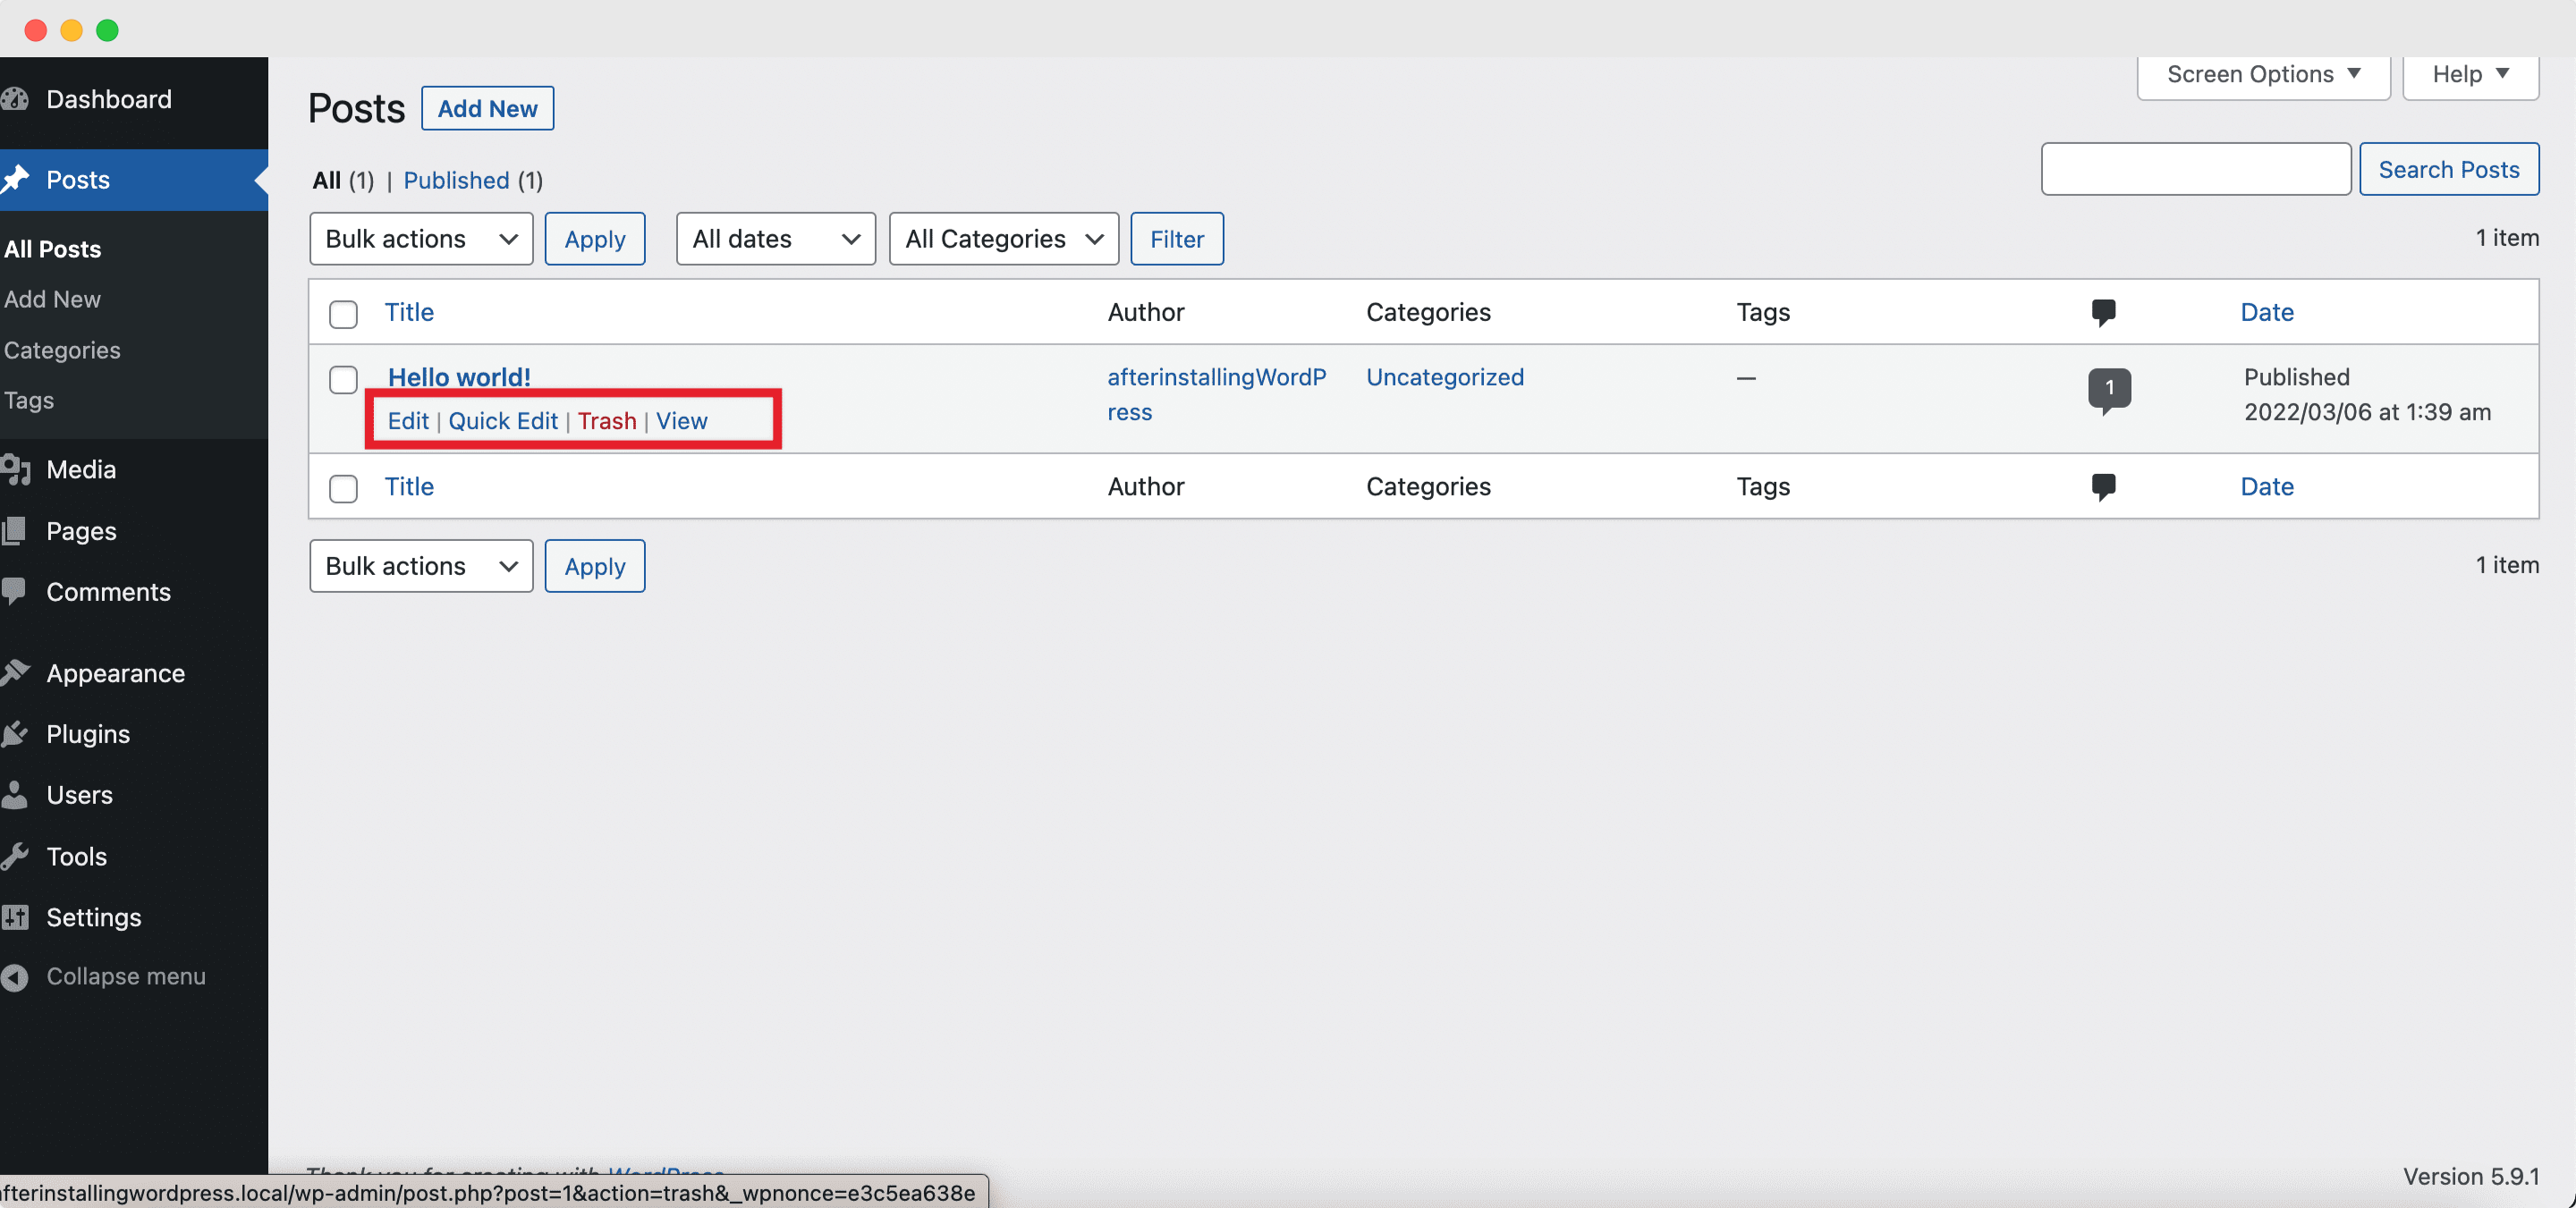
Right after installing WordPress, you will find a dummy sample post, called ‘Hello World’ is automatically added. So, up next, you need to free up more space on your website by removing all dummy content. Open the Posts and Pages tabs from your WordPress dashboard. Then, hover over the existing content, and click the Trash option to delete the dummy content.
And then, create the stunning core pages of your WordPress website – a Landing page, an About Page, a Privacy Policy page, and more. You can use the latest WordPress block editor, Gutenberg, to create the interactive pages on your website, or you can create engaging landing pages using Elementor in less than just 5 minutes.
🚀 Optimize Your Websites For Search Engines & High Ranking
One of the best times to set up plugins and tools to optimize your website’s SEO, short for Search Engine Optimization, is right after installing it. Search engine optimization is the process of improving your website and content so that it ranks higher on search engine results pages.
So if you want to get more traffic and website visitors from search engines, this is one of the most important steps that you should do at the initial stages.
And you can easily do this with the help of WordPress SEO plugins and tools. You can check out this blog to learn of the 3 best WordPress SEO solutions that you can directly install on your site after installation.
💌 Add A Contact Form To Communicate With Visitors
After establishing your website, it’s necessary to include a contact form. So, one of the last essentials that you need to do after installing WordPress is to set up a Contact Page through which your customers and website visitors can easily get in touch and communicate with you.
Contact forms are one of the many essential aspects of a new WordPress website that help you to make direct communication with your customers and users. You can easily make a list of your potential customers, respond to support tickets, and track their responses instantly. And so, we want to include our list of the best WordPress contact form plugins here, so you can check them out and find the perfect one for your new WordPress website.
⚙️ Set Up Backups, WordPress Security & Spam Protection
Imagine what would happen if your website gets hacked or if you had to shift to another domain due to unavoidable reasons after you have completed all the steps mentioned above. Now that you have almost completed all the necessary steps you need to take after installing WordPress, to finish off, you need to create a strong backup and security strategy.
It would pay off really well if you have a backed-up version of your website then. When you set up a secured backup system for your website, you will be able to restore everything to the most recent backup file. However, WordPress does not have a built-in backup system. So it’s vital to use a plugin or tool that would help to perform automated backups from time to time.
Then, to take your site’s security measure a step higher, you need to install powerful WordPress security plugins by adding stronger protection against malware and harm. You can take a look at this blog to check out which 5 anti-spam plugins are the best in the market to use on your website.
List Of Recommended Plugins For Your WordPress Website
Finally, we are at the end of our detailed guide which are the top 10 most important things to do after installing WordPress. We hope it helps all first-time WordPress users out there, as well as those of you who wanted a checklist to follow when starting your next website. Do let us know about your experience; we would love to hear from you.
But before we leave, we also want to help you out a little with the steps that follow. And that is to install and activate all the necessary plugins and tools needed to bring in leads, encourage traffic, generate conversions, and boost sales. Check out one of our latest blogs on the must-have WordPress plugins for any business trying to grow in the market in 2022.
For more useful guides, insightful tips and tricks, trending news, and the latest updates subscribe to our blog. And make sure to join our Facebook group to communicate with and learn from other WordPress users and enthusiasts just like you.

