SchedulePress now offers ‘Enhanced Post Publishing and Sharing Options’ which let you publish WordPress posts immediately while displaying your selected future date. Also, you can choose to auto-share the posts on your selected social media platforms upon publishing. Let us find out how this handy feature works.
How to Configure Enhanced Post Publishing and Sharing Options? #
We will now show you how to configure the Enhanced Post Publishing and Sharing Options of SchedulePress. Follow the steps below to get started.
Note: Make sure you have installed and activated SchedulePress and SchedulePress PRO on your WordPress website.
Step 1: Enable Enhanced Post Publishing and Sharing Options #
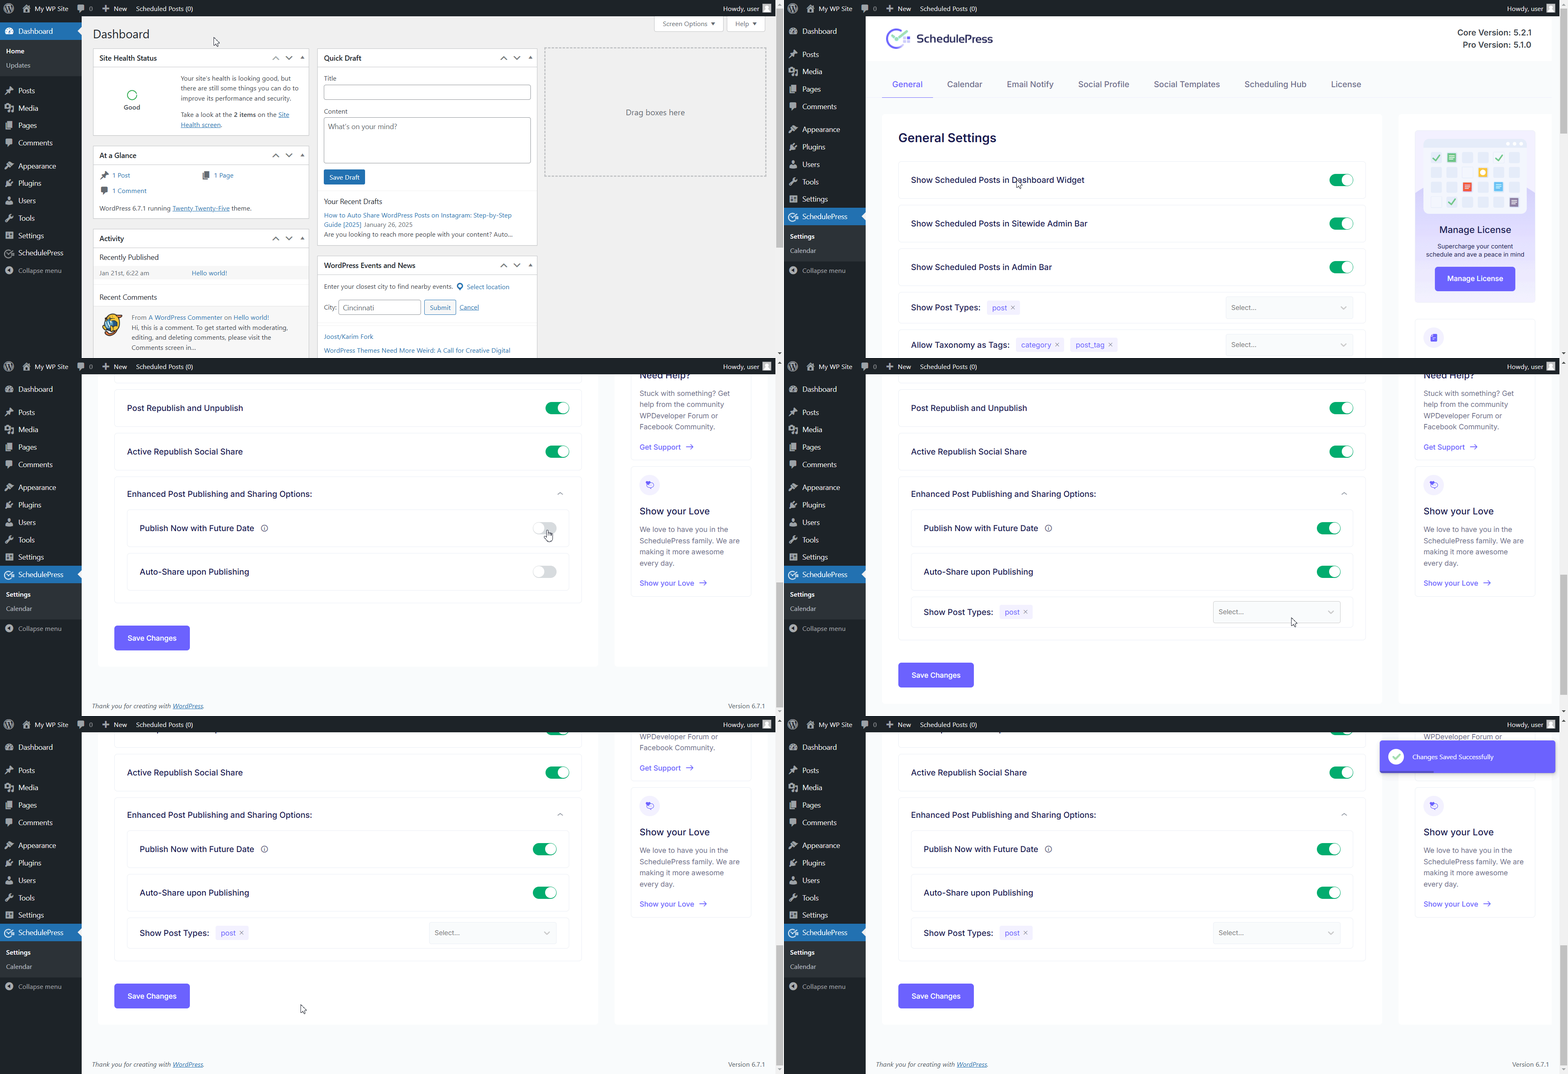
From your WordPress admin dashboard, go to ‘SchedulePress’ → ‘Settings’. Next, navigate to the ‘Enhanced Post Publishing and Sharing Options’ section. Toggle to enable the ‘Publish Now with Future Date’ option. This will let you publish the post now while showing your selected future date.
Also, toggle to turn on the ‘Auto-Share upon Publishing’ option if needed. If this is enabled, your post will be auto-shared on your selected social media platforms upon publishing. From the ‘Show Post Types’ dropdown, you can select specific post types for these options. Click on the ‘Save Changes’ button to proceed.
Step 2: Use Enhanced Post Publishing and Sharing Options #
Let us find out how to use the Enhanced Post Publishing and Sharing Options from SchedulePress on Gutenberg, Elementor and Classic Editor. We will cover each one by one.
For Gutenberg #
When editing your post on Gutenberg, navigate to the ‘Publish’ option under the ‘Post’ tab in the right-side panel. Hit the button beside the ‘Publish’ option and set the future date that you want to display on your published post. Also, choose the social media platforms where you want the post to be auto-shared upon publishing.
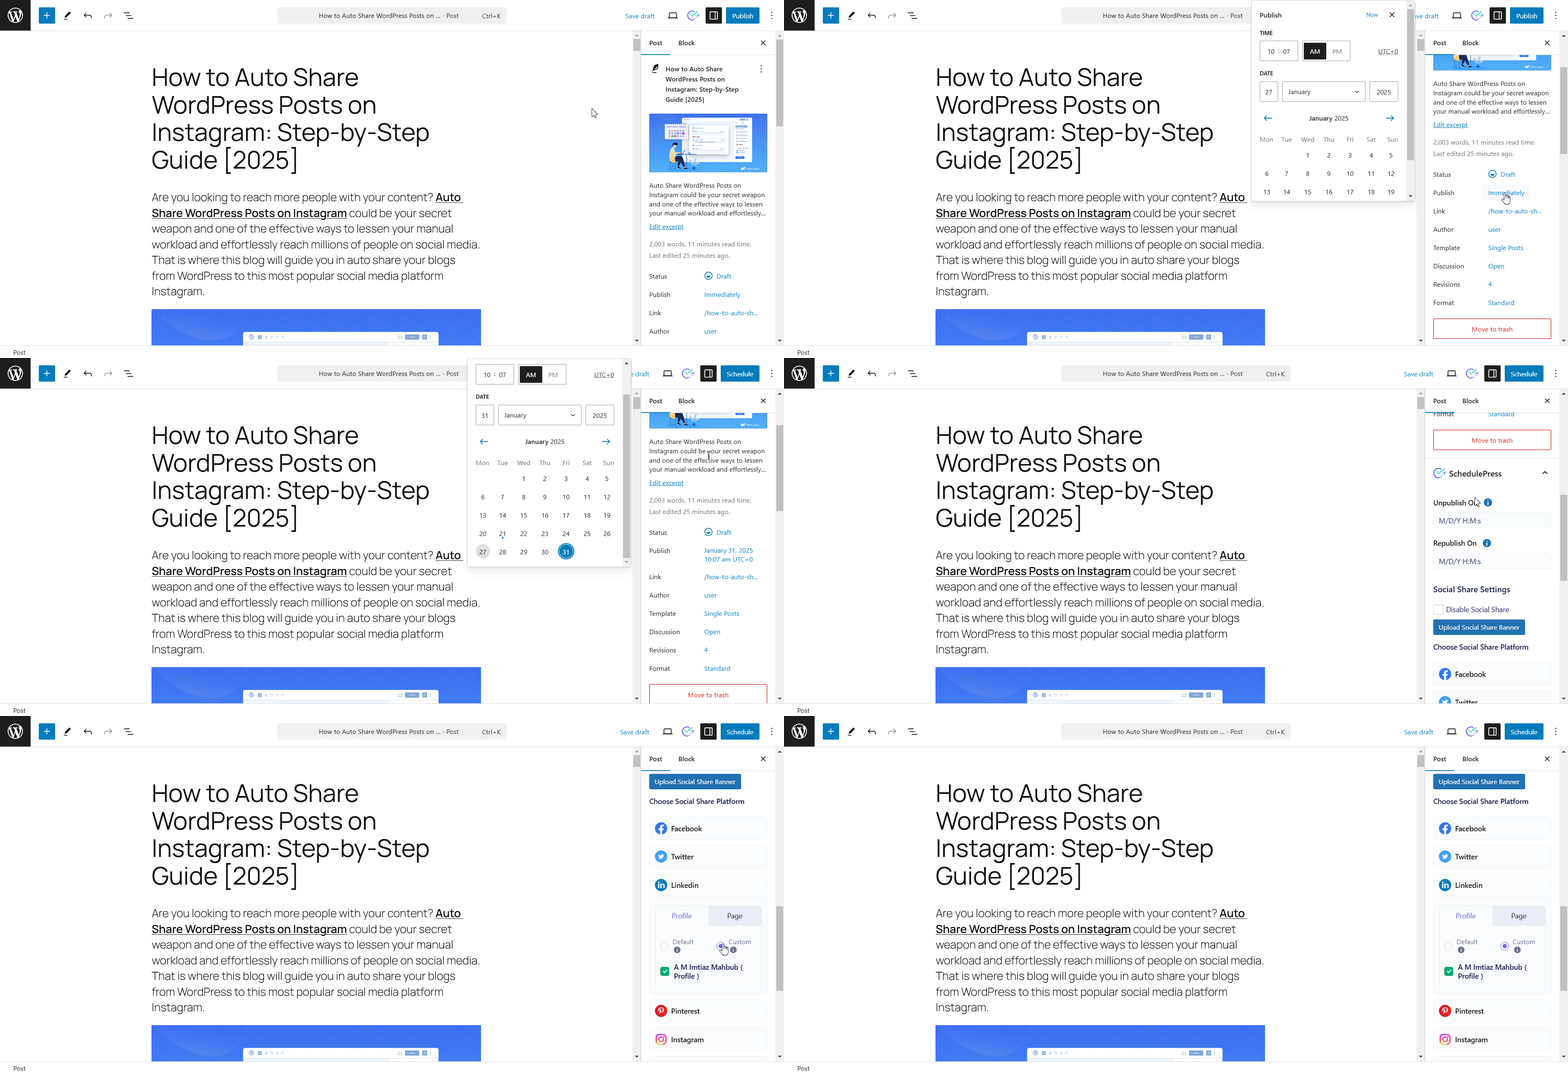
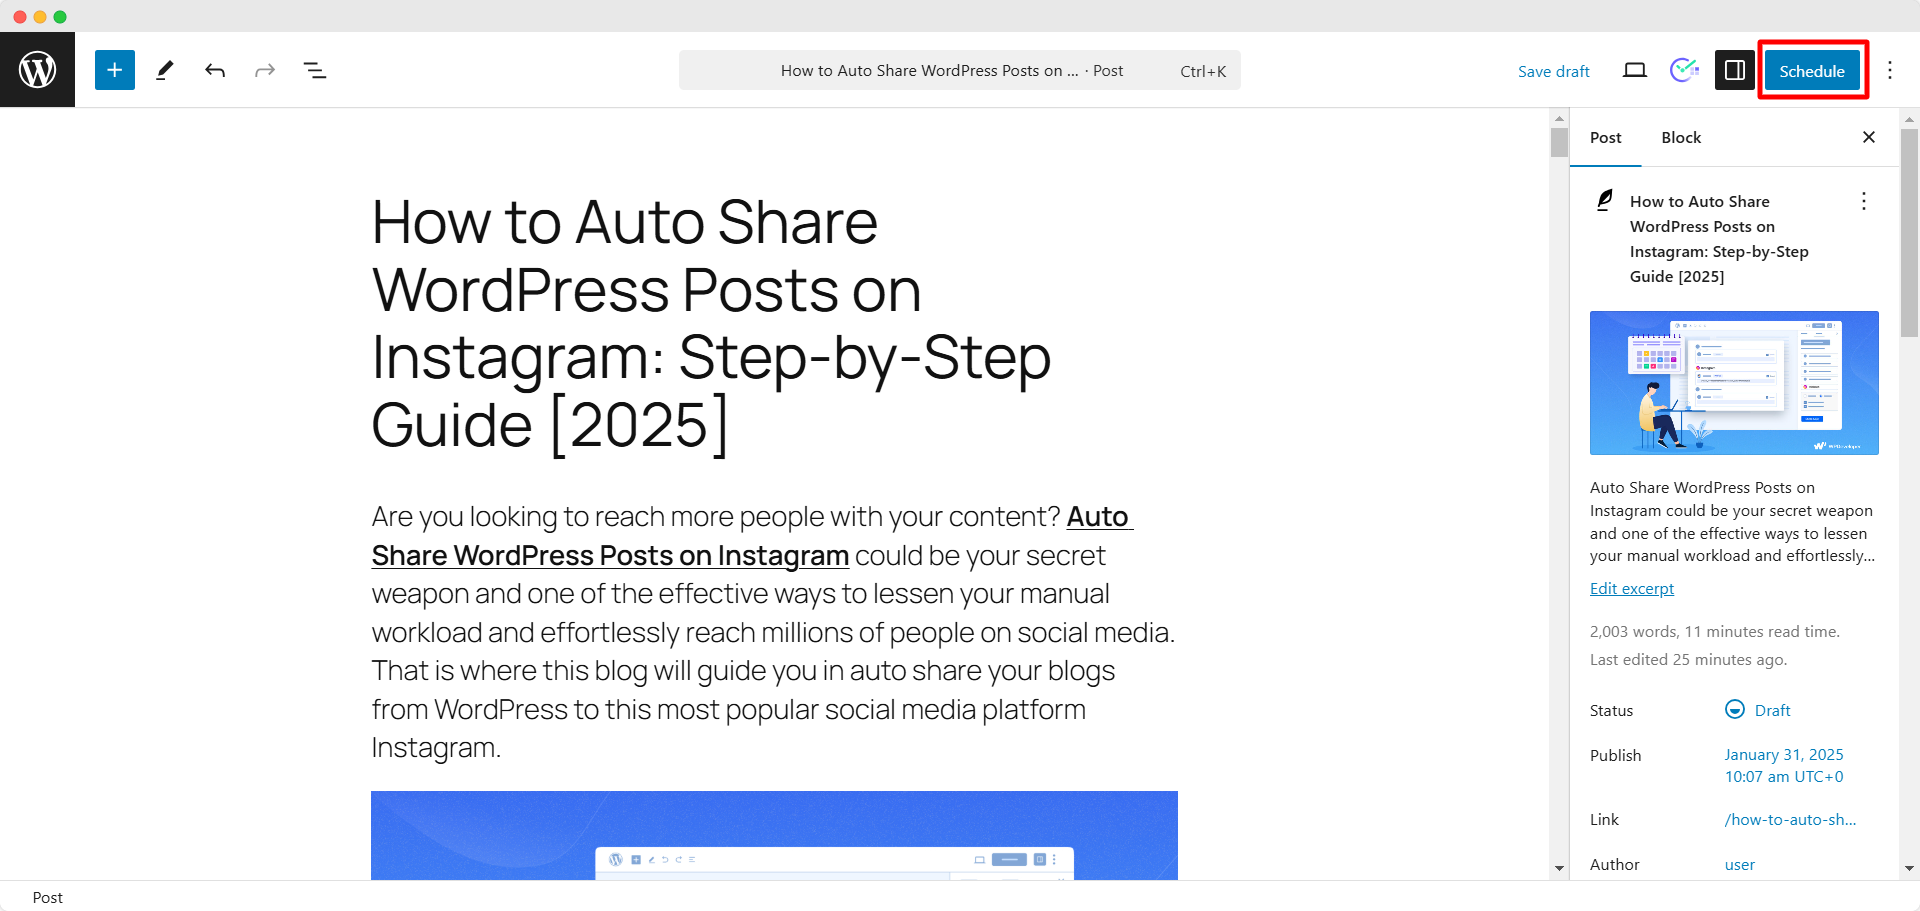
Now, click on the ‘Schedule’ button at the top. Your post will then be immediately published but will show the future date that you have selected. If you have enabled the ‘Auto-Share upon Publishing’ option, it will be automatically shared on your selected social media platforms.
For Elementor #
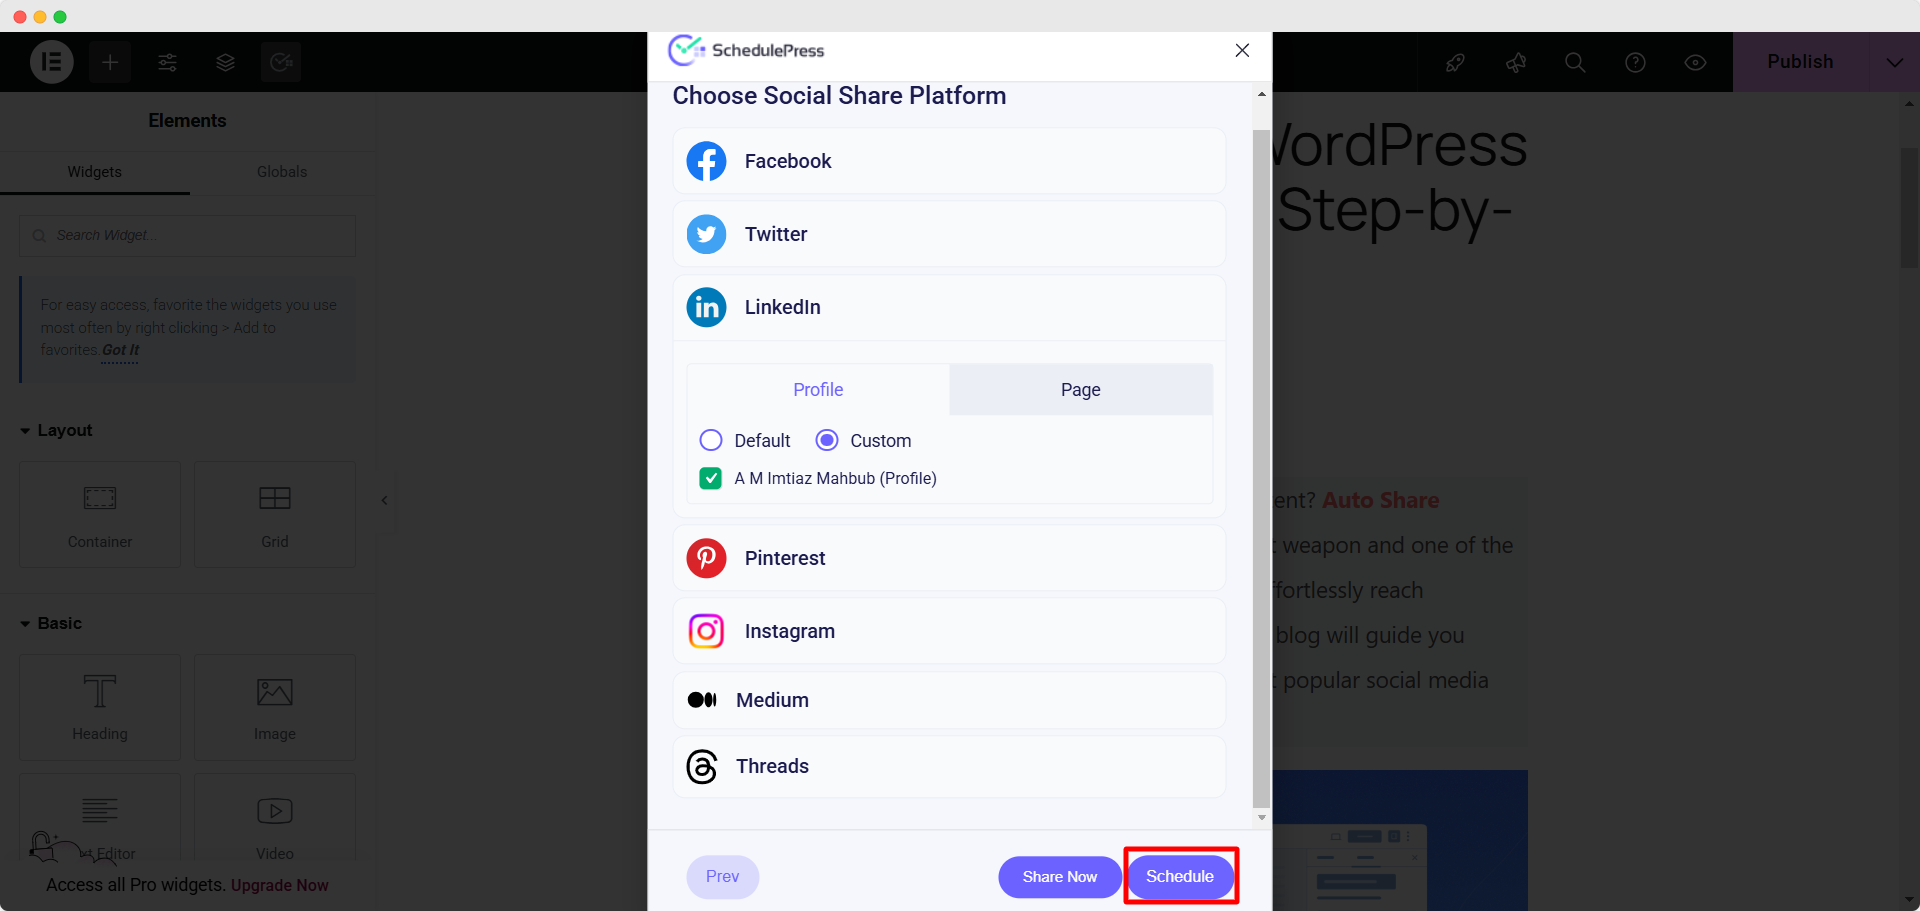
When editing your post on Elementor, hit the ‘SchedulePress’ icon at the top. Then, click on the ‘Publish On’ option. Select the future date from the calendar that you want to show on your published post. Hit the ‘Next’ button to move to the next step. Now, choose the social media platforms where you want the post to be auto-shared upon publishing.
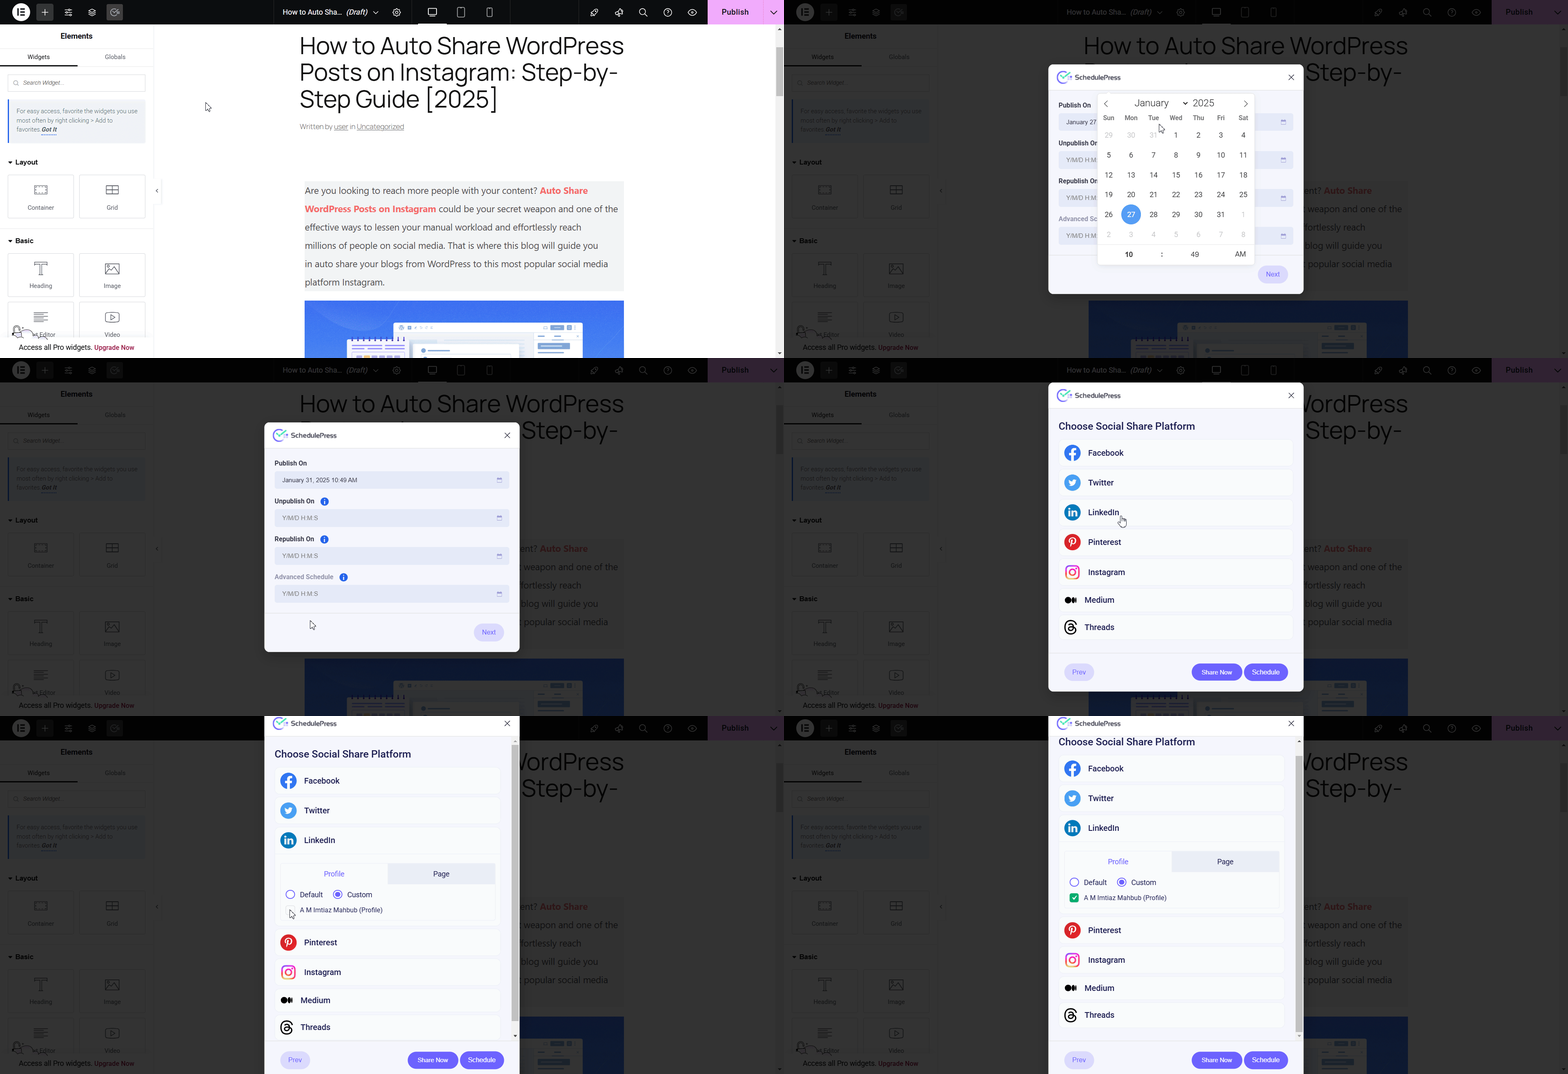
Now, click on the ‘Schedule’ button. Your post will then be immediately published but will show the future date that you have selected. If you have turned on the ‘Auto-Share upon Publishing’ option, it will be auto-shared on your selected social media platforms.
For Classic Editor #
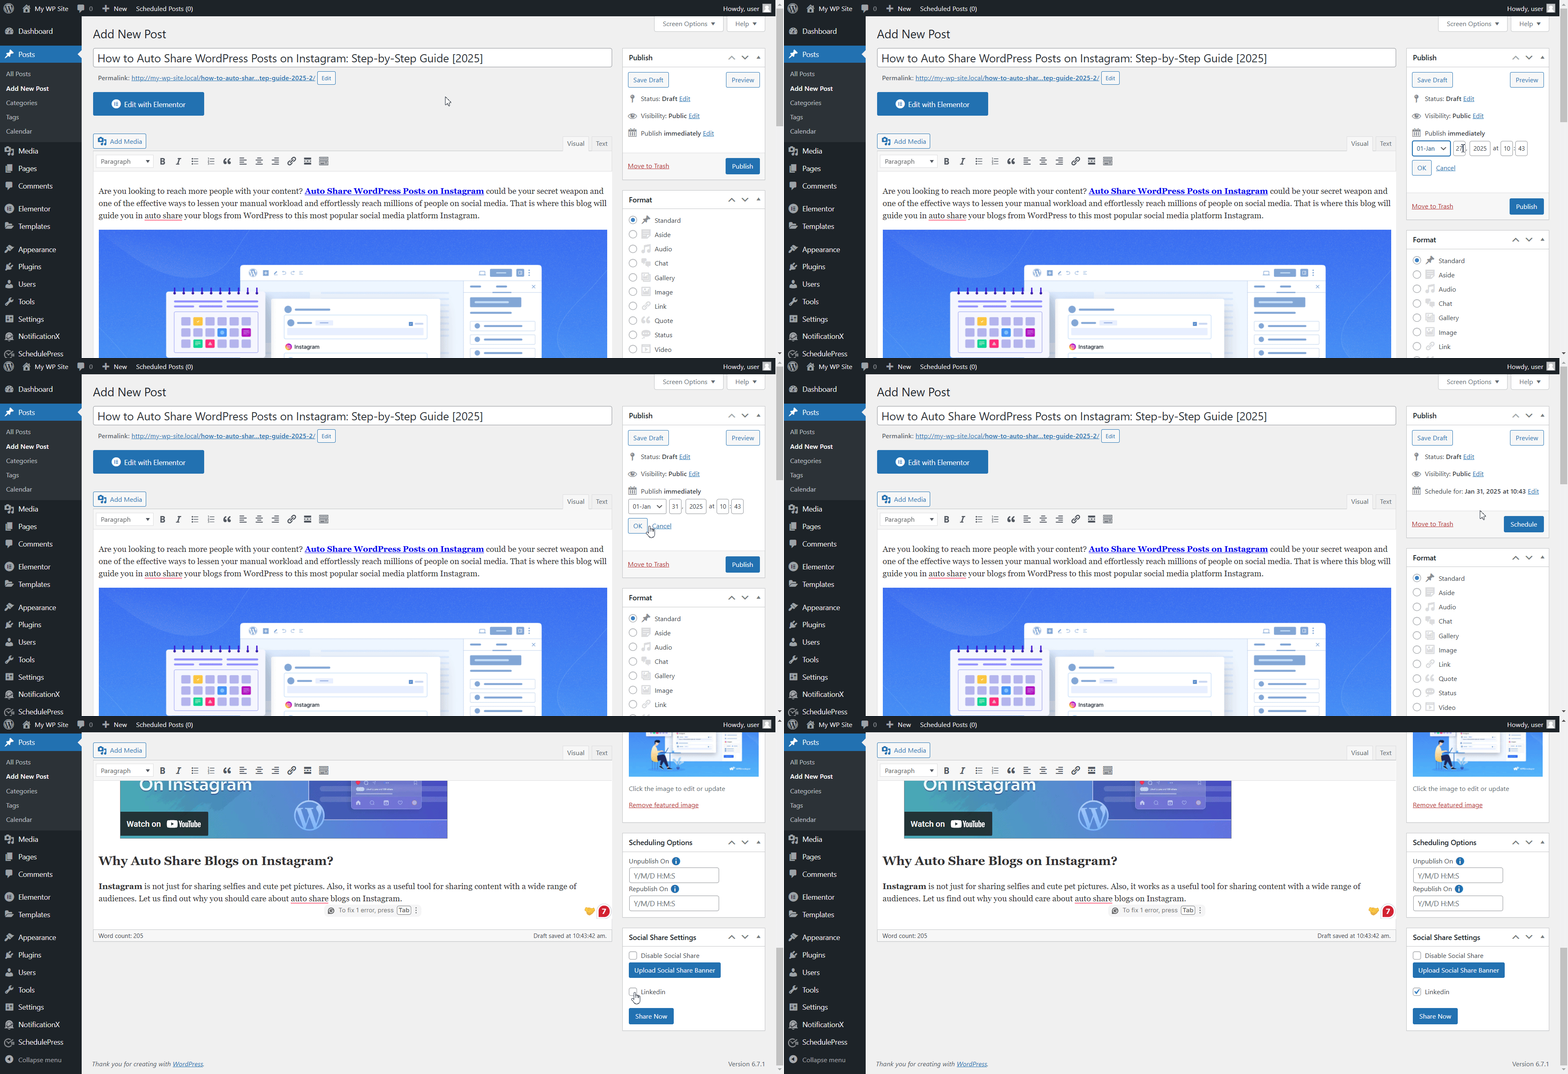
When editing your post with Classic Editor, navigate to the ‘Publish’ section on the right side. Beside the ‘Publish’ option, click on the ‘Edit’ button. Set the future date that you want to display on your published post. Hit the ‘OK’ button to proceed. In the ‘Social Share Settings’ section, select the social media platforms where you want the post to be auto-shared upon publishing.
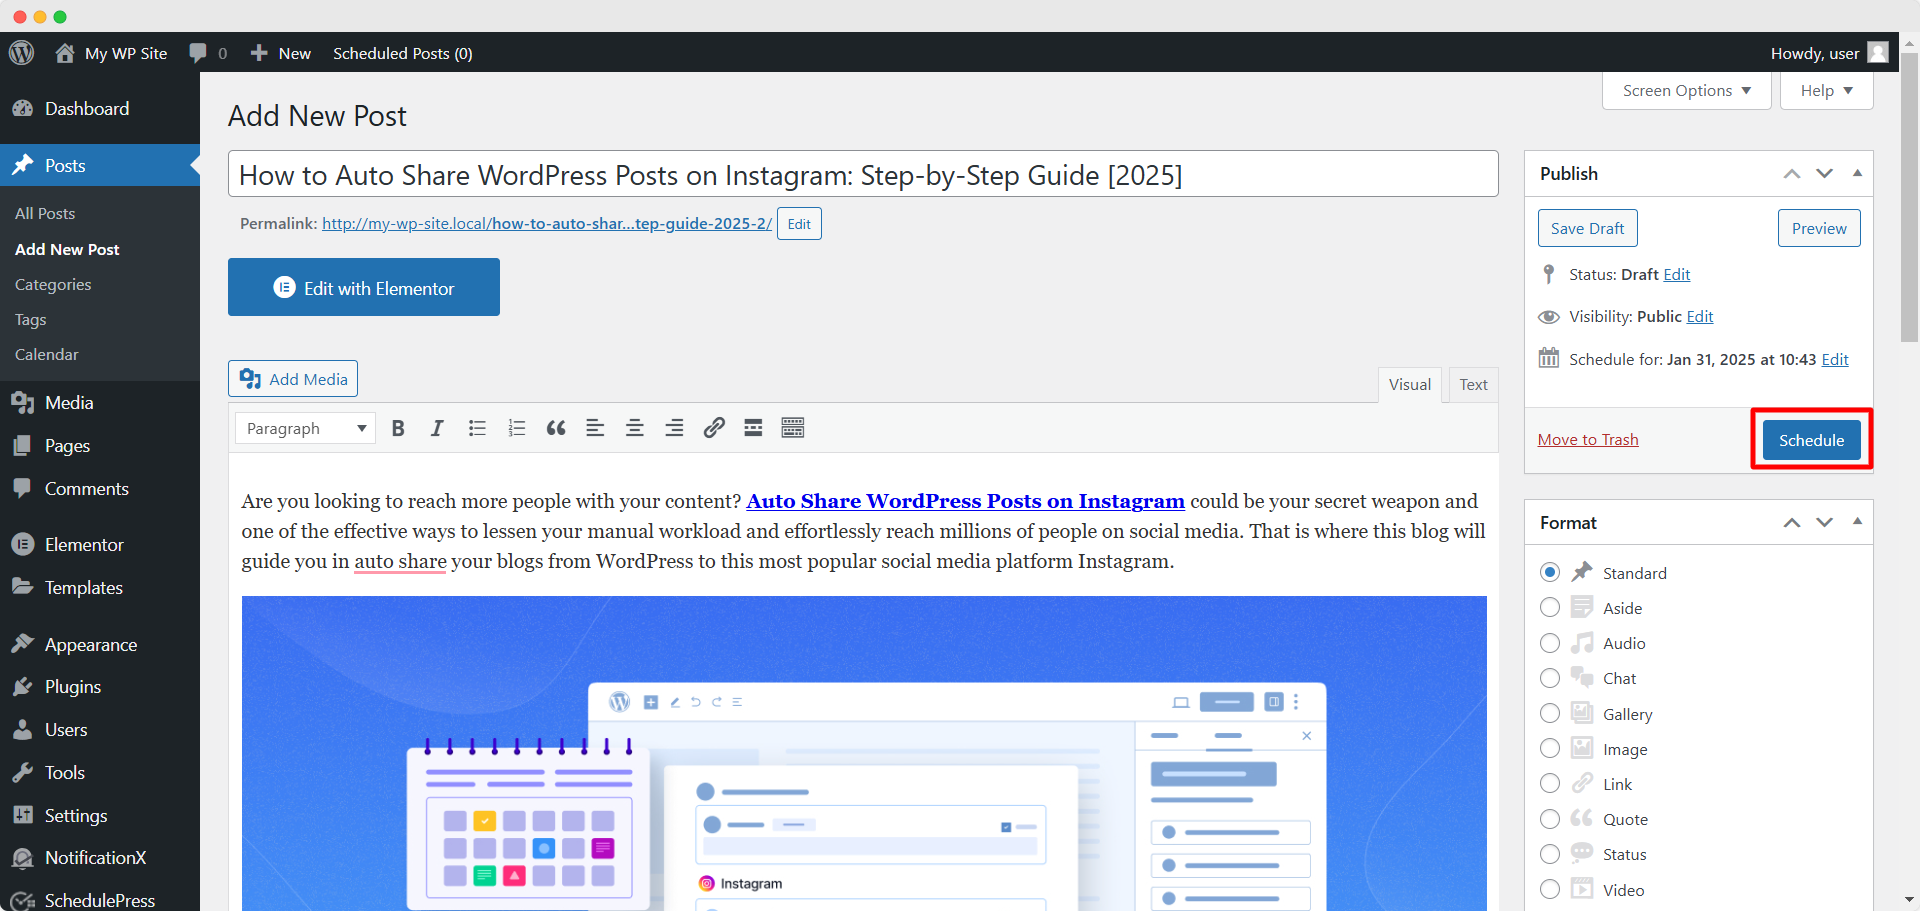
Next, click on the ‘Schedule’ button in the ‘Publish’ section. Your post will then be immediately published and will display the future date that you have chosen. If you have enabled the ‘Auto-Share upon Publishing’ option, it will be auto-shared on your selected social media platforms.
Final Outcome #
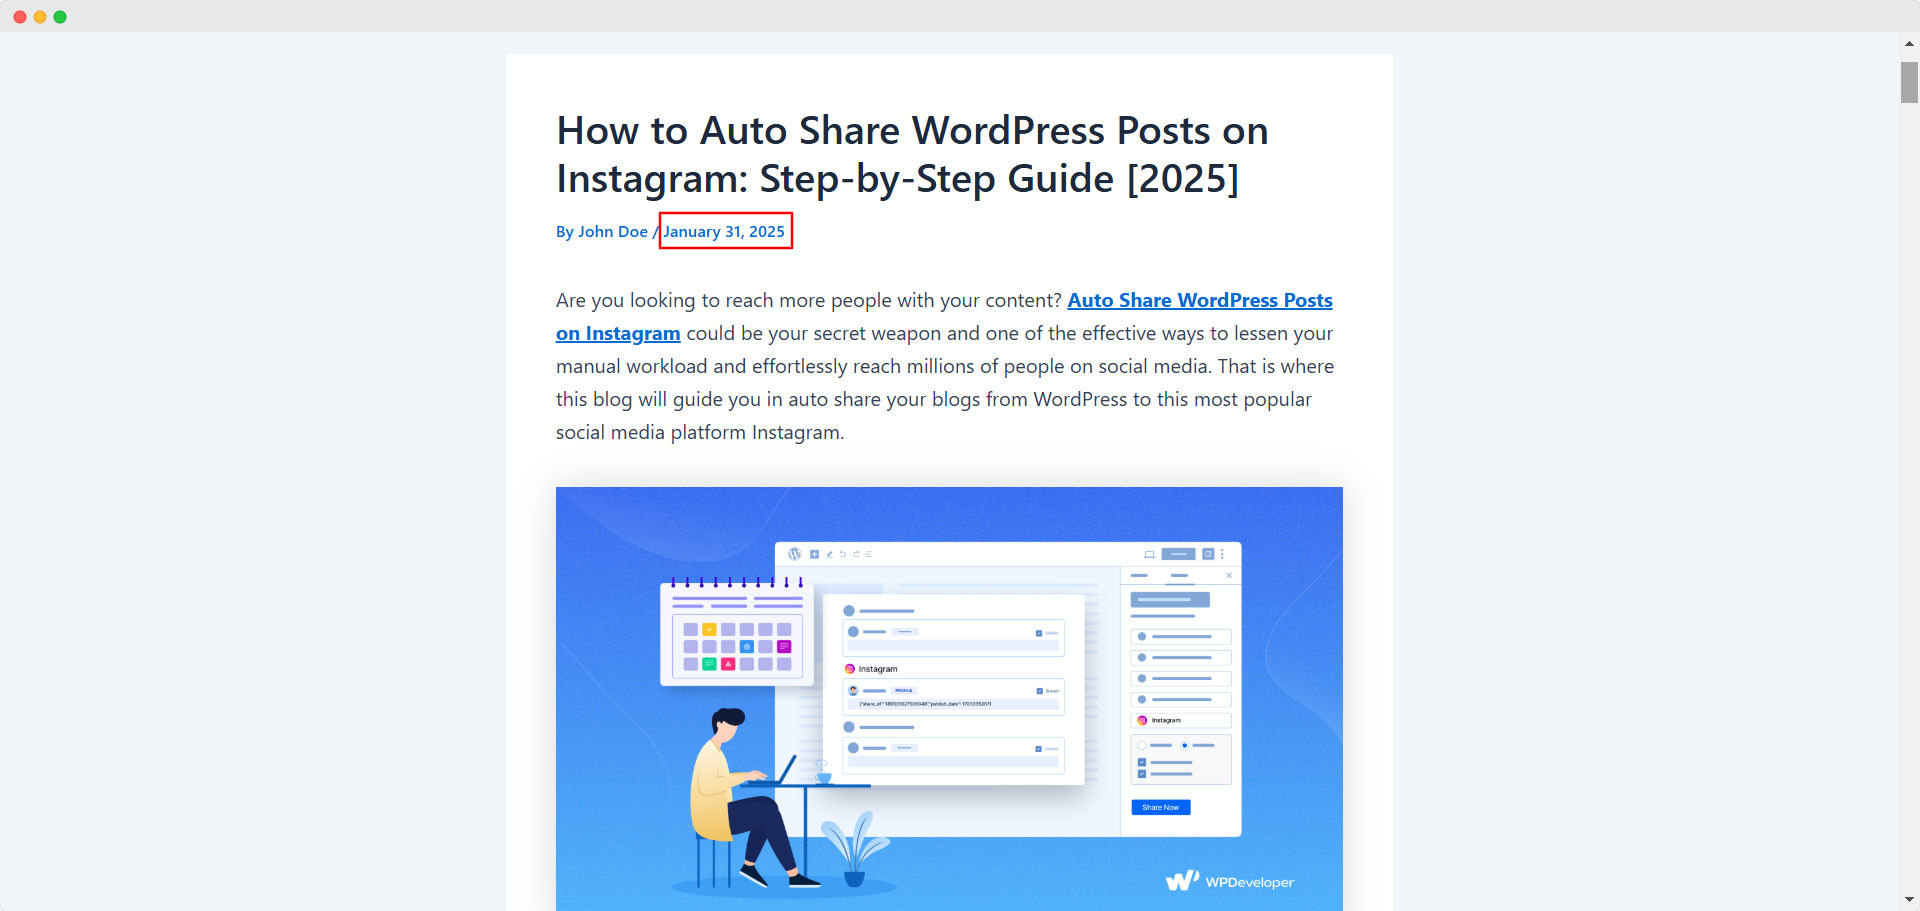
This is what the published post will look like on the front end after using the Enhanced Post Publishing and Sharing Options of SchedulePress. As you can see, the post has been published immediately but is displaying the future date that we have selected.
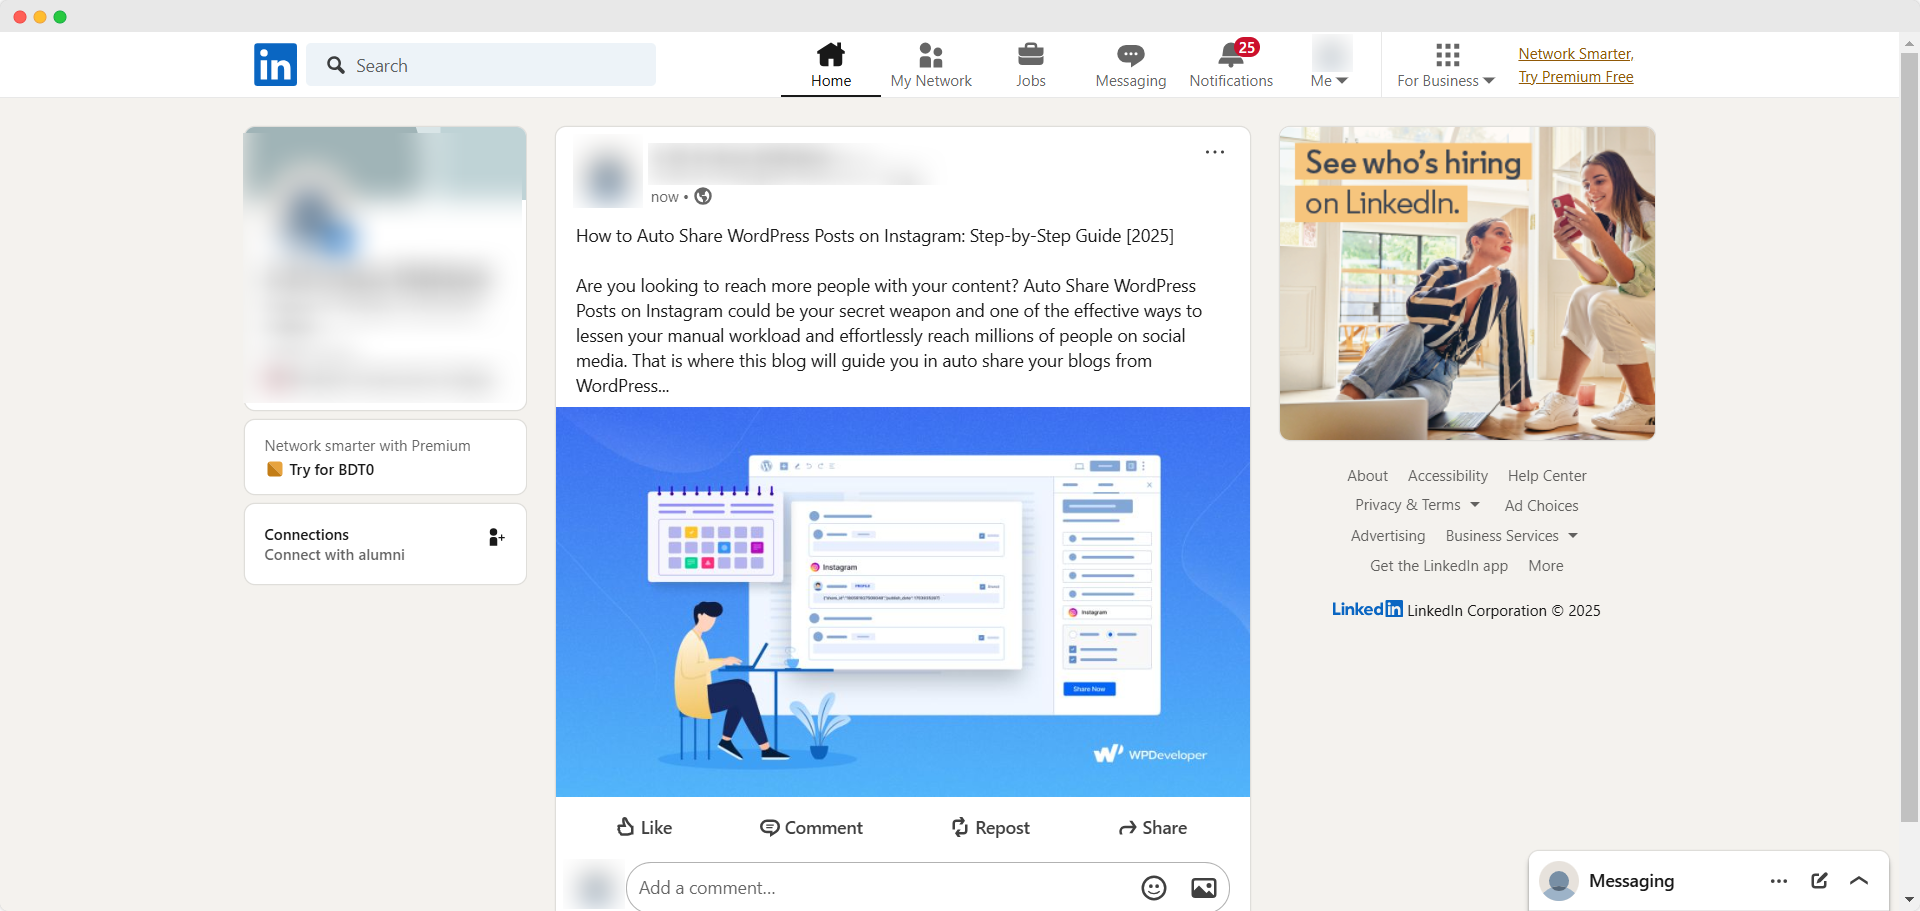
If you have enabled the ‘Auto-Share upon Publishing’ option, the post will also be auto-shared on your selected social media platforms upon publishing. This is what the auto-shared post will look like (we have used LinkedIn in our example):
This is how easily you can configure the Enhanced Post Publishing and Sharing Options of SchedulePress on your WordPress website. Read our documentation to find more useful guides like this one.
Feel free to contact our support team if you face any difficulties.


