Better Payment simplifies the way you handle payments and donations on your Elementor website. It works with common payment methods like Stripe and PayPal. With this plugin, you can easily keep tabs on all your payment records in your WordPress Dashboard.
How To Activate Better Payment License Key? #
To activate Better Payment PRO on your Elementor WordPress site, follow these simple steps below:
Note: Ensure you have Elementor PRO installed and activated on your website. Plus, install and activate the free and pro version of Better Payment on your site.
Step 1: Get Your Better Payment License Key #
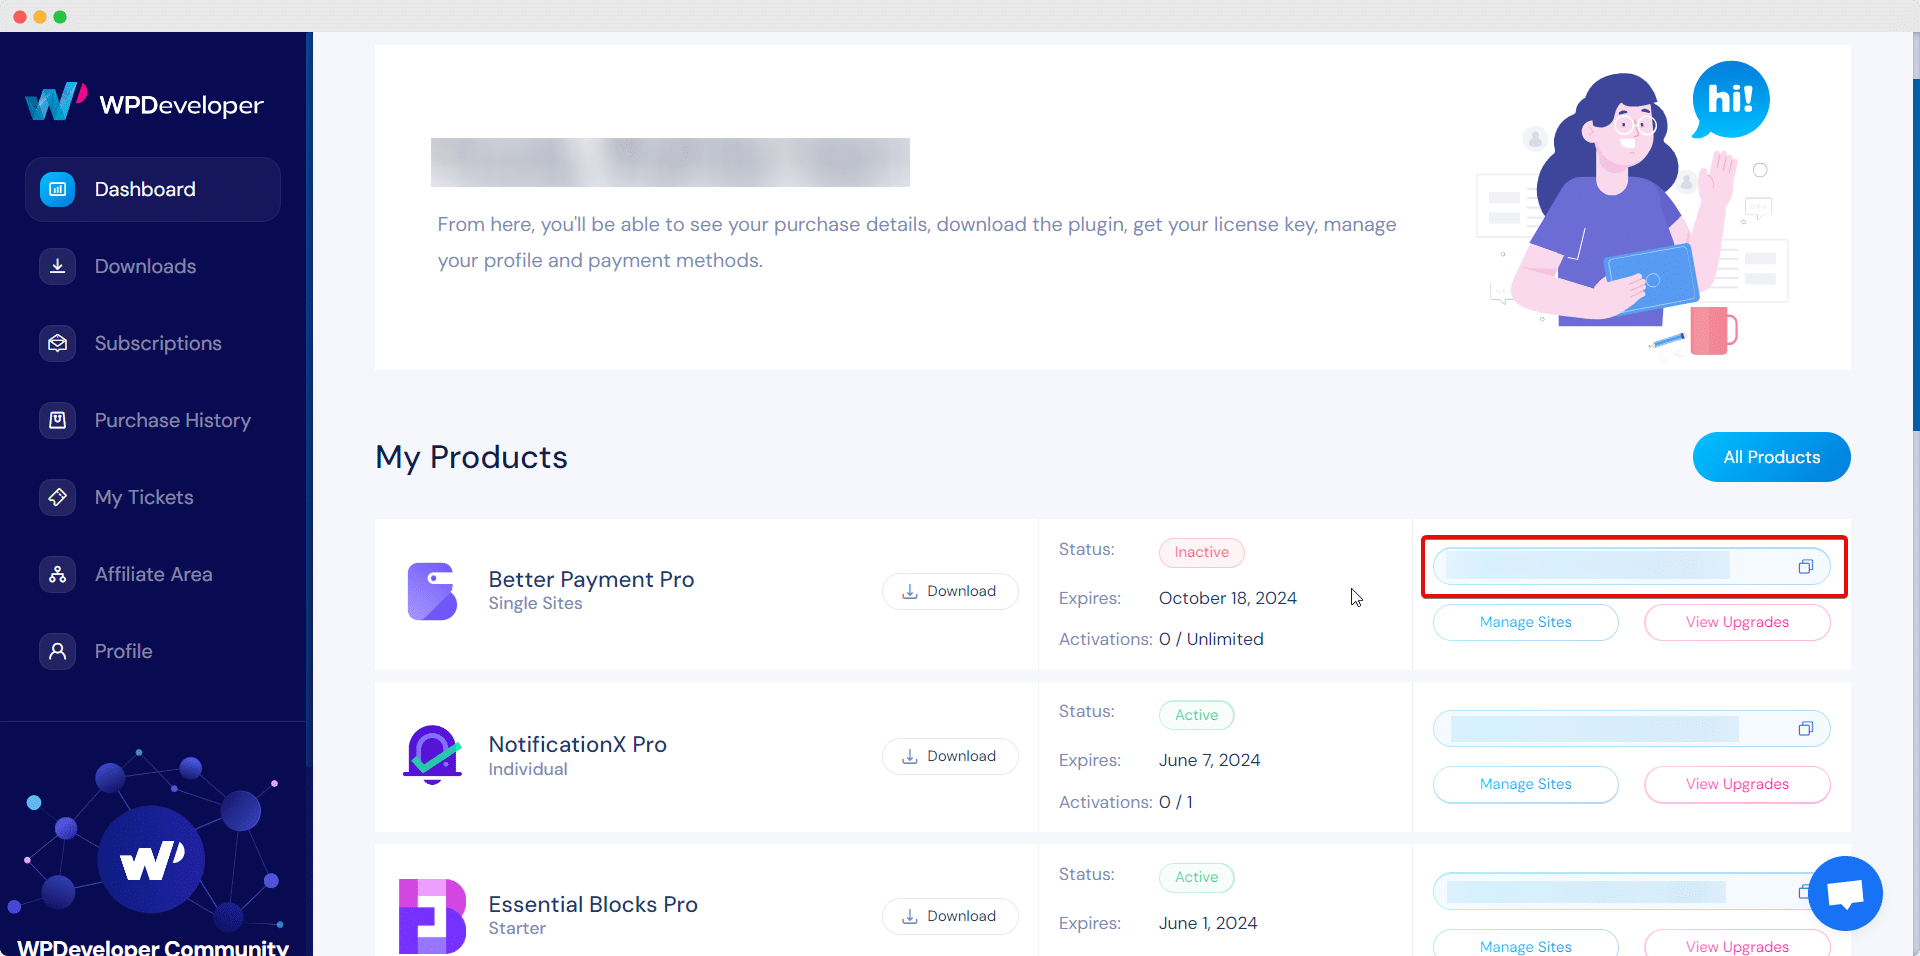
Go to your WPDeveloper Account. Under the ‘My Products’ section, you will be able to see the Better Payment plugin that you have already purchased. Simply just ‘Copy’ the License Key from there.

Step 2: Activate Better Payment License Key #
Now, switch back to your WordPress website & click on Better Payment. Now click on the ‘License’ tab from the resulting page. Then, paste your license key and click on the ‘Activate License‘ button, as shown below.

After you have successfully activated your License Key, this is how the ‘License’ tab is going to look like:

Troubleshooting #
- If you encounter a problem, you’ll notice a message from the administrator that tells you what’s wrong, like “Invalid License” or “License Expired.” This will help you understand the status of your license.
- If you don’t see any activation or error message, try refreshing the page and clearing your browser’s cache if you use a caching plugin. Then, attempt to activate it again.
- If you’re still unable to resolve the issue, don’t worry. Get in touch with our support team, and we’ll help you fix the problem.
This is how you can easily activate the license for Better Payment PRO. If you have any queries, feel free to contact our support team for further assistance.


