SchedulePress allows you to automatically share scheduled WordPress posts on Instagram social profiles. By connecting Instagram with SchedulePress, your posts will automatically be shared on your Instagram business or creator account at the scheduled time. Besides, with its ‘Instant Share’ flexibility, you can share your post anytime you want on Instagram as well.
Moreover, you can now simultaneously share your posts on multiple Instagram accounts by using SchedulePress Pro as well. This feature will come in very handy if you want to grow your social media presence and give your brand some much-needed exposure. Follow the guidelines below to share scheduled posts of WordPress on your Instagram profile.
Step 1: Set Up Facebook App for Instagram Integration #
To connect your WordPress site with Instagram, you first need to create and set up a Facebook Developer App properly.
Create And Configure a Facebook Developer App #
Go to Meta for Developers and log in with your Facebook account. Click ‘My Apps’ on the top-right corner, then select ‘Create App’.
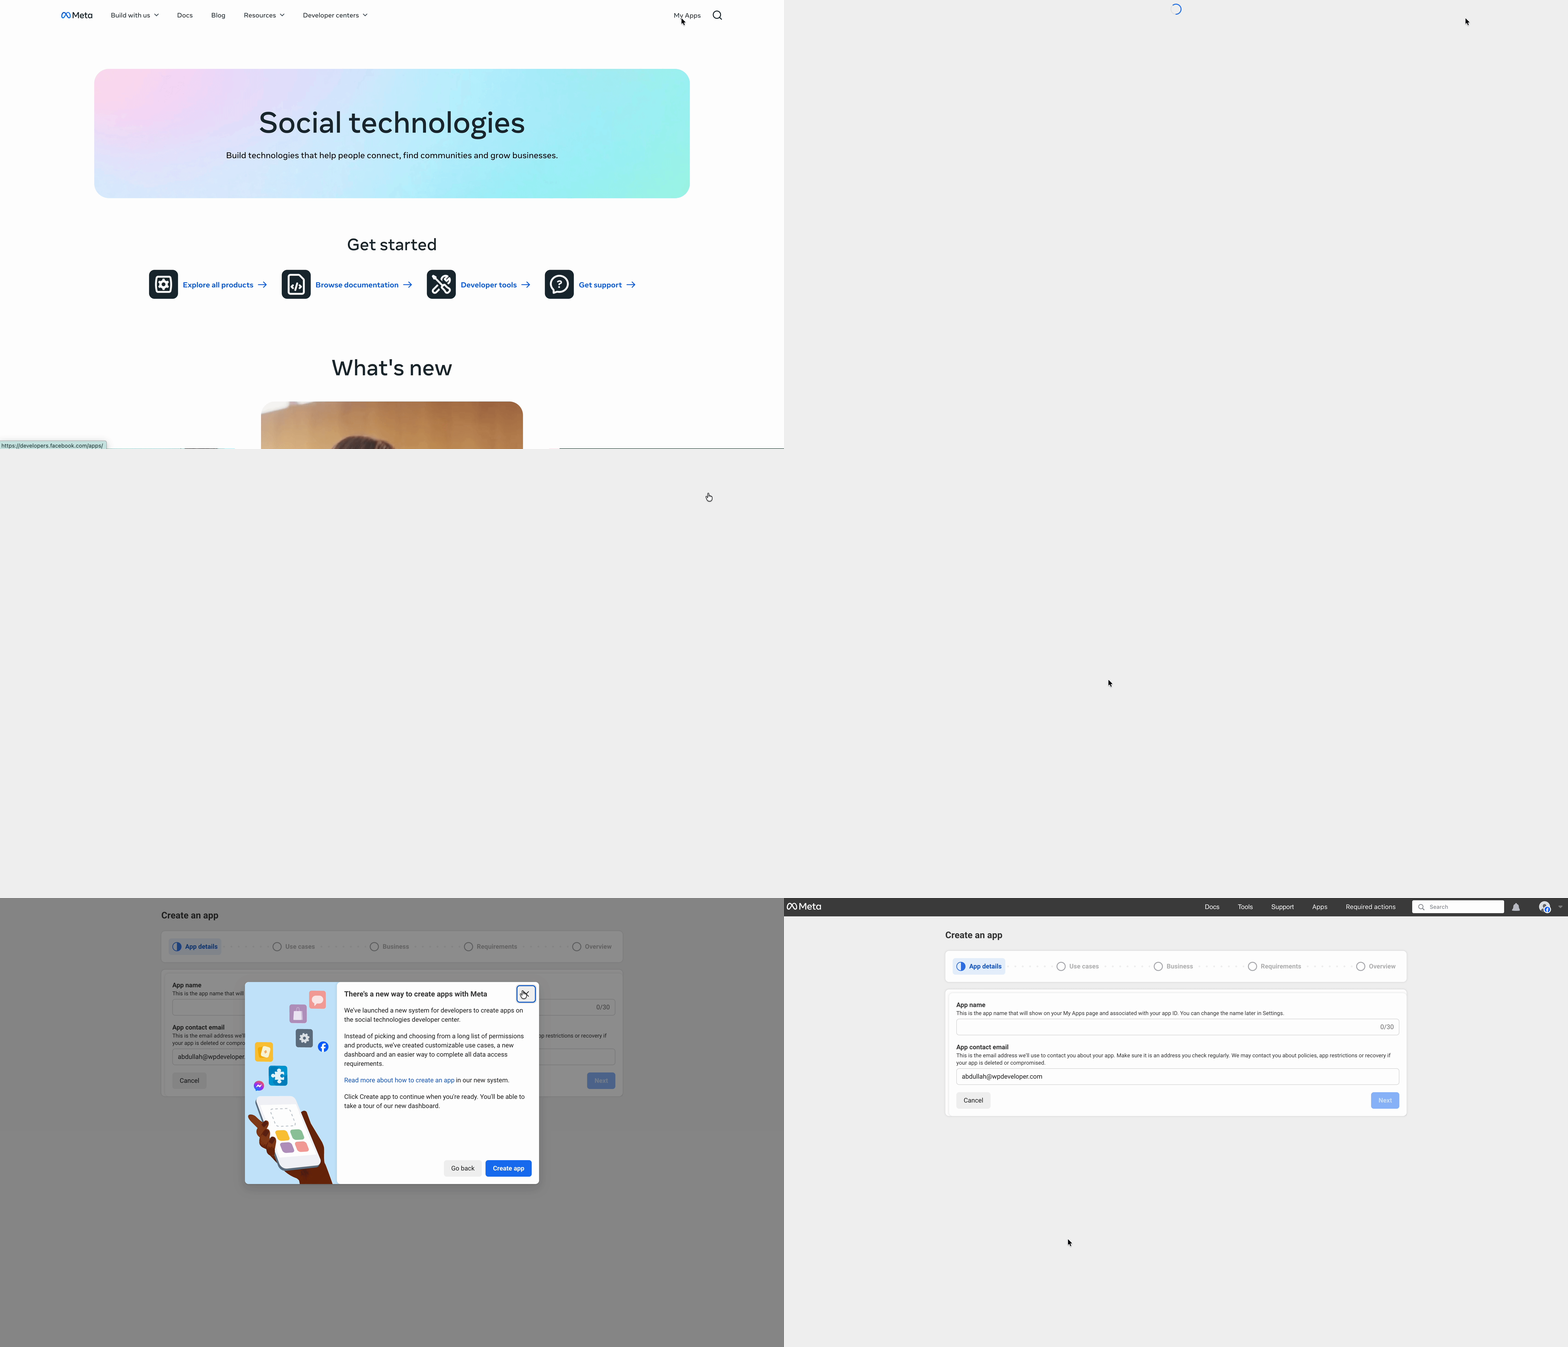
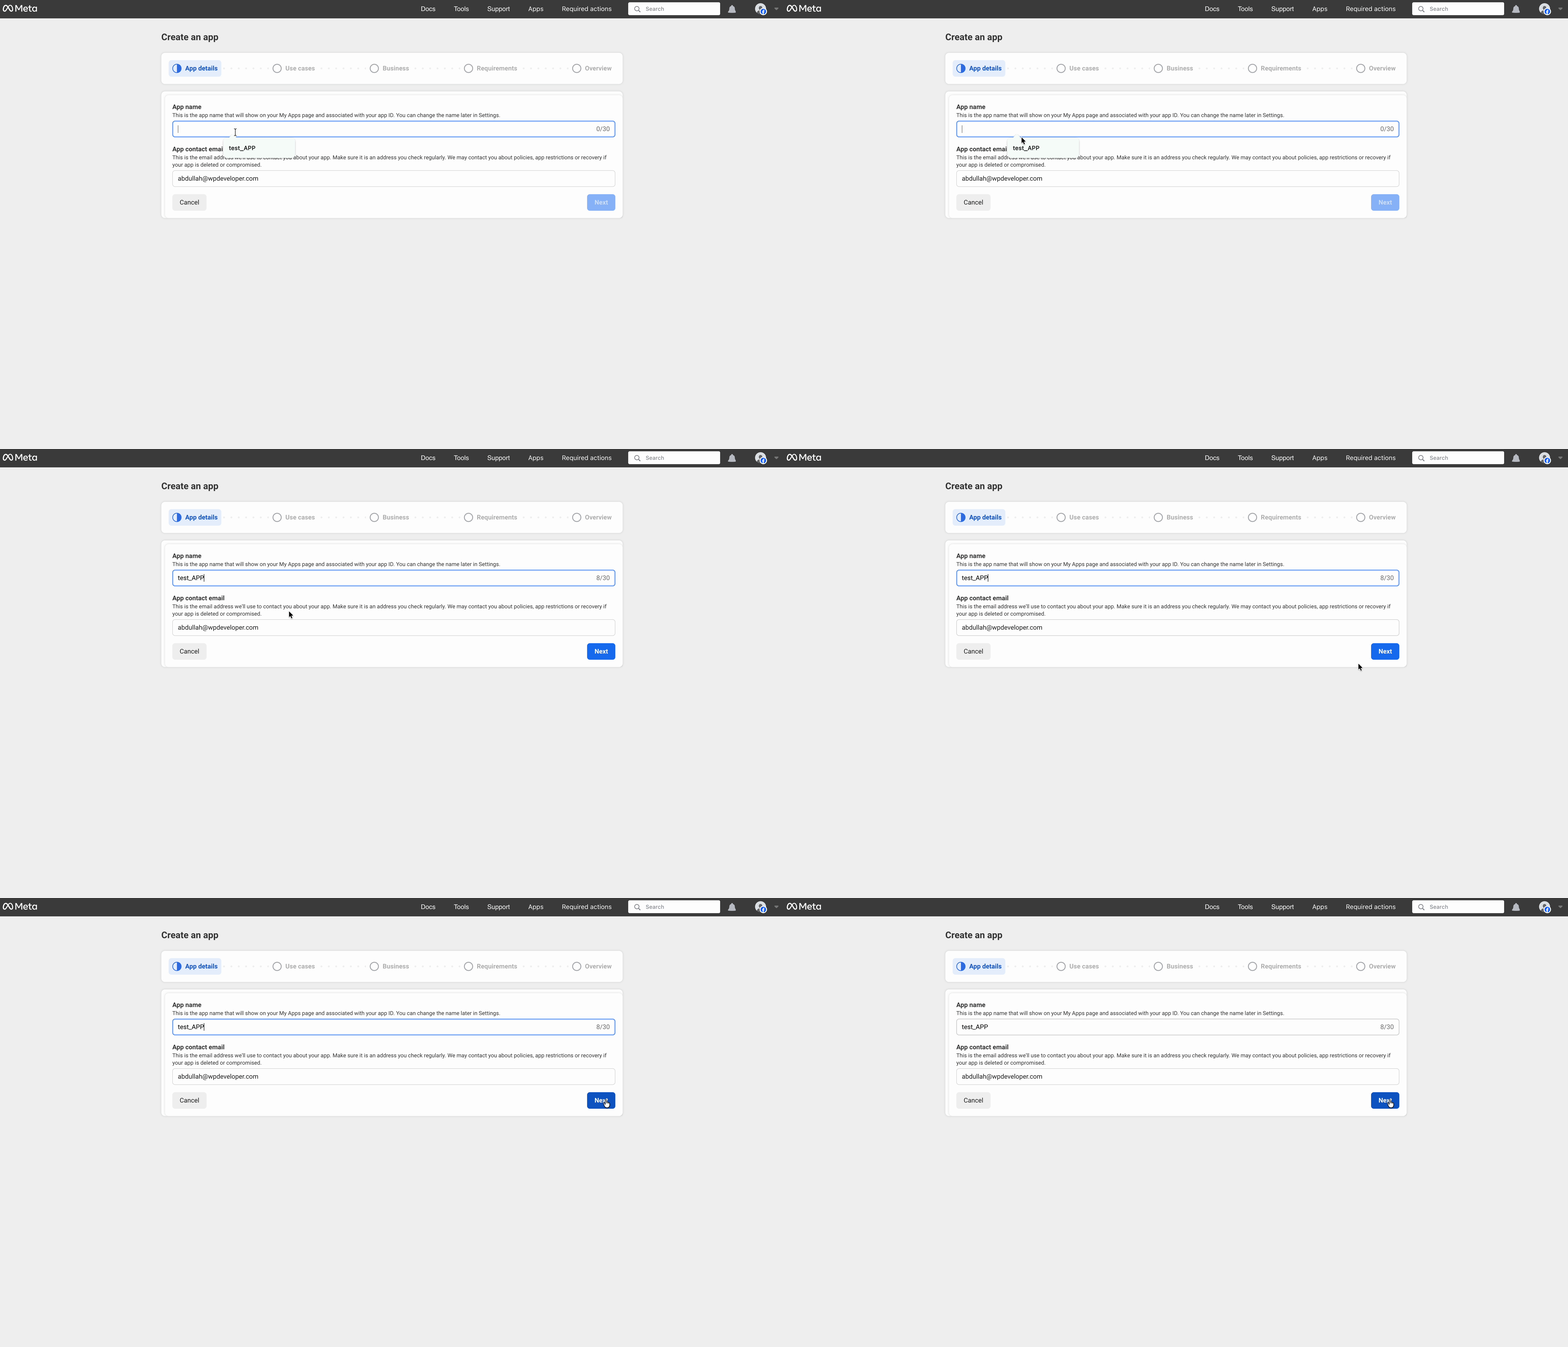
Here, you need to configure app details, such as App name and App contact email. Once done, hit the ‘Next’ button.
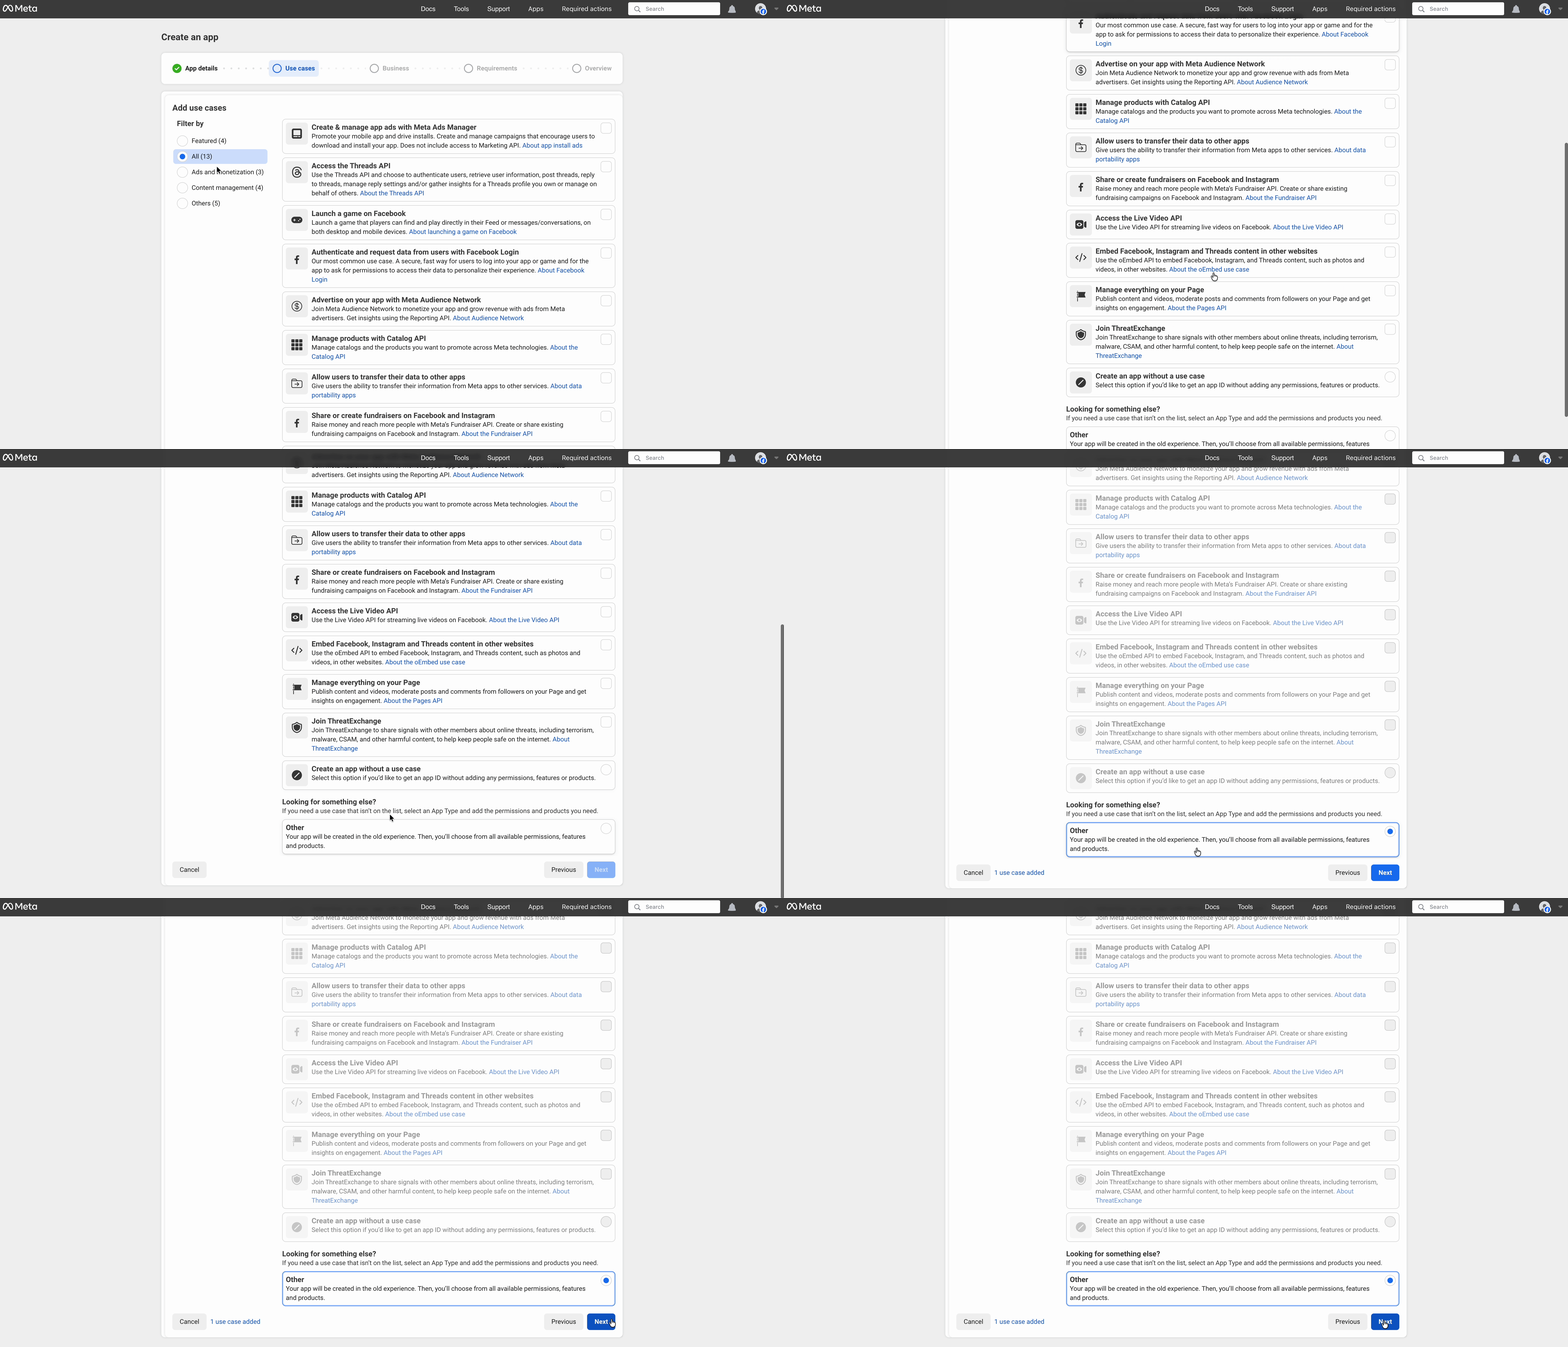
Now, you need to select the use cases of your app. You can filter and choose one from the list of use cases. Here, we have chosen ‘Other’ available under All options.
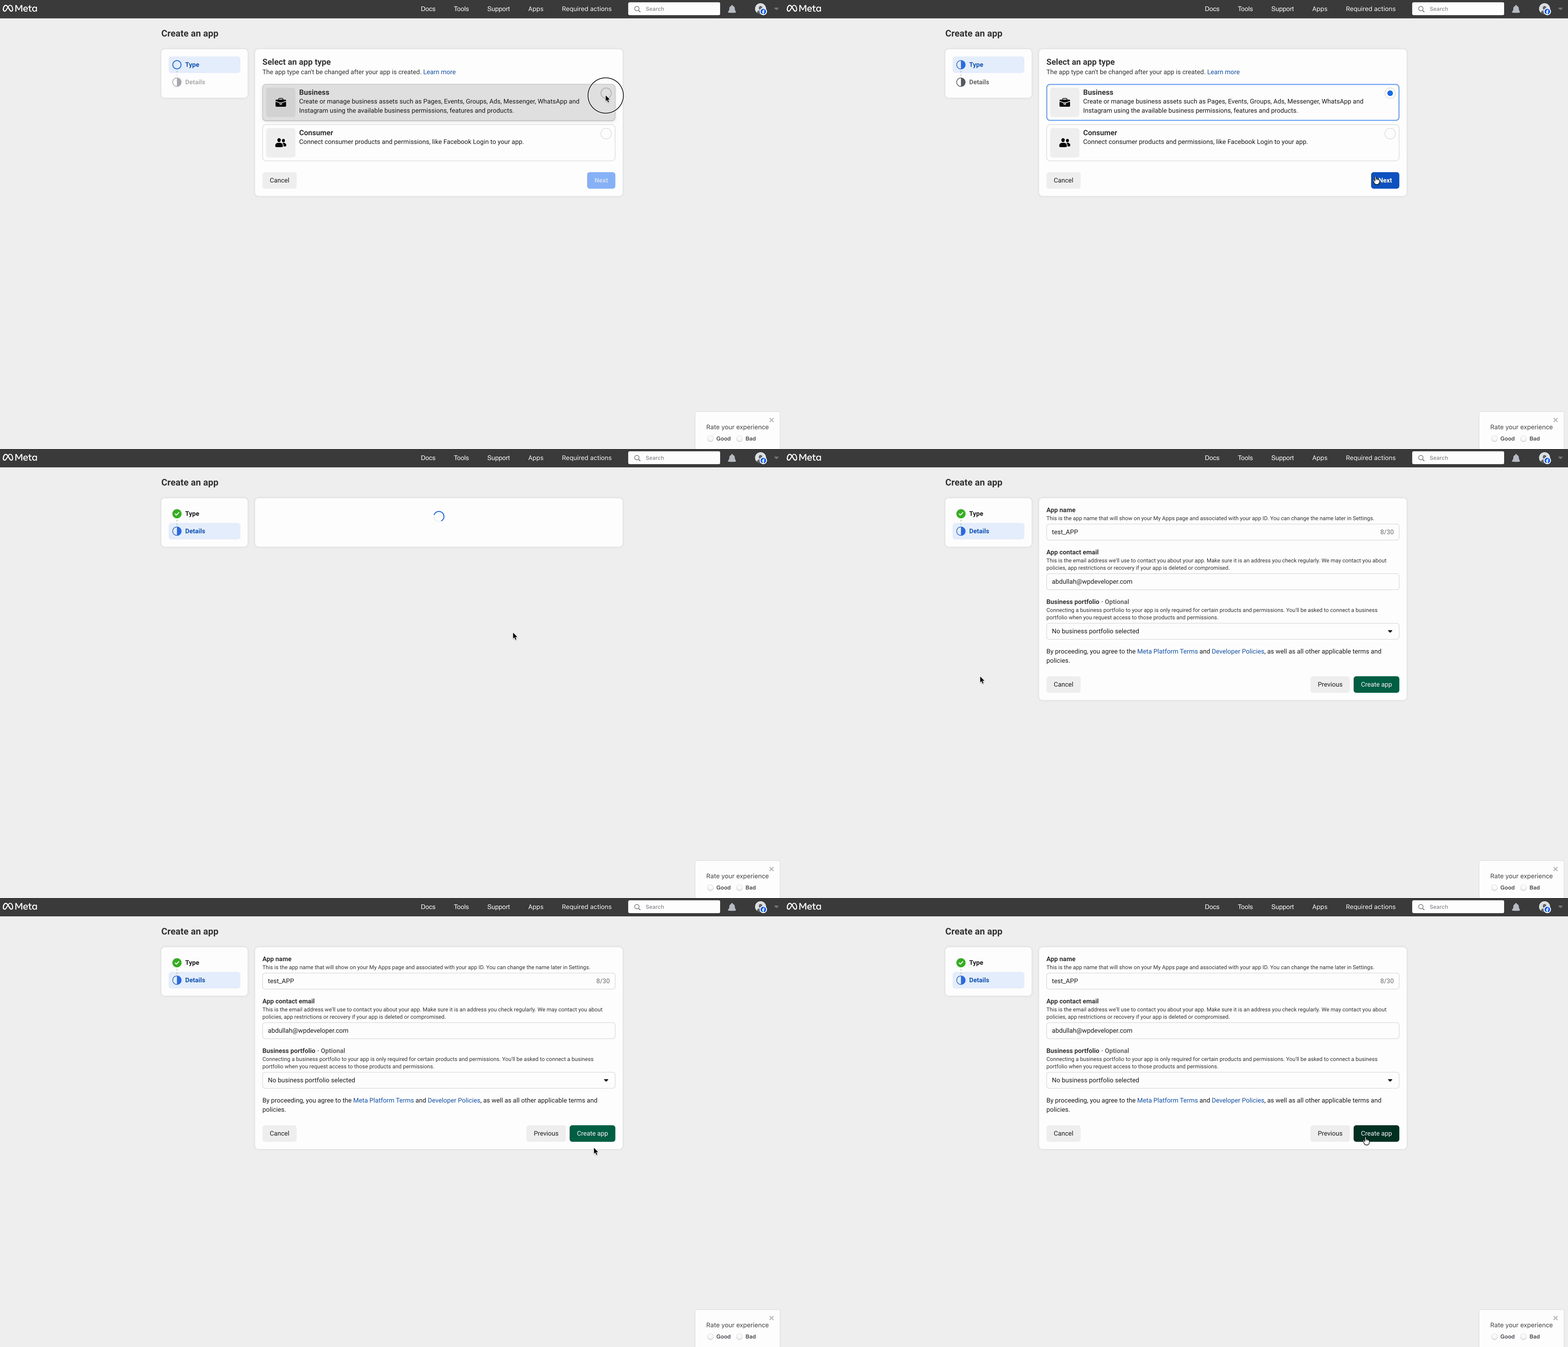
On the next page, select an app type (Business) and confirm the app details. Once done, hit the ‘Create App’ button to create your app.
Instagram Setup #
Once the app is created, you will land on the app dashboard. Scroll down to the ‘Add a Product’ section. Find ‘Instagram’ and click ‘Set Up’ to enable it.

Step 2: Add Instagram Tester And Connect Your Account to SchedulePress #
To complete the integration, you need to add a tester, accept the invitation, and connect your Instagram account to SchedulePress using the App ID and Secret Key.
Add Instagram Tester #
In the Facebook Developer Console, go to: App Roles > Roles. Add yourself or another Instagram user as an Instagram Tester. Enter the Instagram username you want to share posts from.

Accept Tester Invitation #
Log in to the specified Instagram Account. Go to Settings > Website Permissions.
Accept the Tester Invite.

Set Up Instagram Business Login #
From your WordPress Dashboard, go to: SchedulePress > Settings > Social Profile
Scroll down to Instagram, then click ‘Add New’. Copy the Redirect URL provided.
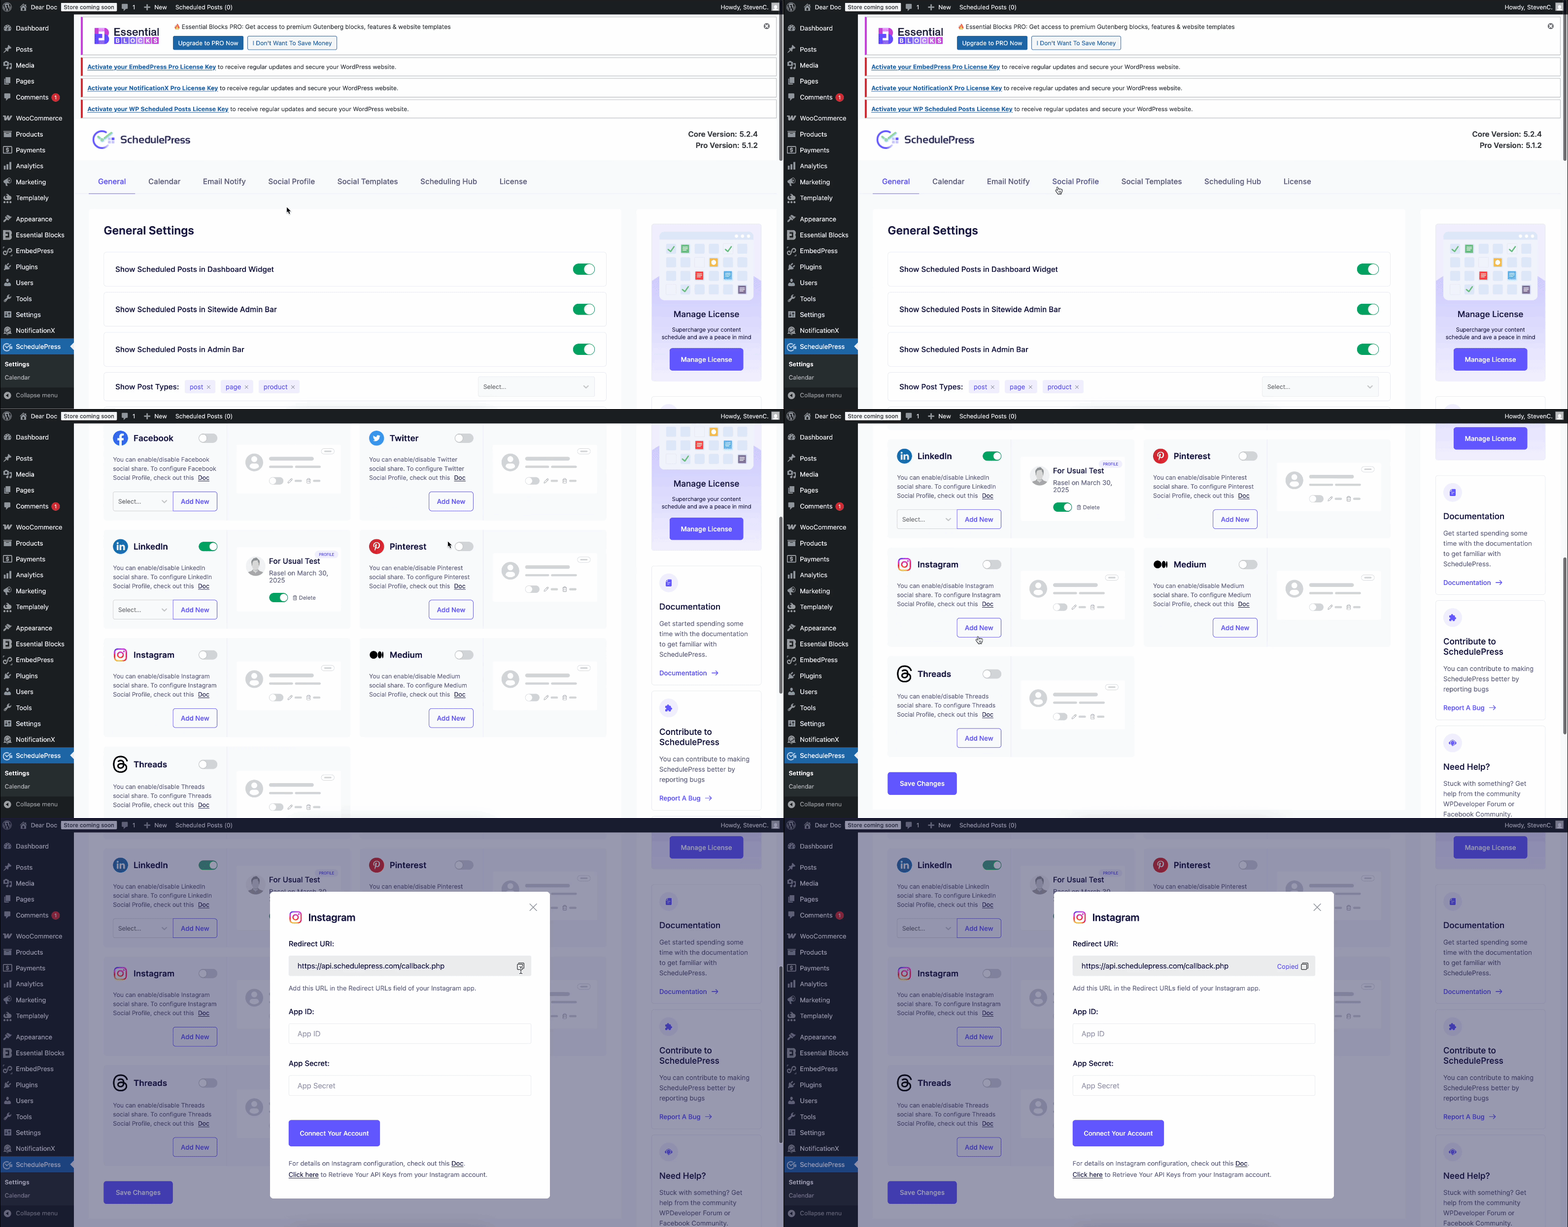
Go back to the Meta Developer Console and paste the copied Redirect URL in the API setup with Instagram Login > Set up Instagram business login Valid section. Click ‘Save’.
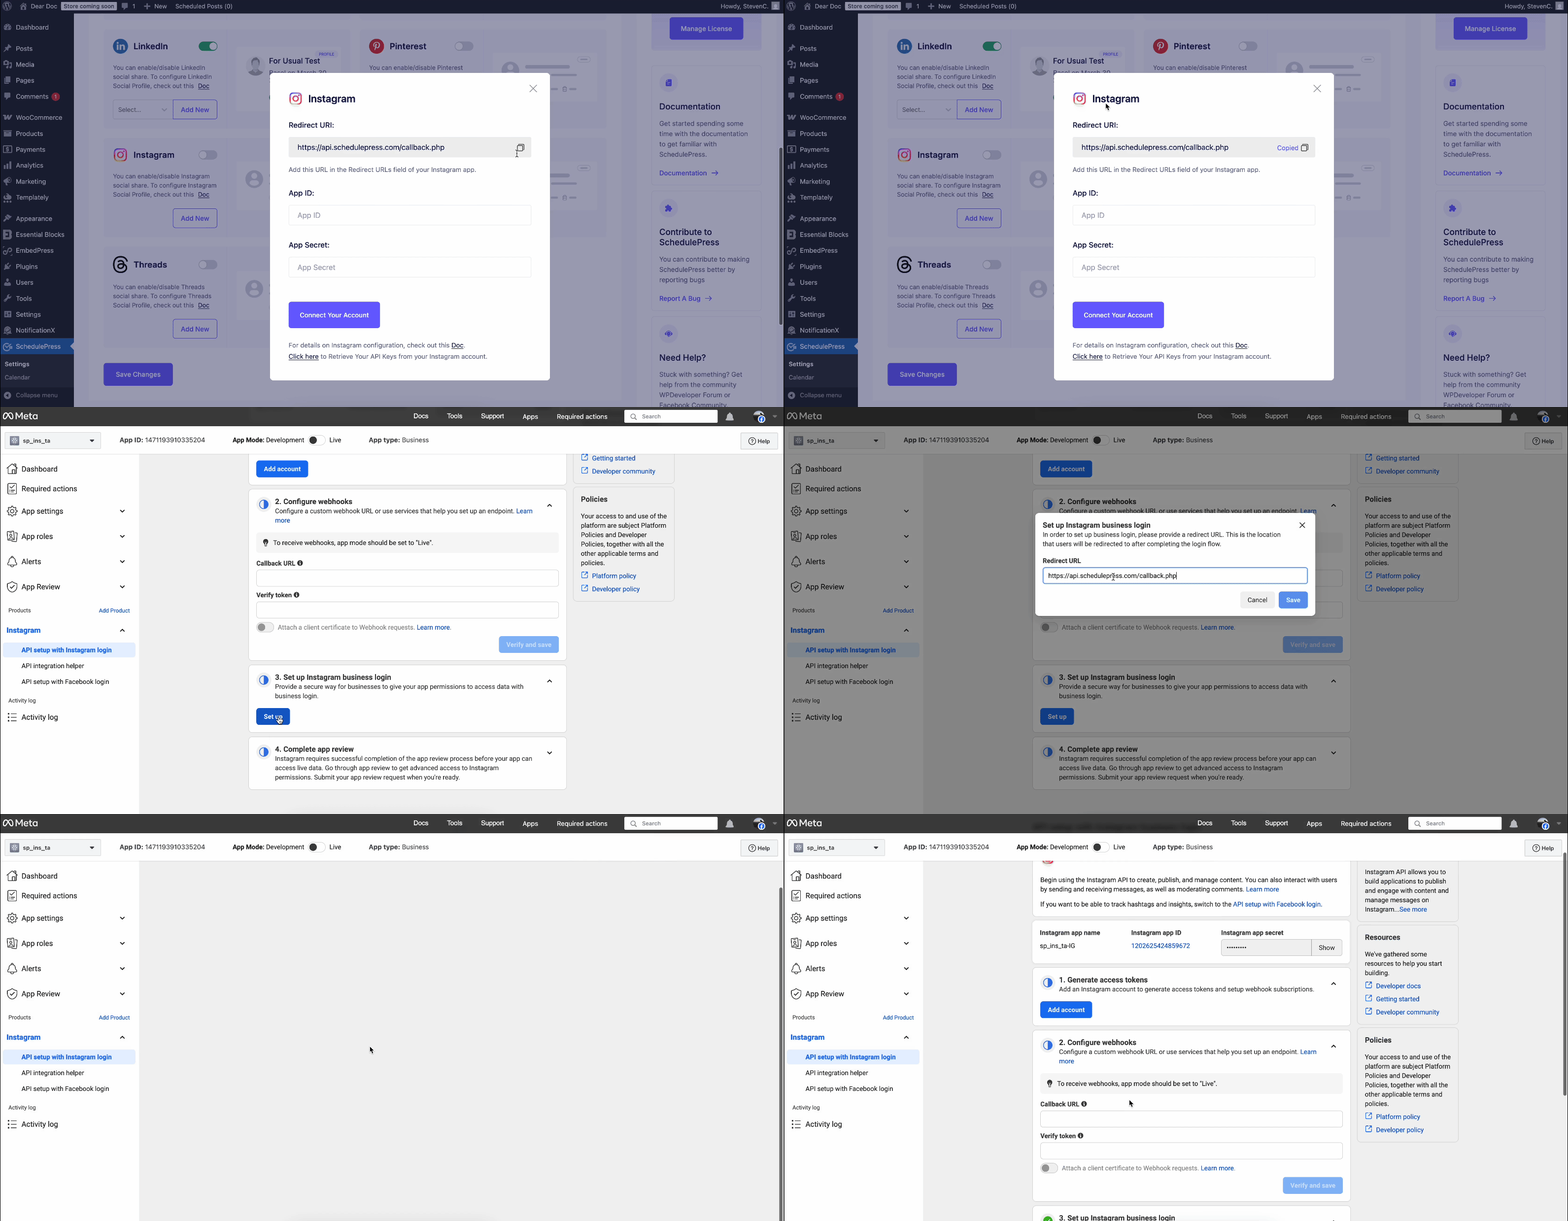
Connect Instagram to SchedulePress #
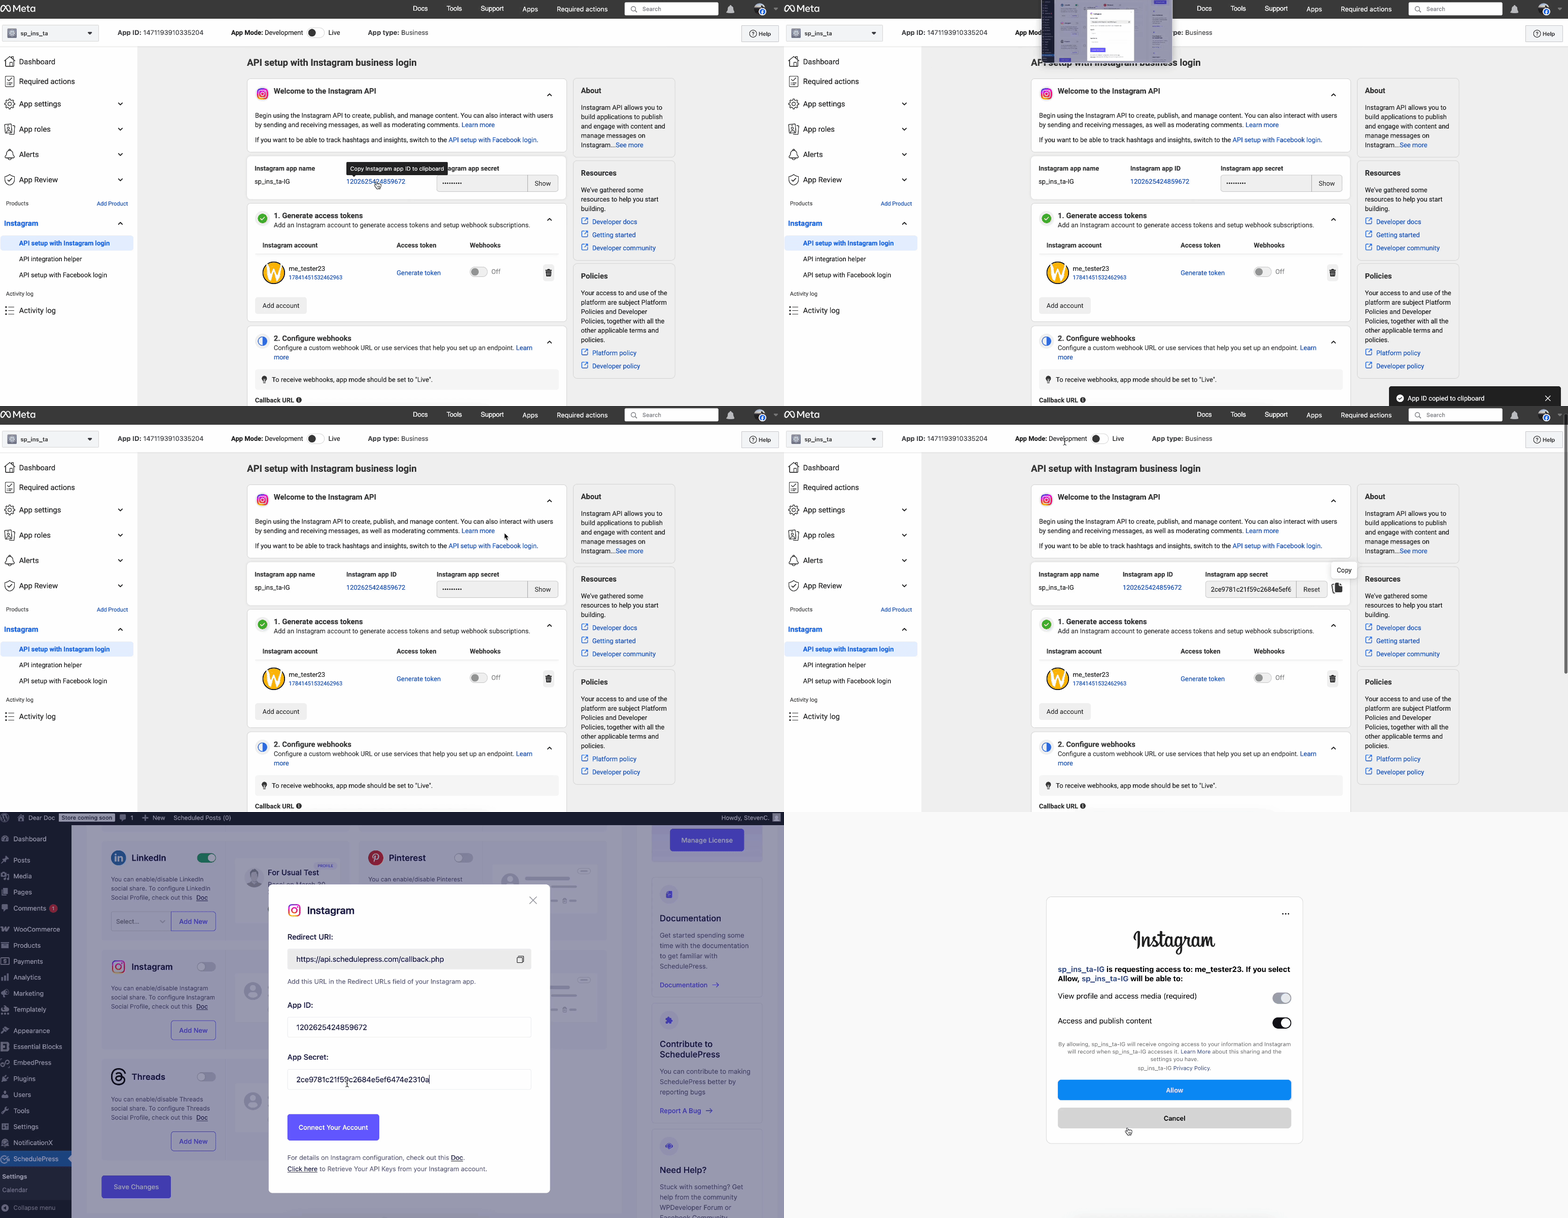
To begin, navigate to the Meta App Dashboard from there, select API Setup with Instagram Login. At the top, you will find your Instagram App ID and Instagram App Secret. Copy both of these, as you will need them to connect your Instagram account to SchedulePress.
Then, in your WordPress Dashboard, go to: SchedulePress > Social Profile > Instagram
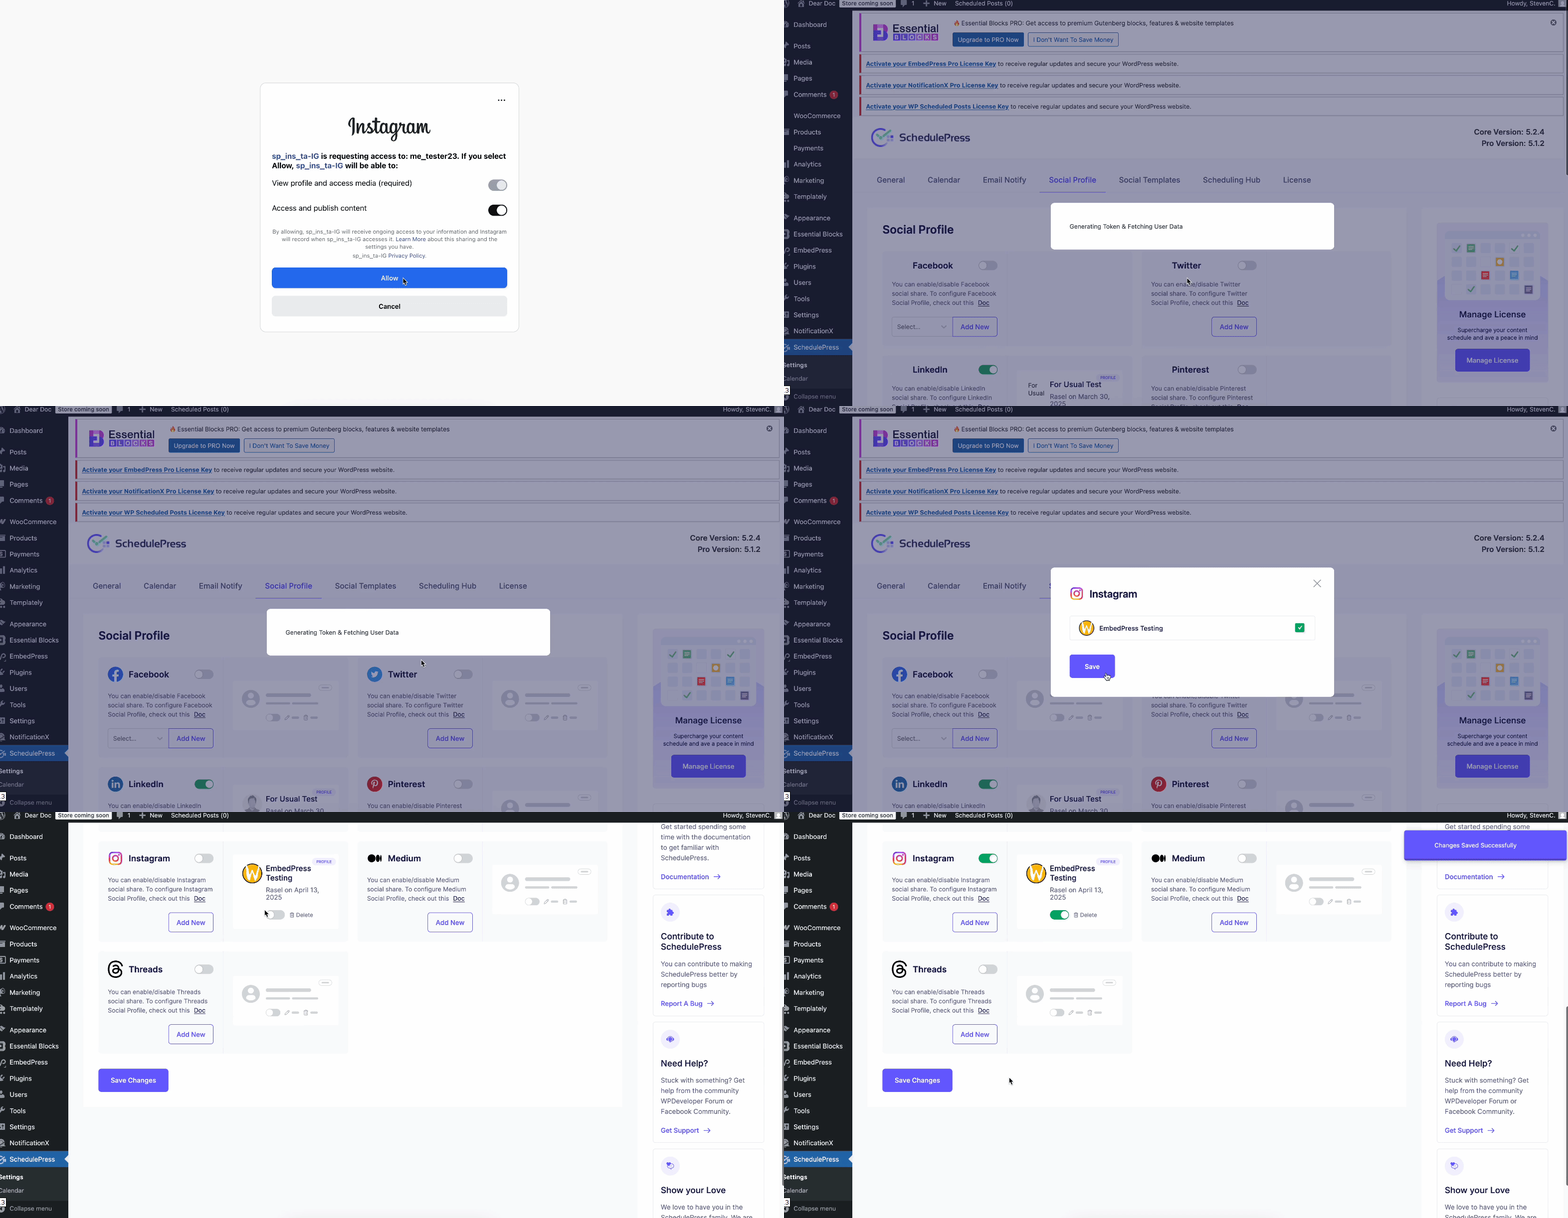
Paste the App ID and App Secret Key. Click Connect and allow access from Instagram.
A popup will show: ‘Generating Tokens & Fetching User Data’. Tick the checkbox on your connected ‘User Profile’ and save it.
Step 3: Now Automatically Share Scheduled WordPress Posts on Instagram #
If you schedule your WordPress post, it will automatically be shared on the Instagram account. Besides, if you want, you can even instantly share your live post on Instagram as well. To do that, go to your post, navigate to ‘Social Share Settings’ and choose ‘Instagram’ social share platform. Simply hit the ‘Share Now’ button and your post will instantly be shared on your Instagram profile. If you want, you can even upload a custom ‘Social Share Banner’ for your Instagram post as well.

Final Outcome #
After all of these previous steps are finished, your scheduled posts of WordPress will be automatically shared on your Instagram account when they go live. This is how it will appear on your Instagram account:

By using SchedulePress, this is how you can instantly share scheduled posts from your WordPress site to your Instagram profile has now become absolute ease.
Getting Stuck? Feel free to contact our Dedicated Support Team for any further assistance.


