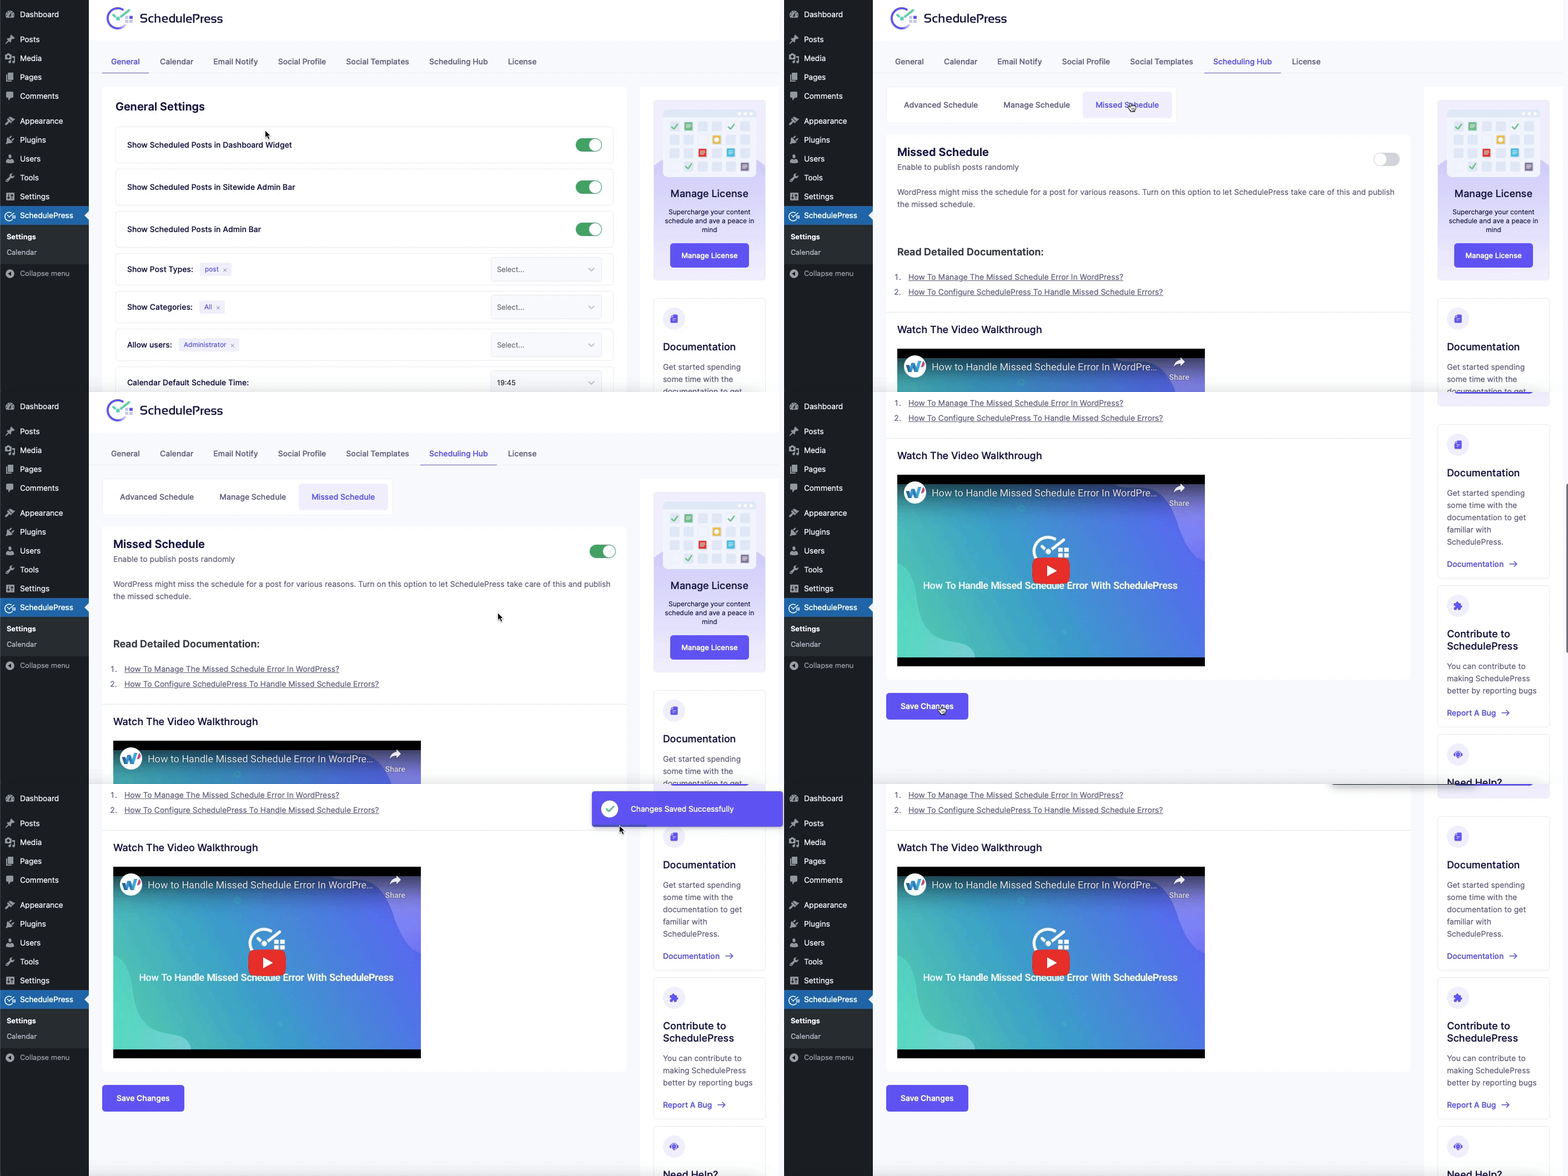
Occasionally WordPress may fail to publish your scheduled posts on time due to various reasons. In this case, you can use SchedulePress PRO to prevent missed scheduled errors with its Missed Schedule Handler feature. Follow these instructions to handle missed schedule errors with the help of SchedulePress.
How To Configure SchedulePress To Handle Missed Schedule Errors #
Step 1: First, make sure that the free version of SchedulePress is installed and activated on your website. Next, you will need to purchase SchedulePress PRO as the Missed Schedule Handler is a premium feature. Check these instructions to install and activate SchedulePress PRO.

Step 2: After installing and activating both the free and premium versions of SchedulePress, go to your WordPress dashboard, navigate to SchedulePress→ Settings, and click on the ‘Scheduling Hub’ tab.
Now, go to the ‘Missed Schedule’ tab and toggle to turn on the feature. Make sure to click on ‘Save Settings’ when you are done.

By following these simple steps you can handle missed schedule errors using SchedulePress and make sure that your content is published on time. If you face any difficulties, feel free to contact our support team or join our Facebook Community.


