
SchedulePress features a centralized Schedule and Share Board that brings your entire publishing workflow and social sharing into a single hub. You can manage publish dates, set up auto-scheduling, handle post lifecycles and customize social media messages all from one place.
This unified approach makes it seamless to prepare your content for publication with just a few clicks in Gutenberg, Elementor and Classic editors.
[Note: Before getting started, make sure you have installed and activated the SchedulePress plugin on your WordPress site.]
Step 1: Open the Schedule And Share Board #
Navigate to your post or page in the Gutenberg editor. On the right-hand sidebar, locate the SchedulePress block and click the Schedule And Share button.
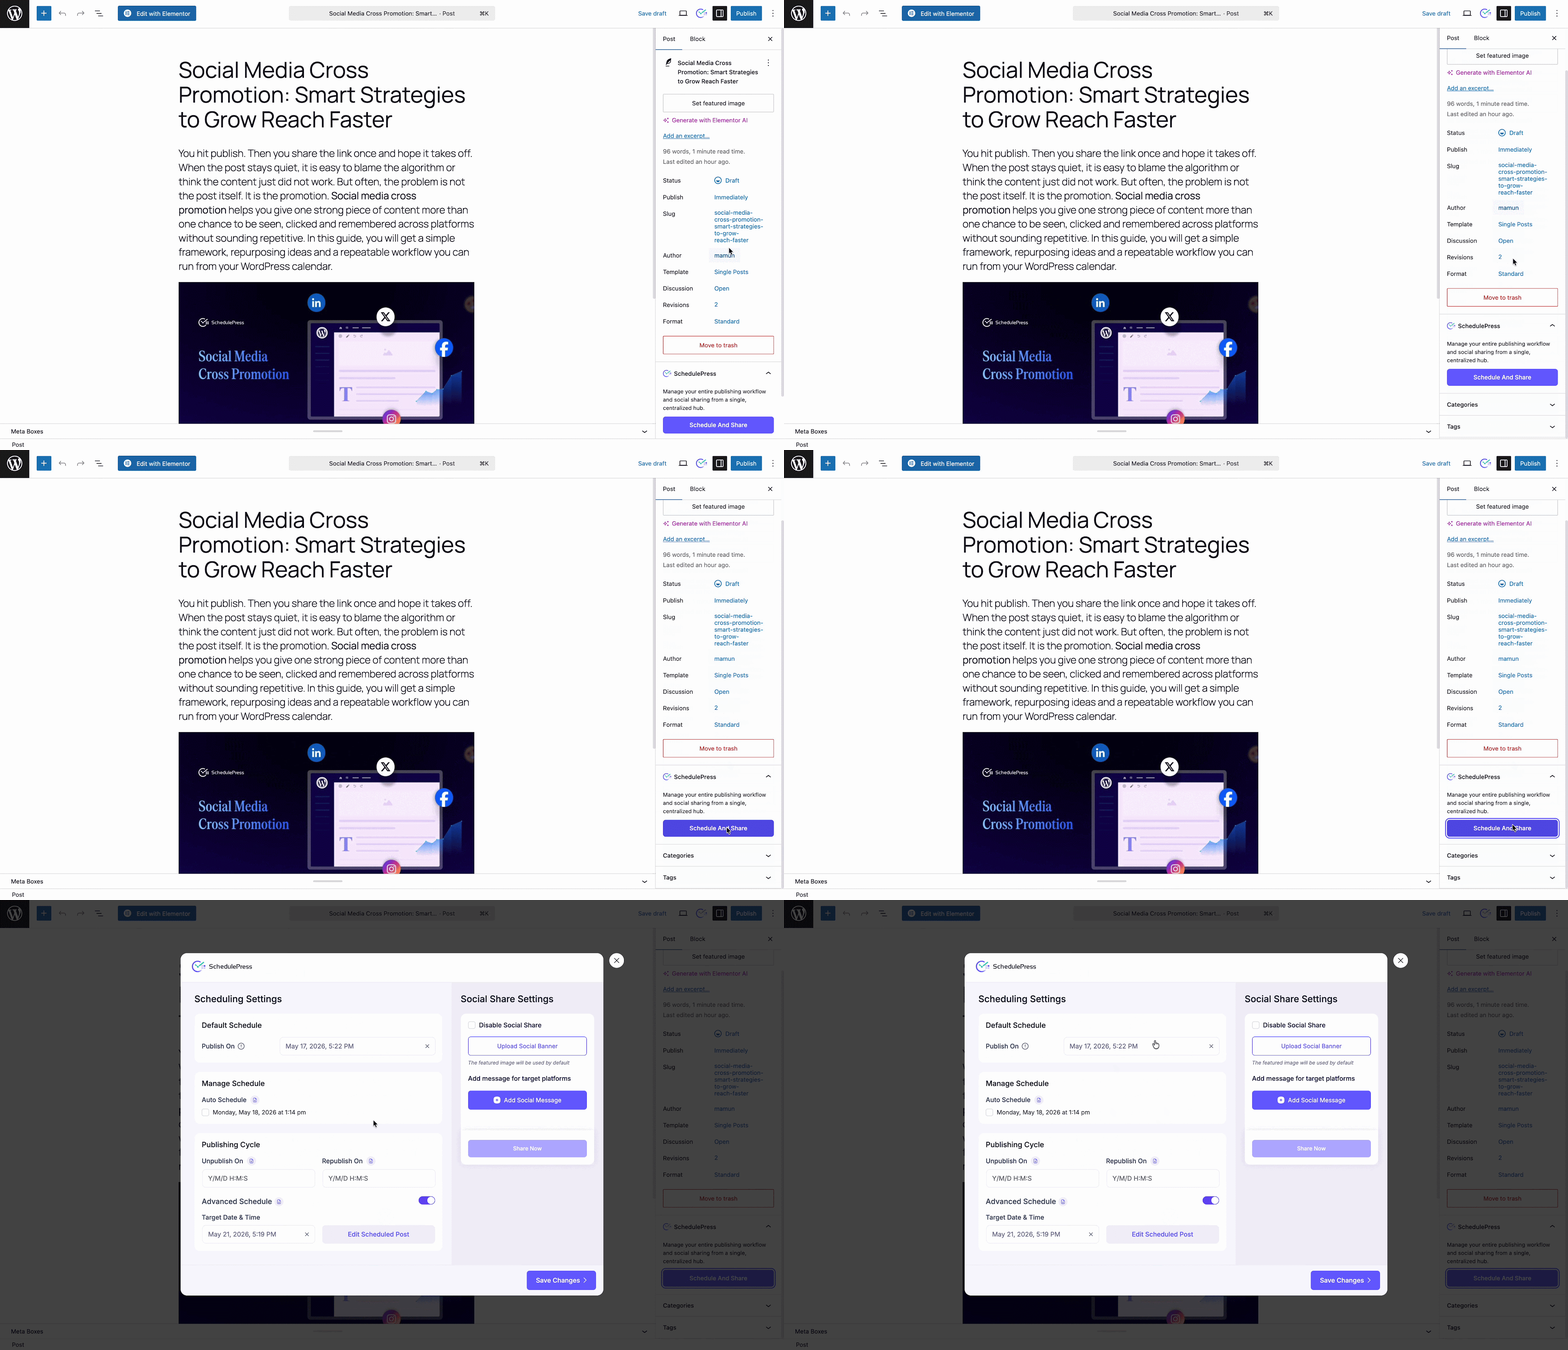
This will instantly launch the Schedule and Share Board as a pop-up over your editor, giving you a full view of your publishing and sharing controls.
Step 2: Configure Your Primary Schedule #
On the left side of the board, you will find your Scheduling Settings. Under the Default Schedule section, you can select the exact date and time for your content to go live.
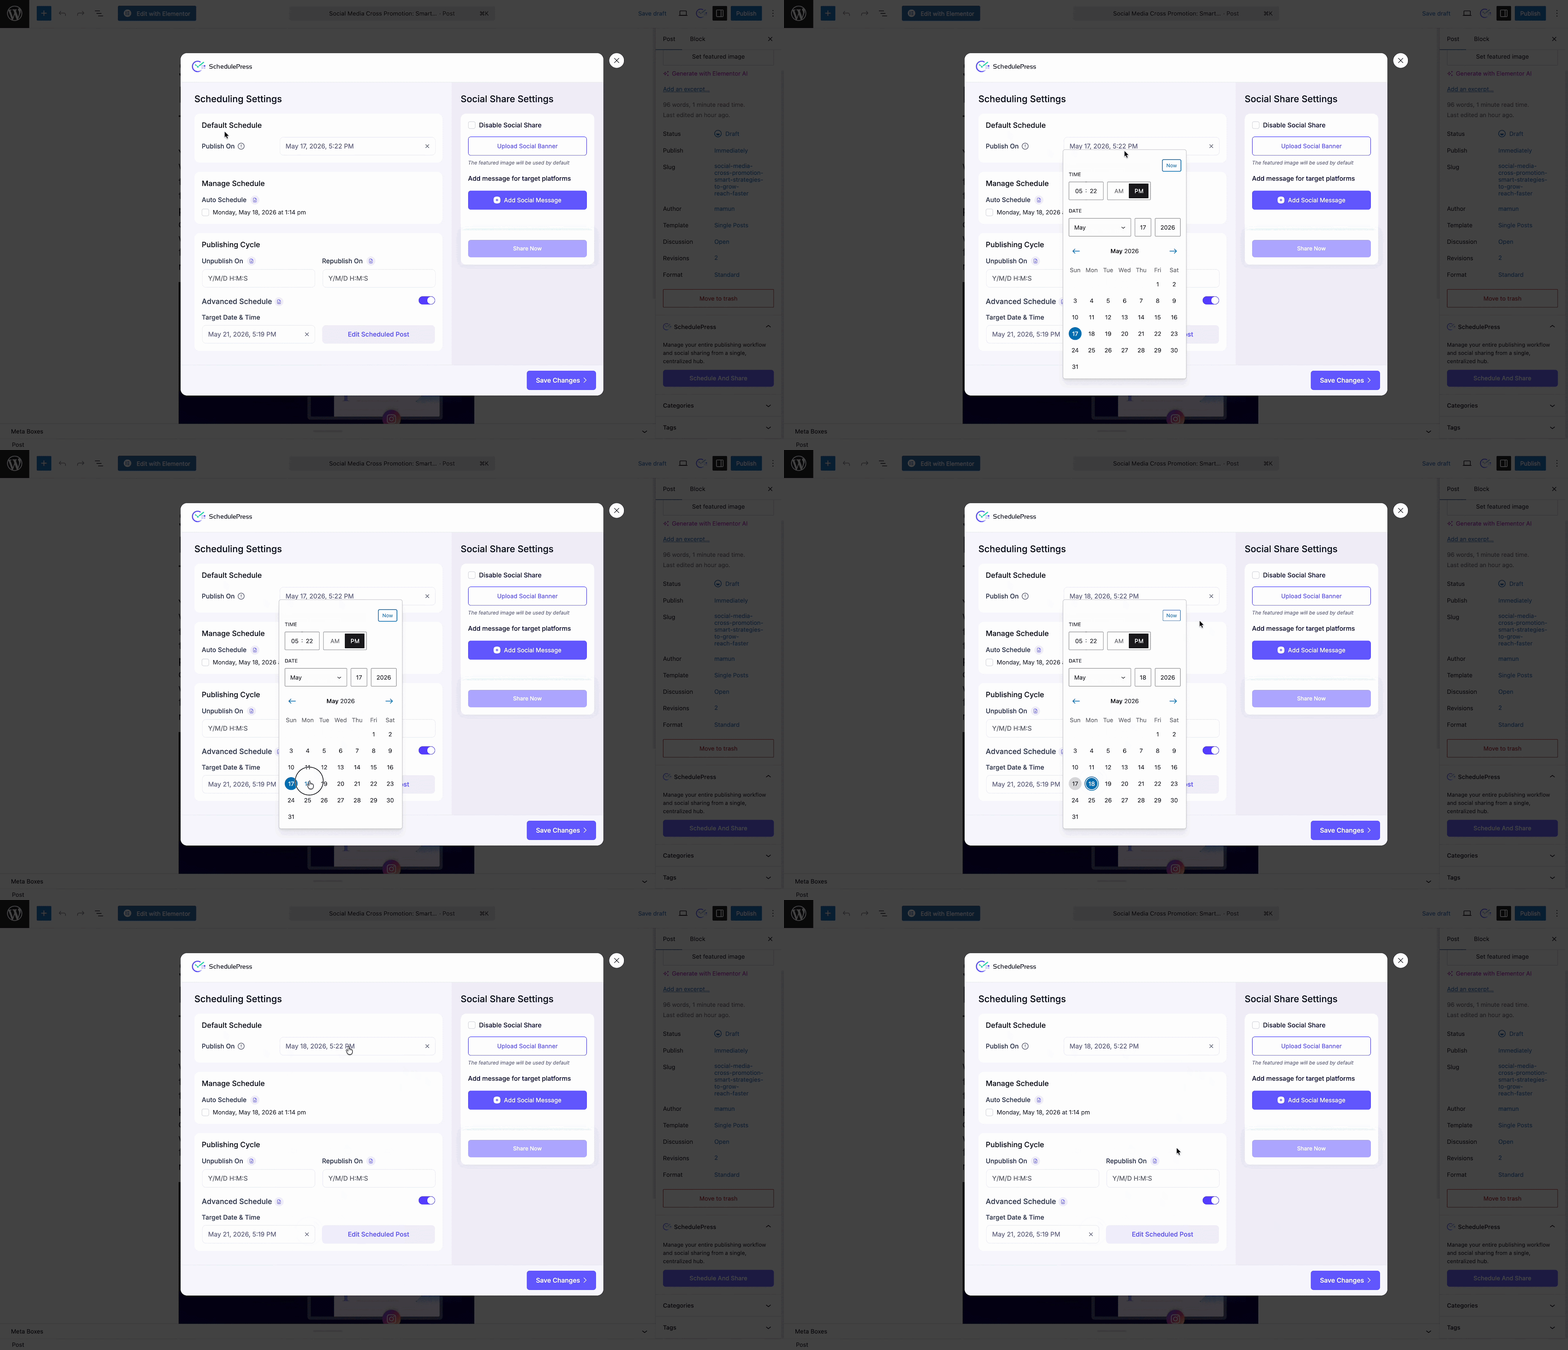
If you have enabled Manage Schedule rules in your global settings, you can also utilize those here.
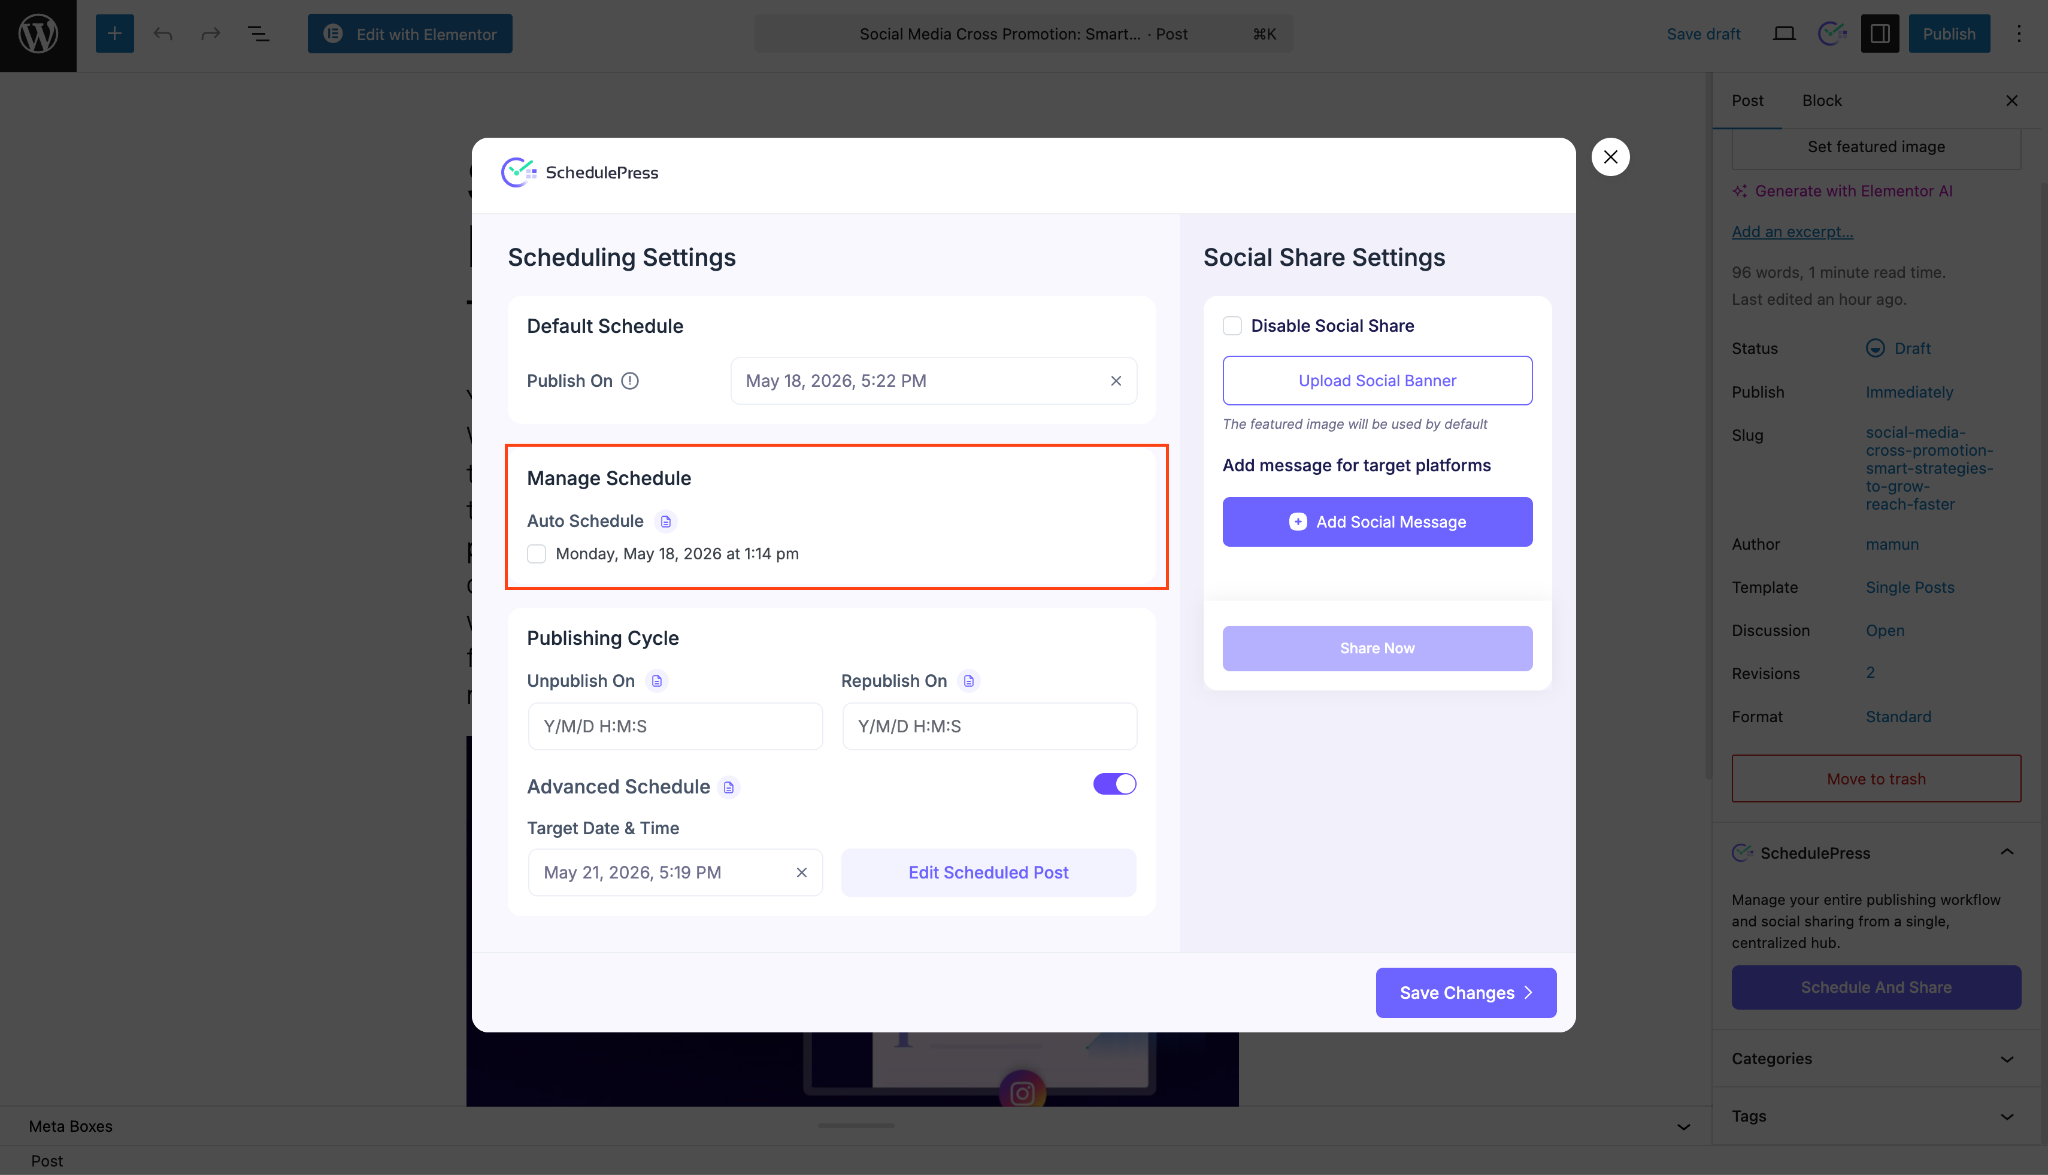
- Auto Schedule: If turned on, the system will automatically slot your post into the next available pre-configured publishing time. However, enabling this will disable manual scheduling.
- Manual Schedule: Select a specific, pre-set time slot from your configured dropdown menu. However, enabling this will disable auto-scheduling.
Step 3: Set Up Your Publishing Cycle #
If you are running a time-sensitive campaign, the Publishing Cycle feature allows you to control exactly when a post is visible to your audience.
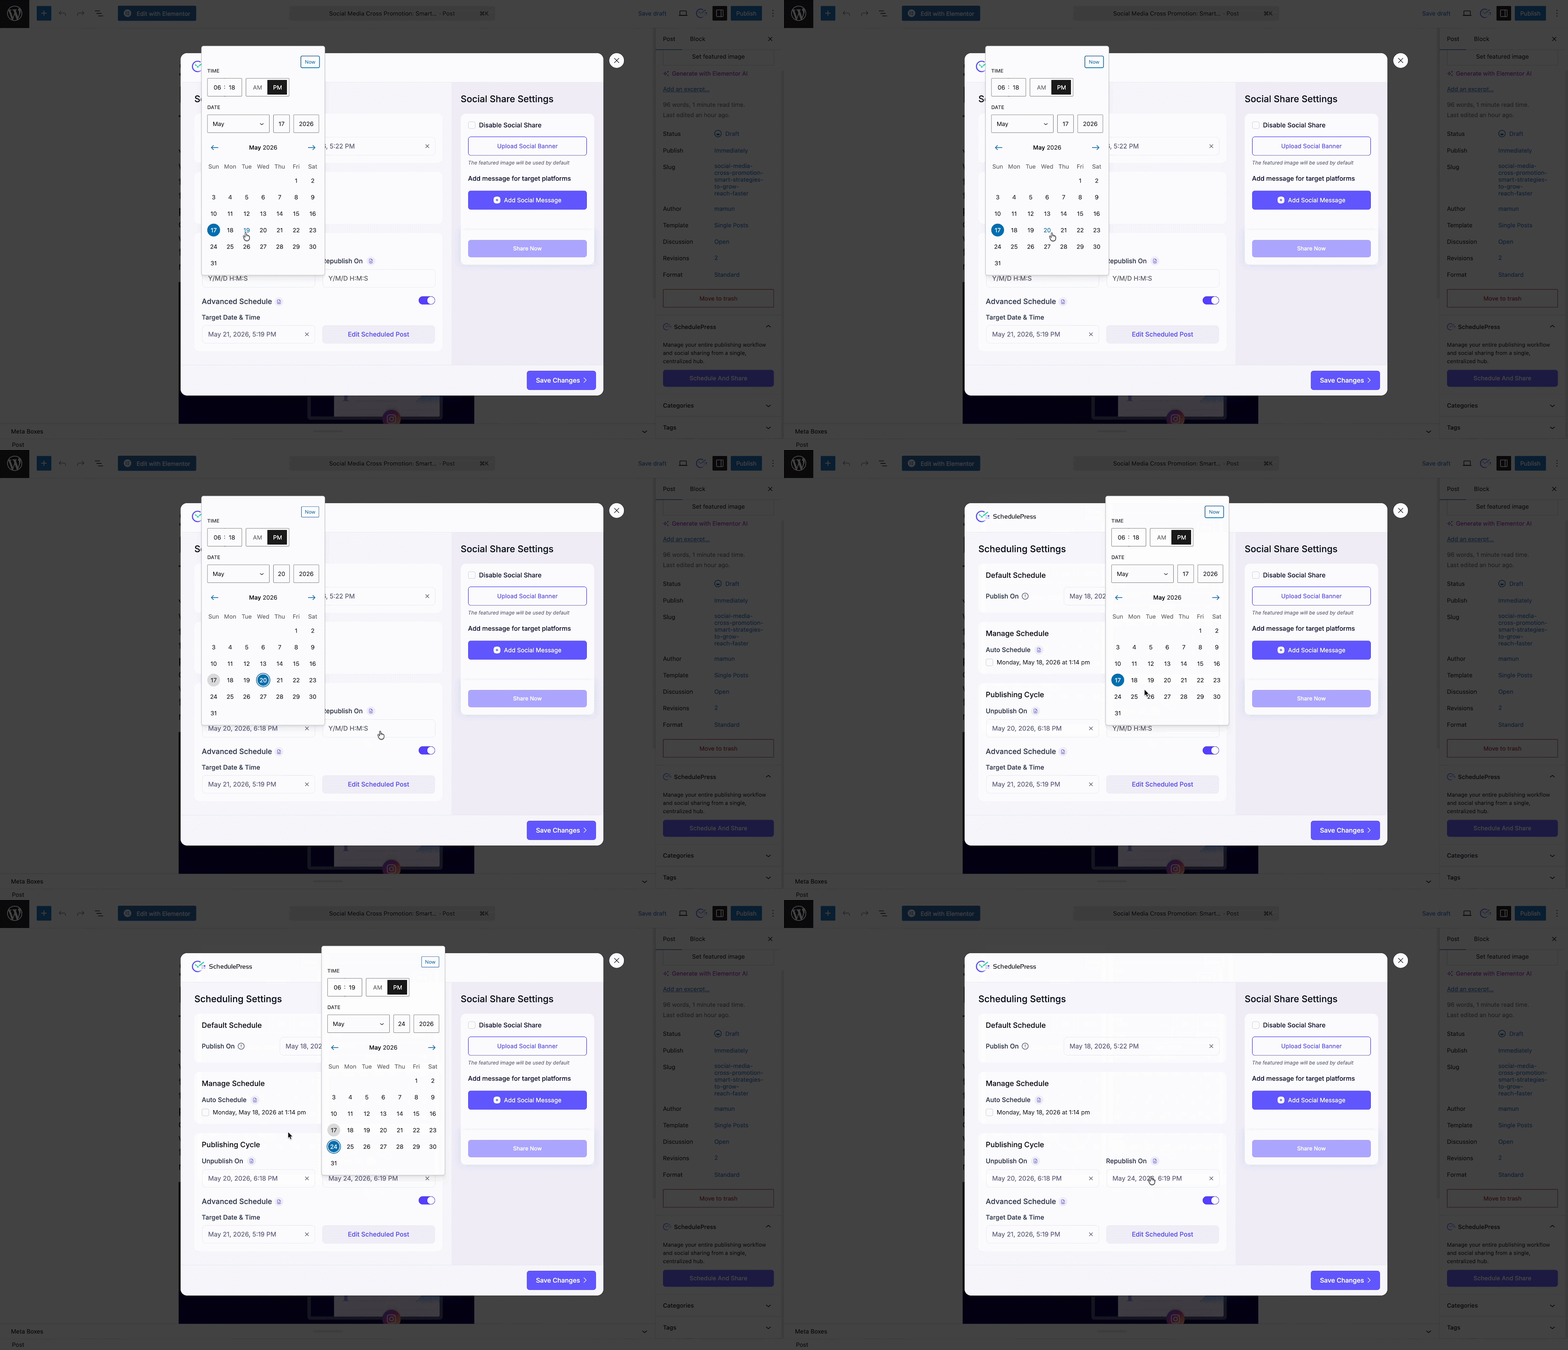
- Unpublish On: Set a specific date and time for your live post to automatically unpublish and revert to a draft.
- Republish On: Choose a future date and time for that temporarily hidden post to automatically go live on your site again.
Step 4: Plan Future Updates with an Advanced Schedule #
The Advanced Schedule feature inside the Schedule and Share Board lets you schedule future updates to an already live post without having to take it offline first.
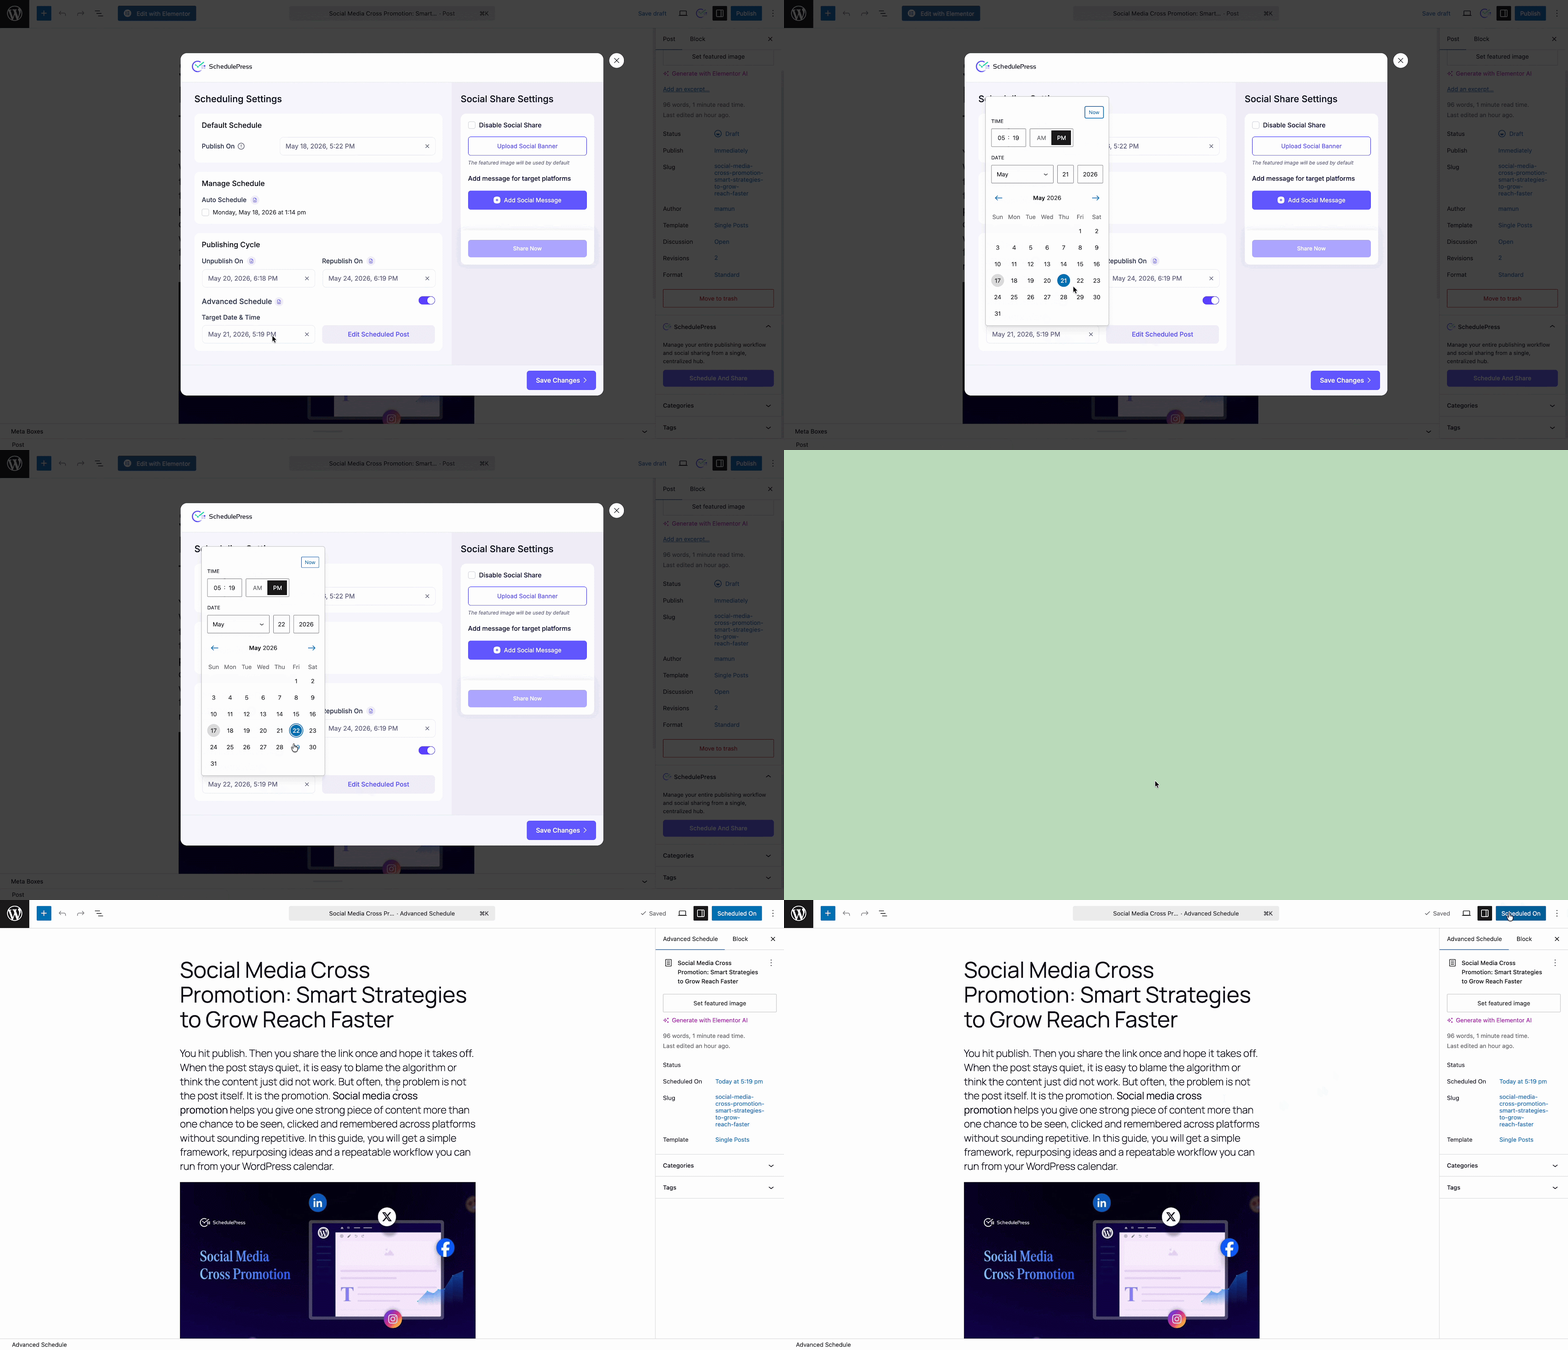
Simply toggle the Advanced Schedule option on and click Edit Scheduled Post. This creates a cloned, draft version of your live content. You can safely make changes to this clone and set a target date. Once that date arrives, the new content will automatically replace the old content on your live site.
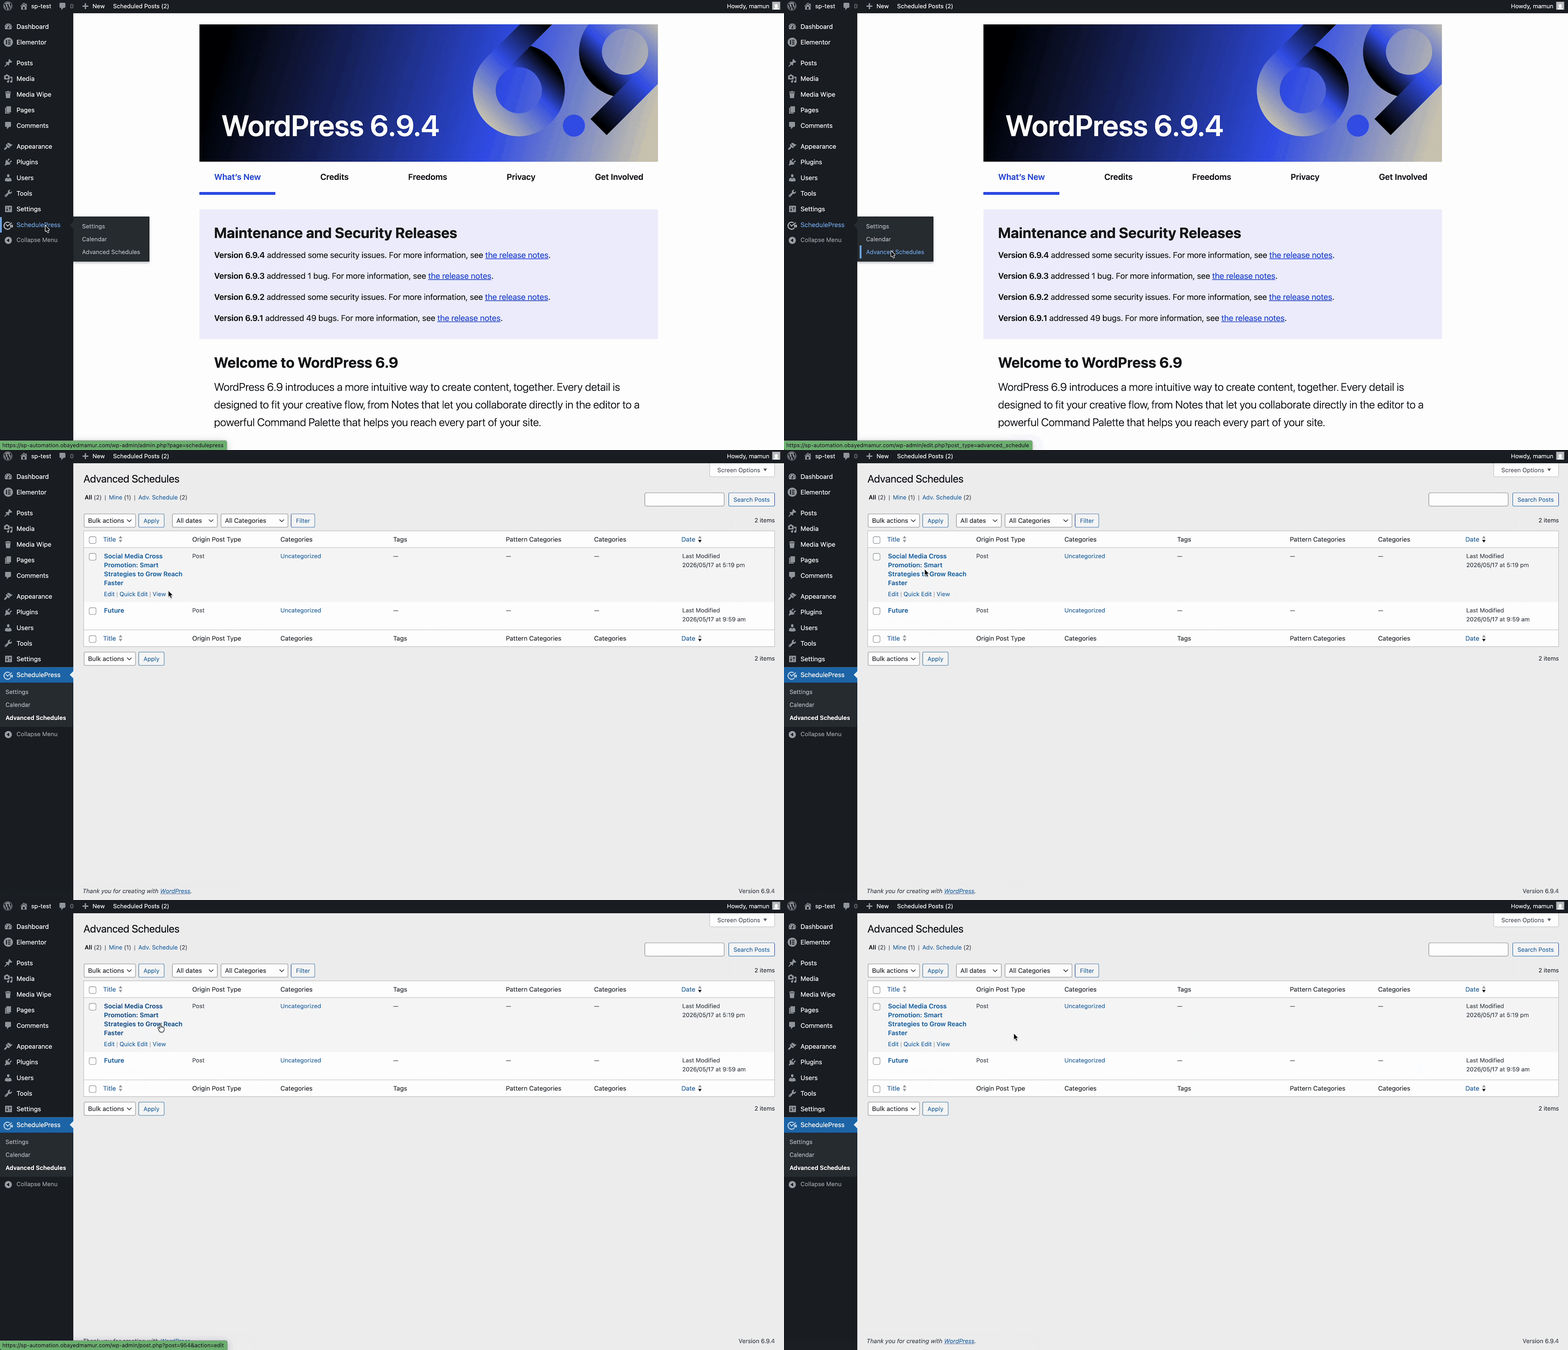
You can track all your upcoming content updates by navigating to SchedulePress → Advanced Schedules from your WordPress dashboard.
Step 5: Customize Your Social Share Settings #
On the right side of the board, you can manage your cross-promotion strategy. You can upload a custom Social Banner and add unique messages for 7+ target platforms like Facebook, LinkedIn, or X. After adding a message for your target platforms, you can edit or share instantly.
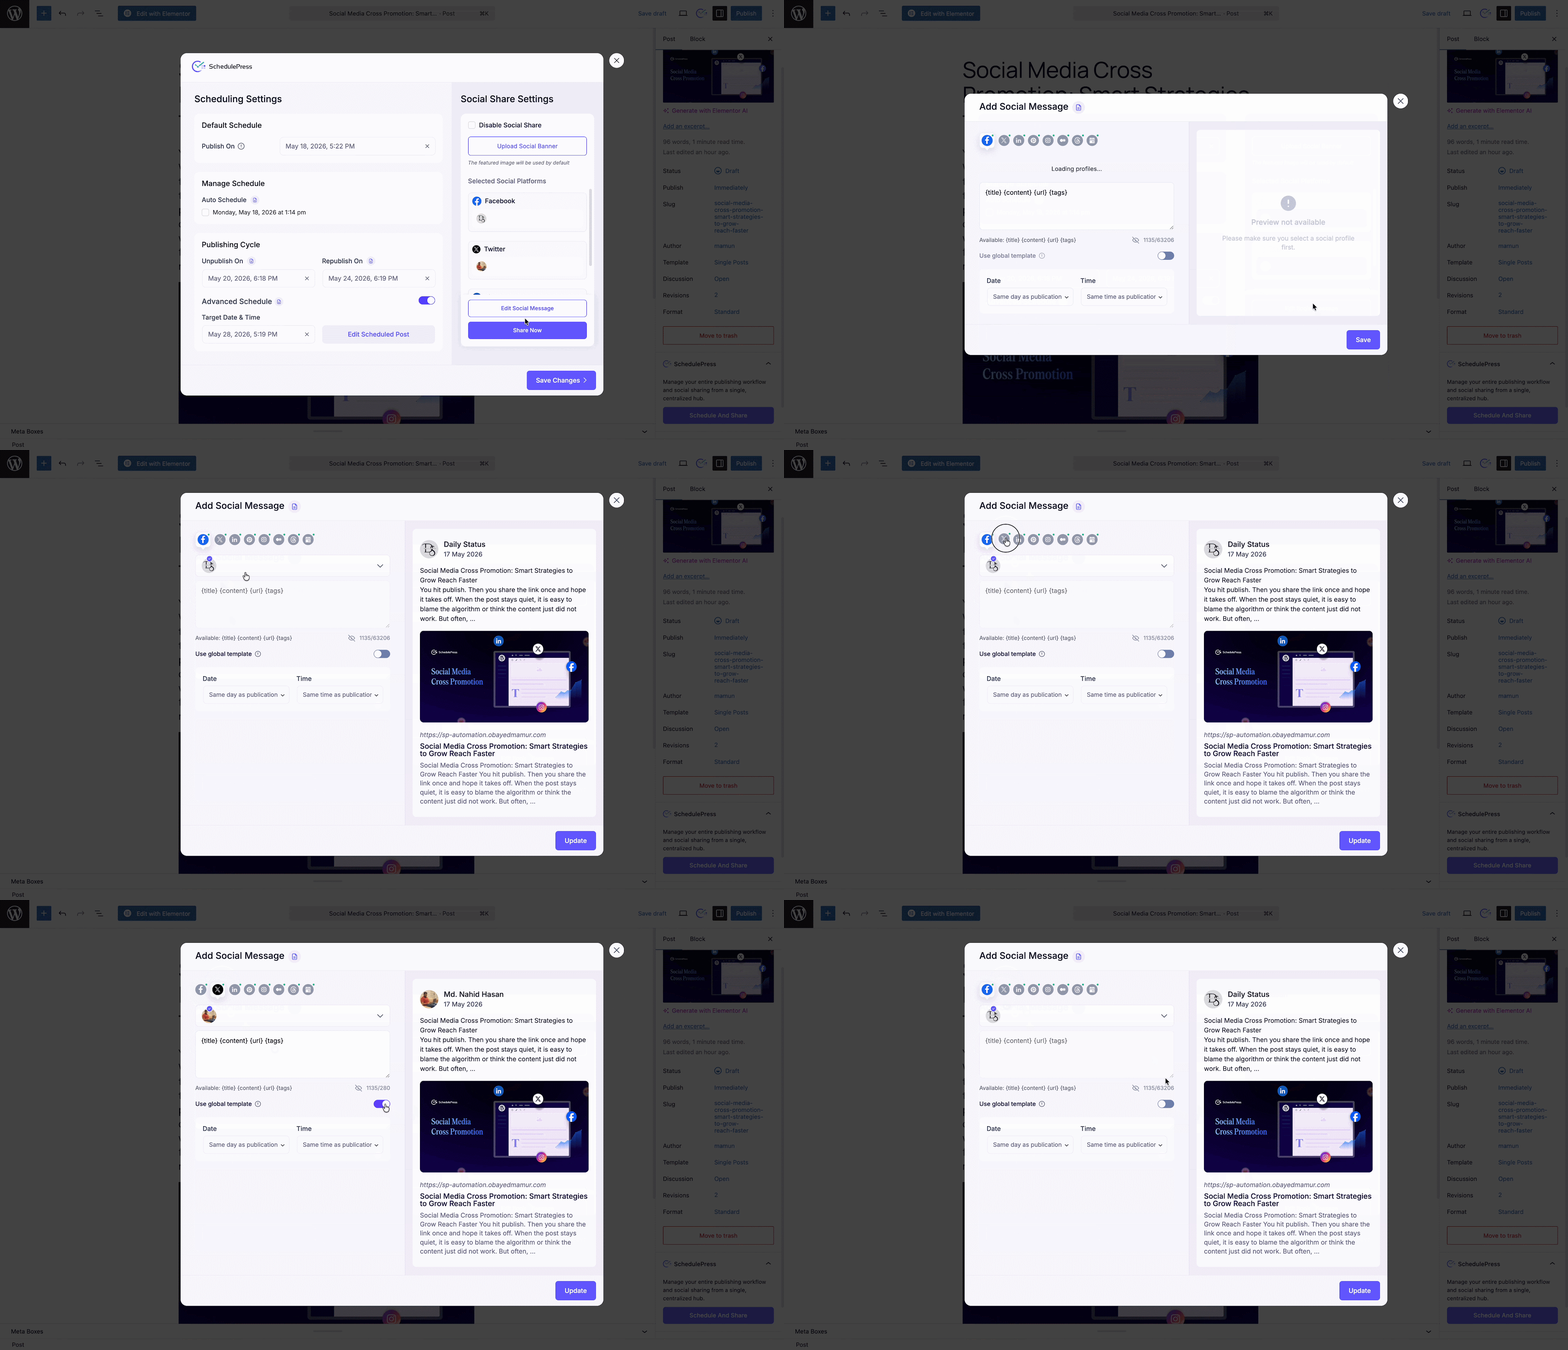
For detailed instructions on setting up global templates or platform-specific messages, check out our complete guide on Custom Social Templates.
Save and Automate #
Once your scheduling rules, content lifecycles, and social media templates are perfectly set, simply click the Save Changes button at the bottom of the Schedule and Share Board. Your content is now fully scheduled and prepped for its entire lifecycle!
That is how easily you can take full control of your WordPress publishing strategy using the Schedule and Share Dashboard in SchedulePress.
Need further help? Do not hesitate to reach out to our dedicated support team.


