
Writing unique social media captions for every platform takes time. In SchedulePress, you can write social media captions with AI for 7+ different platforms. It lets you instantly generate engaging, platform-perfect captions directly from your WordPress editor.
This powerful tool connects with your OpenAI account to analyze your post content and output optimized social shares in seconds.
Follow this guide to learn how to write social media captions with AI in SchedulePress.
[Note: Before getting started, make sure you have installed and activated the SchedulePress plugin on your WordPress site.]
Step 1: Configure Your OpenAI API Key #
To use the AI features, you first need to securely connect your OpenAI account. Navigate to ‘SchedulePress → Settings’ from your WordPress dashboard.
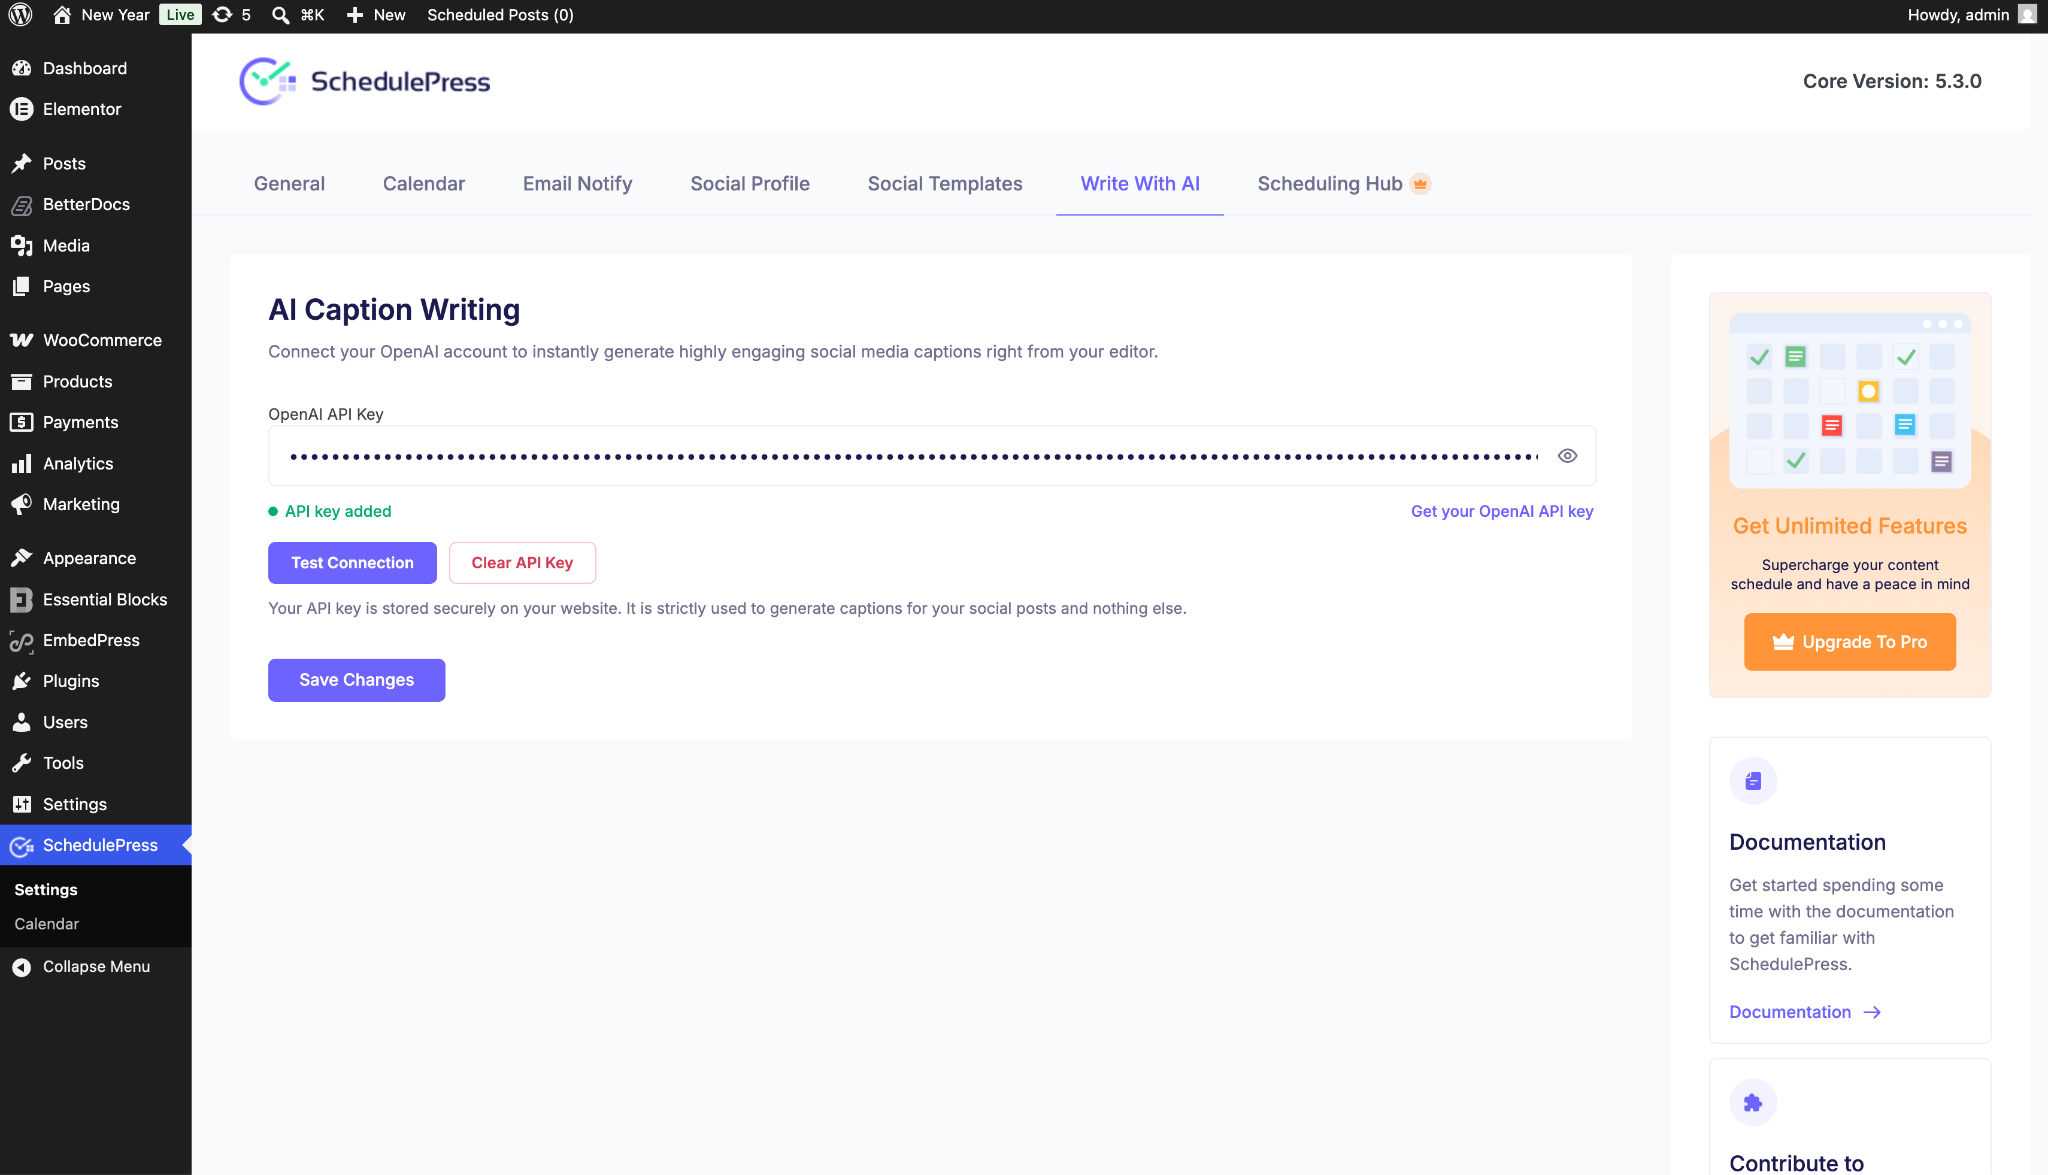
Click on the Write With AI tab. Paste your OpenAI API Key into the designated field, click the Test Connection button to ensure it works, and then hit Save Changes.
Step 2: Launch the AI Caption Generator #
Open a new or existing post in your editor. On the right-hand sidebar, locate the SchedulePress block and click the Schedule And Share button. This will launch your centralized publishing hub as a pop-up.
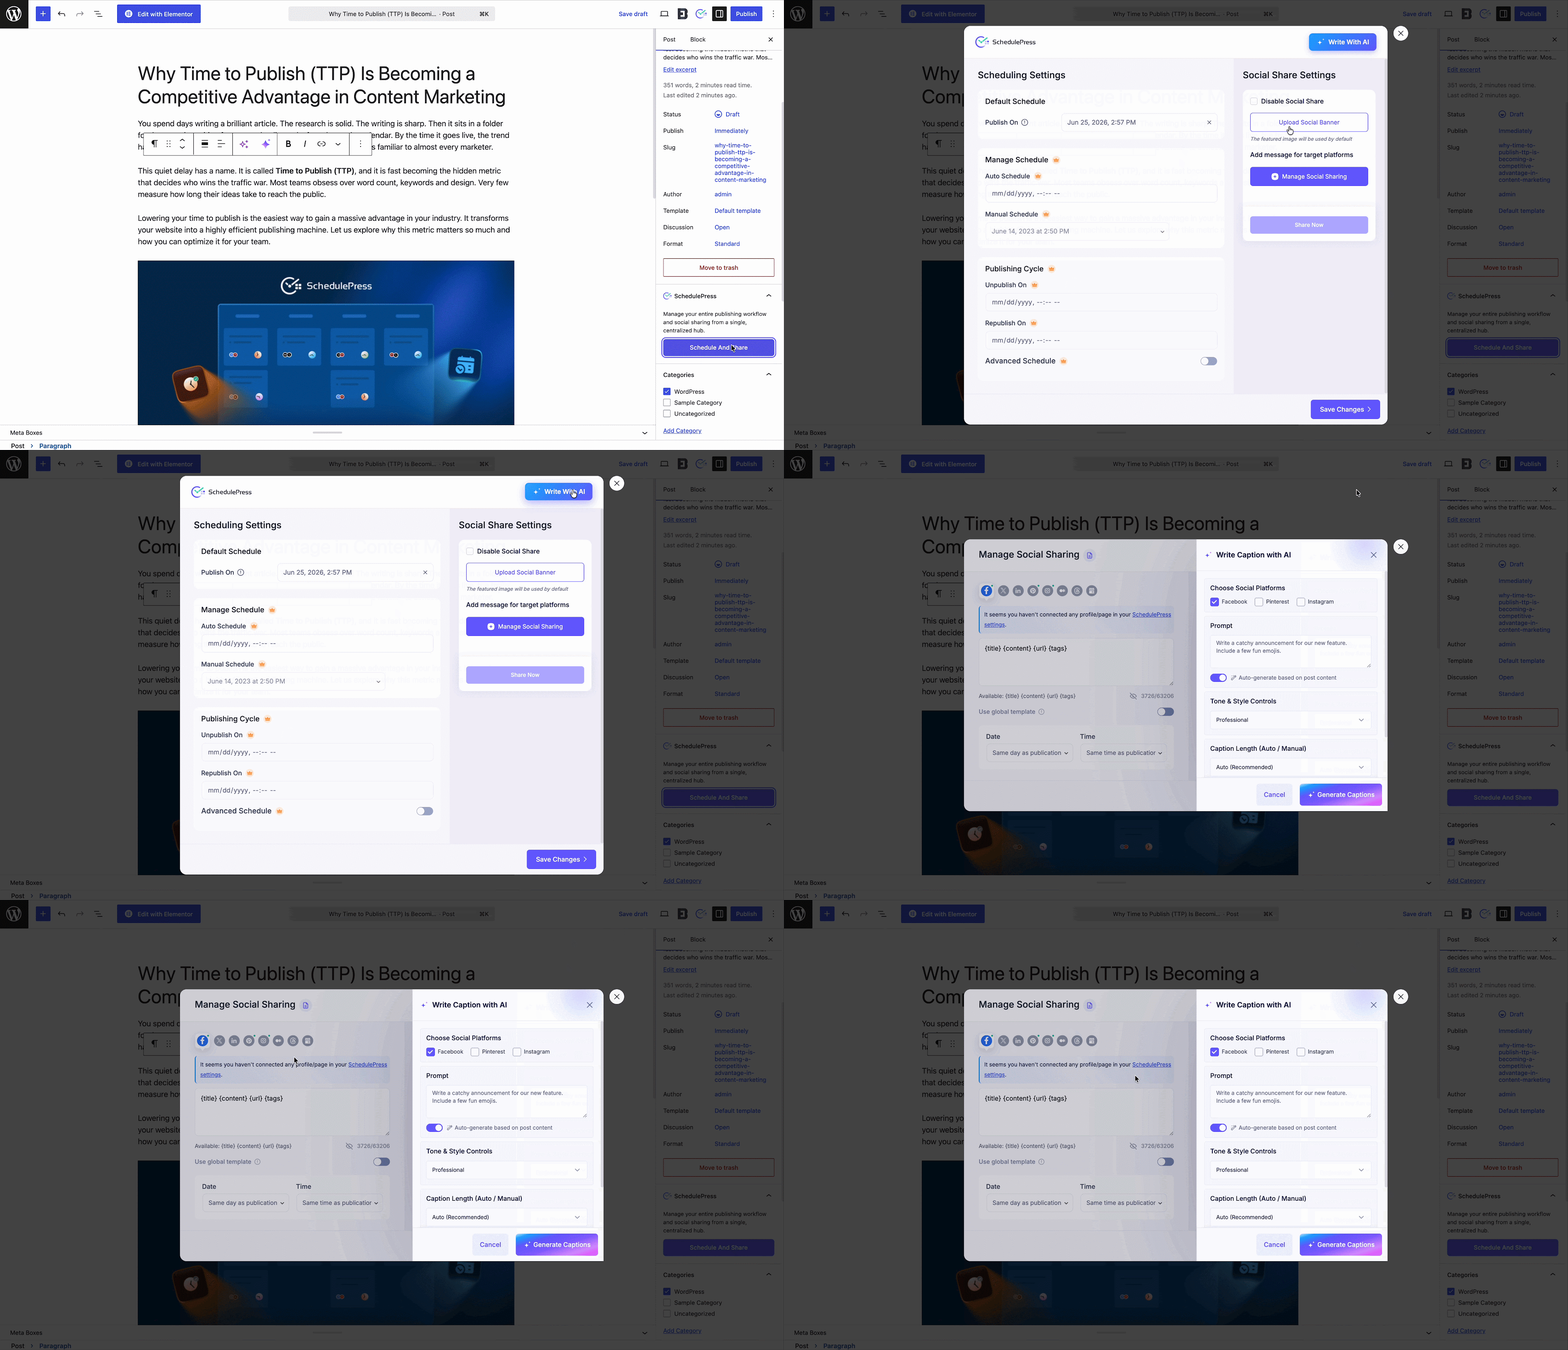
On the right side of the board, navigate to your Social Share Settings and click the button to craft your social messages. From there, select the Write Caption with AI option to open the generator panel.
Step 3: Customize Your AI Settings #
Inside the AI modal, you have complete control over how your social media captions are generated.
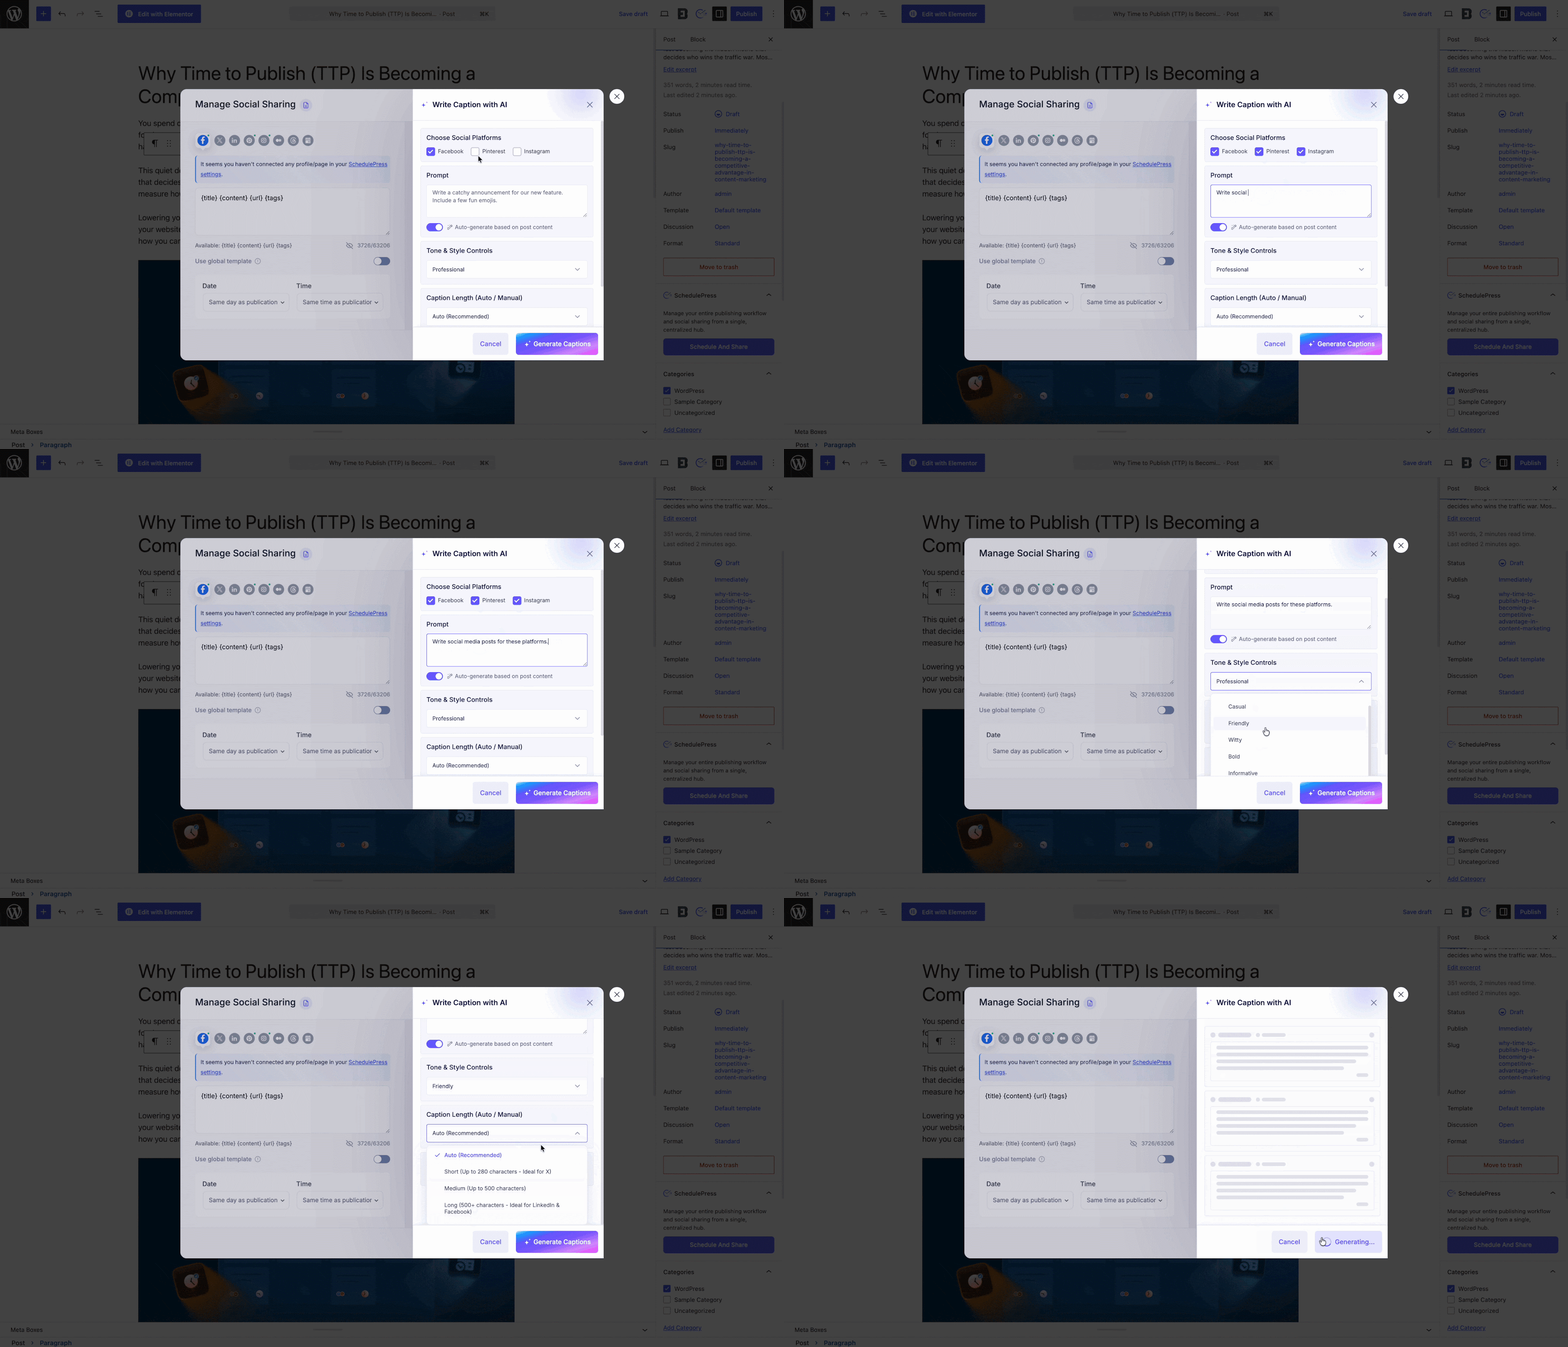
- Choose Social Platforms: Check the boxes for the specific networks you want to target, such as Facebook, Pinterest, or Instagram.
- Prompt: Type a custom instruction or toggle the Auto-generate based on post content switch to let the AI pull context directly from your article.
- Tone & Style Controls: Select a voice that perfectly matches your brand, such as Professional, Casual or Witty.
- Caption Length: Choose your preferred character length, or leave it on Auto to let the AI determine the best size for each platform.
- Hashtags & Emojis: Choose whether you want the AI to automatically include relevant hashtags and fun emojis in the text.
Once your settings are configured, simply click the ‘Generate Captions’ button.
Step 4: Write Social Media Captions with AI & Insert #
Within seconds, the AI will generate unique, tailored captions for your selected platforms. You can review the exact text and check the live character counts for each generated response.
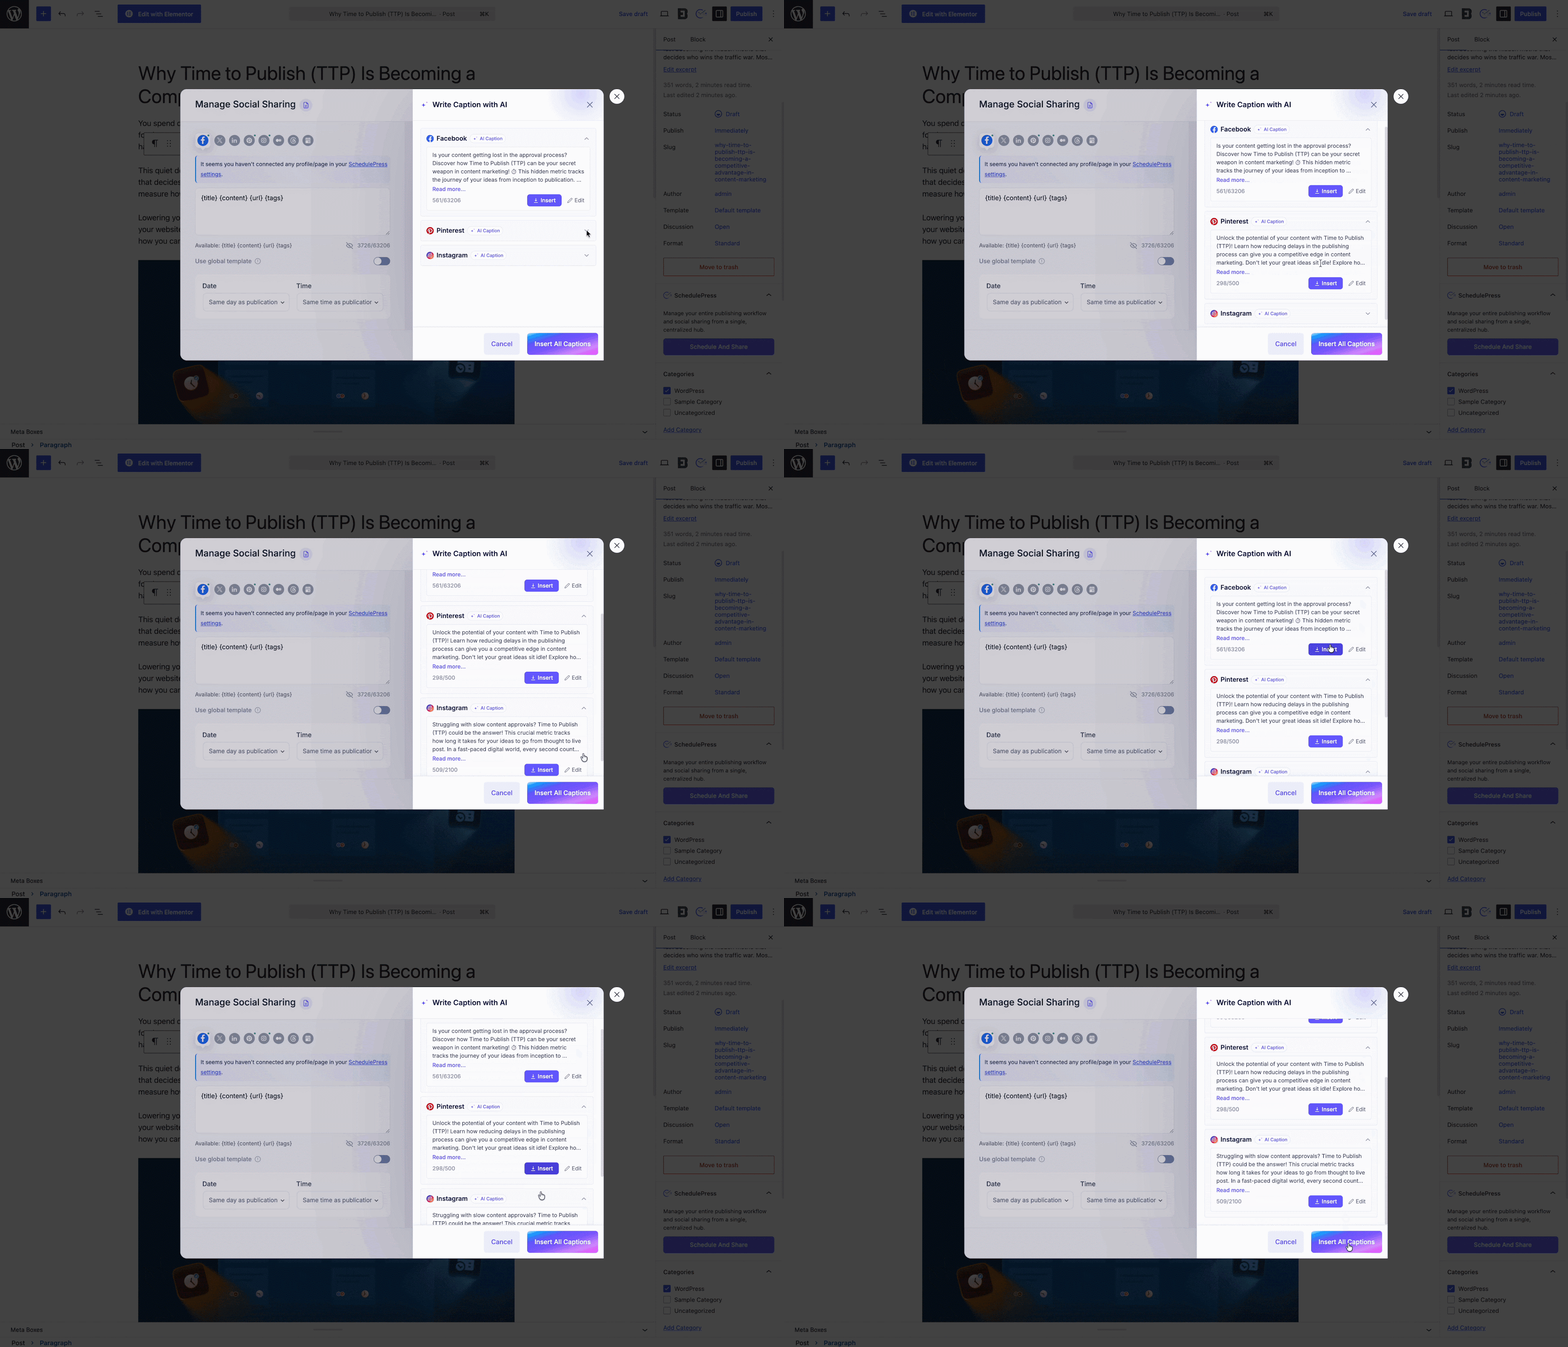
You can click Insert on an individual platform card to apply that specific caption, or click the Insert All Captions button at the bottom of the screen to apply them all at once.
Adjust Timing and Save #
Once inserted, the generated text will automatically populate into the supported social platforms under each of your connected profiles. You can easily click through your platform tabs to preview the text and make any final manual edits if required.
Once everything looks perfect, click Save Changes.
This is how easily you can write social media captions with AI using SchedulePress. Now, your AI-generated captions are fully queued up and will be shared automatically to your social channels once your post goes live or at your specifically chosen time!
Need further help? Do not hesitate to reach out to our dedicated support team.


